Recording
7
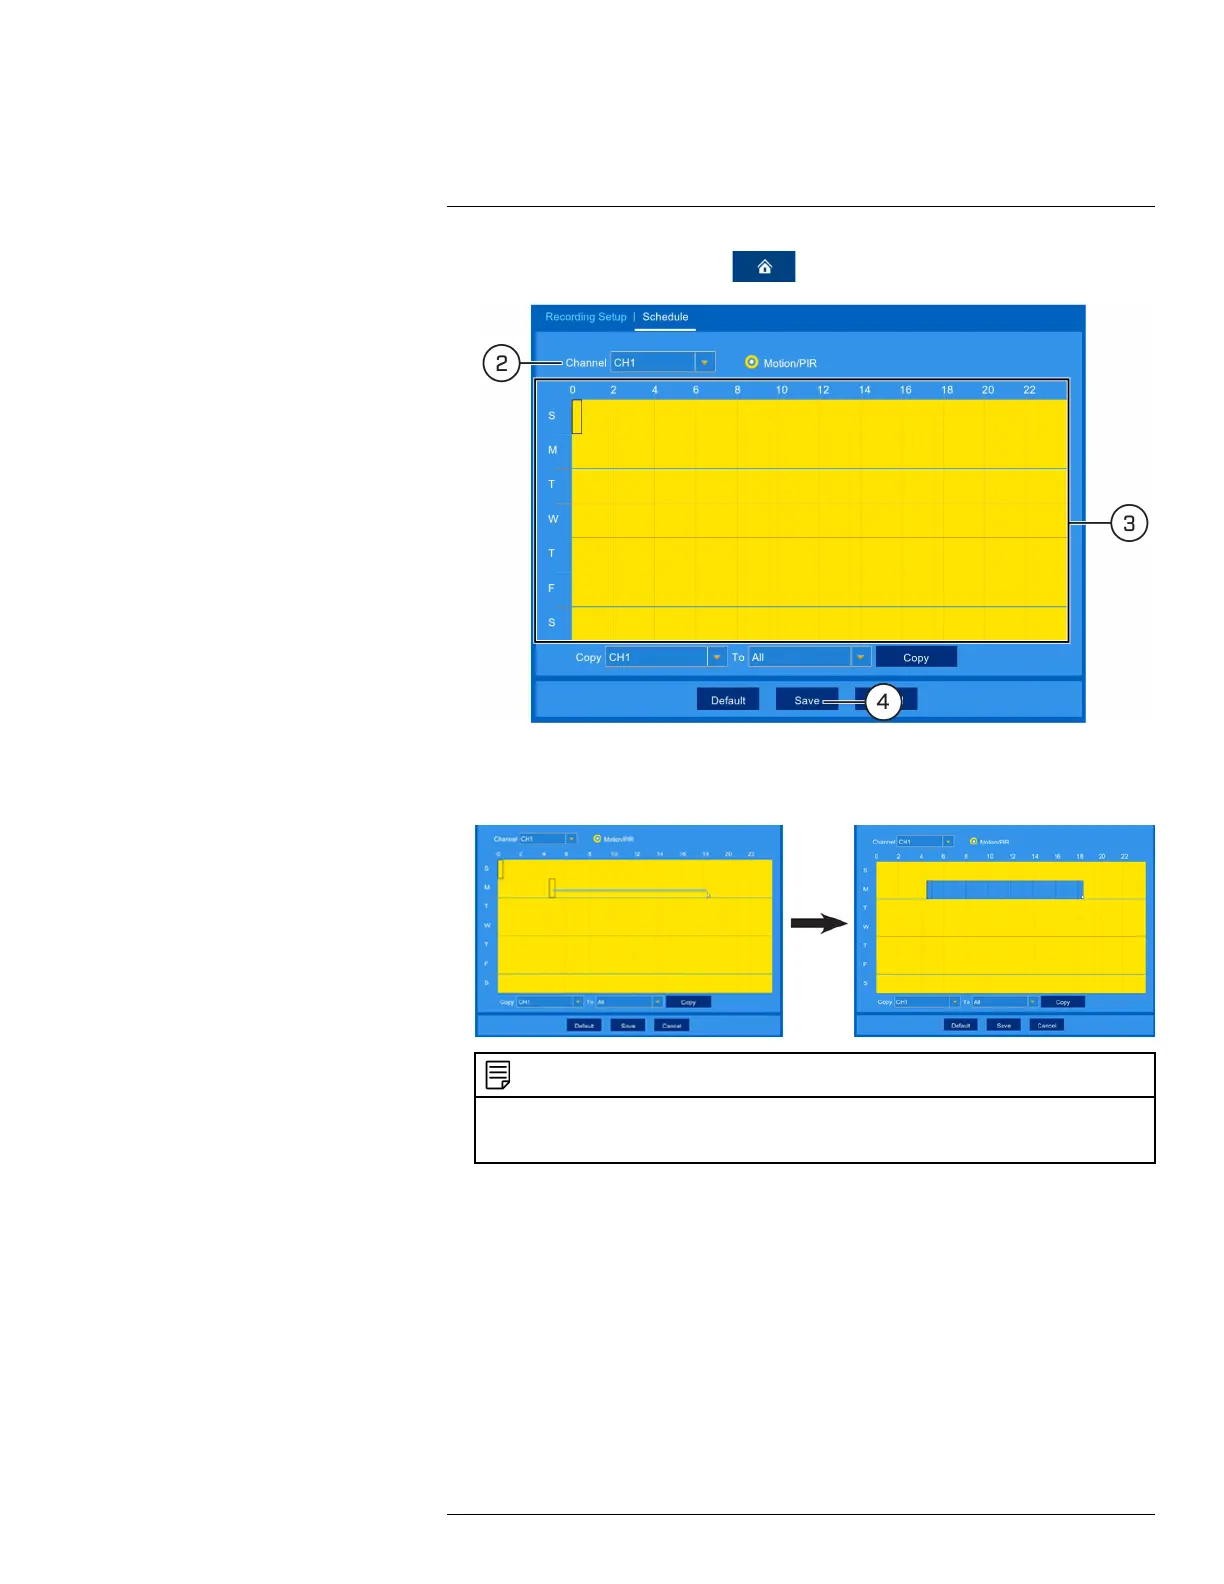
1. From the live viewing screen, click > Settings > Recording > Schedule.
2. Use the dropdown next to Channel to select a channel to set the recording schedule for.
3. Click or click-and-drag over existing bars to remove sections from the recording schedule. For
blank areas of the schedule, click or click-and-drag to add sections to the recording schedule.
NOTE
If your system and the selected channel support continuous recording, you will have the option to choose be-
tween Motion and Continuous schedules for each day of the week. Continuous recording will only occur if
you set a recording schedule.
4. Click Save.
5. (OPTIONAL) Use the Copy function to copy your settings to another or all connected cam-
eras. See 13.1.1 Copying Channel Settings to Another Channel, page 45 for details on using
the copy function.
#LX400109; r. 5.0/56381/56402; en-US 24

 Loading...


