Setting up Yoics™ Remote Viewing
18
3. Enter your personal information in the required fields (marked with *) and click Register.
You will be sent an email confirming your registration; use the email address and password you
entered when registering to login to lorex.yoics.com
Registering your camera
Once you have created an account with Yoics™, you must register your camera in order to
enable Yoics™ remote viewing.
To register you camera:
1. In your browser go to lorex.yoics.com
and login using your username and password
(from the confirmation email). Click Yes in the subsequent security window.
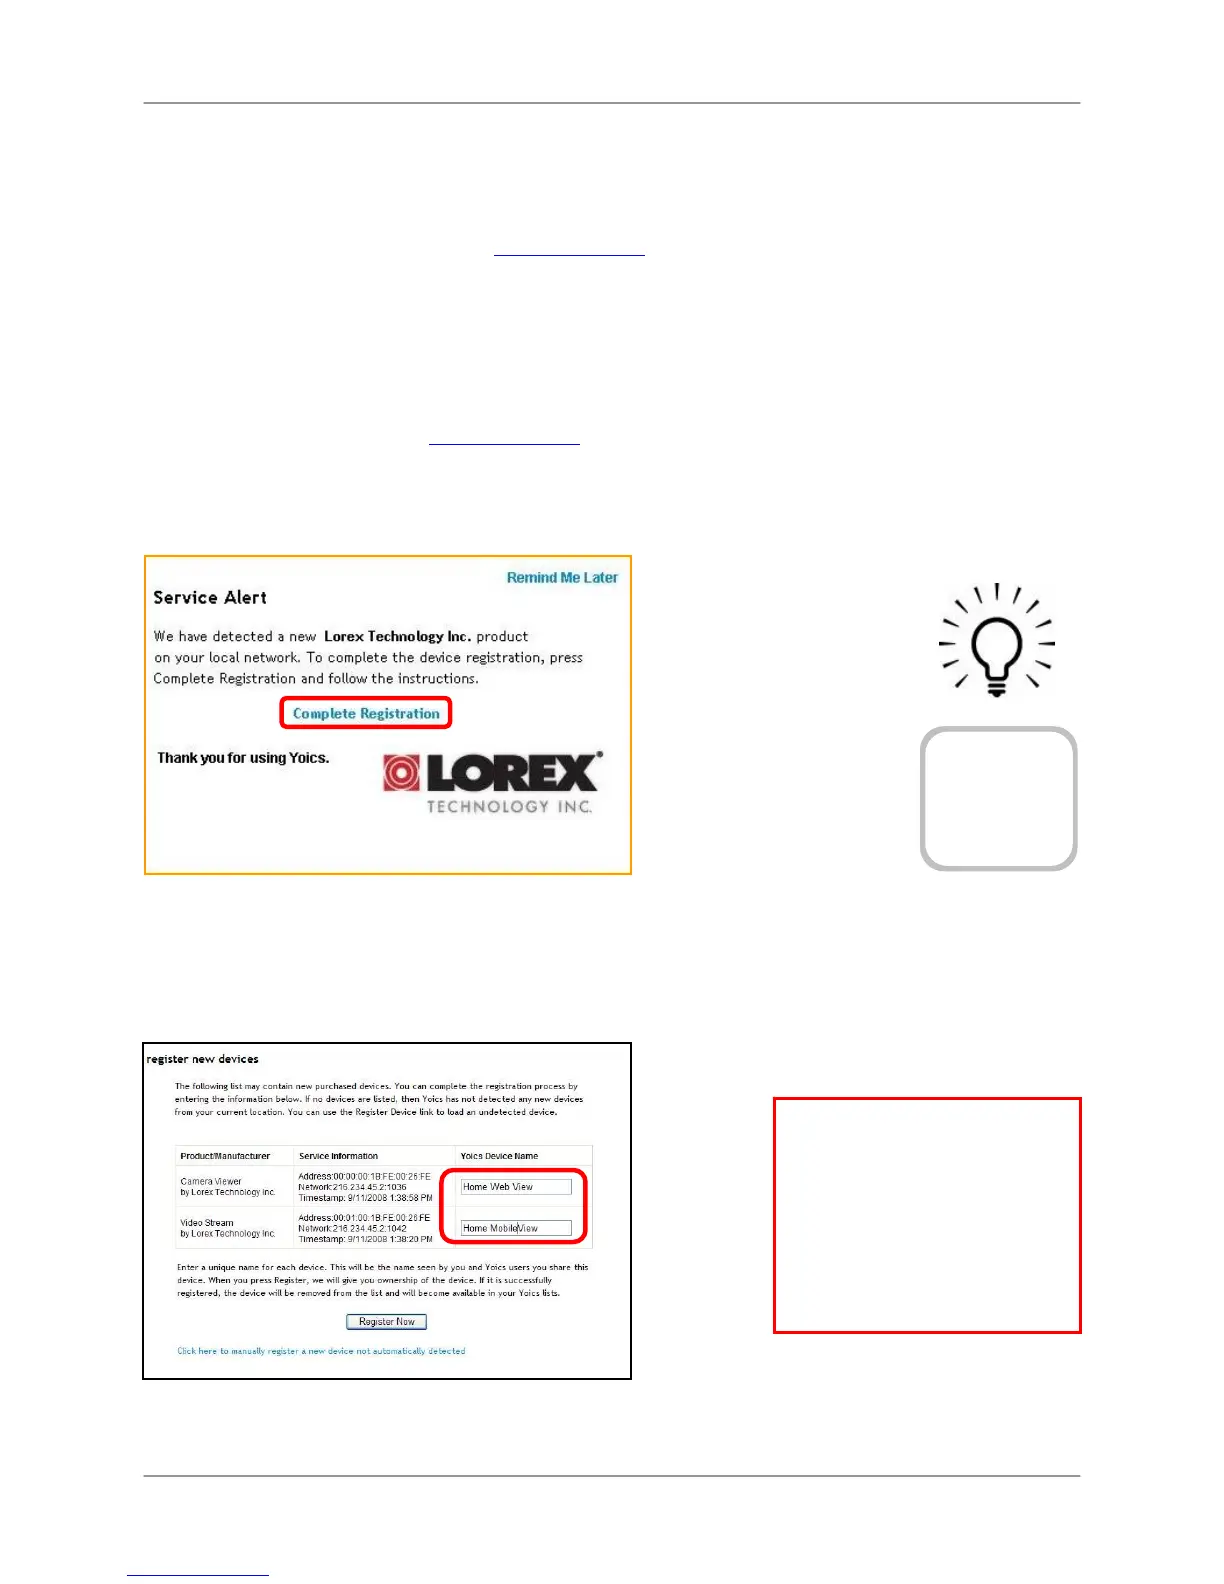
2. From the Lorex pop-up window click Complete Registration. The Register New
Devices page opens.
3. You will be asked to register your camera twice: Video Stream (when using a Web
browser), and Camera Viewer (when viewing from an iPhone™ or iPod touch™). Enter a
name for the camera in the Yoics Device Name text field and click Register Now.
Figure 4.1 Complete registration
Figure 4.2 Register your camera for high bandwidth and low bandwidth
TIP!
If your camera
does not appear in
the under “My
Stuff,” press F5 on
your keyboard to
refresh the page.
ATTENTION: If you want to
use Yoics™ Remote Viewing
and port forwarding, you must
first register your camera with
Yoics™. For more information
on port forwarding and DDNS
setup, please refer to the
DigiConsole & DigiViewer
Software Manual.