4 Installation
4.2 Installation (Indoor / Outdoor)
CAUTION
• Make sure to disconnect the power cable before installing the
camera. Camera will begin moving immediately when power
cable is connected.
• Make sure to install the camera in a location that can support
the camera weight.
To install the camera on a wall:
1. Attach the included rubber ring to the back of the wall mount to
ensure the weatherproof rating of the camera.
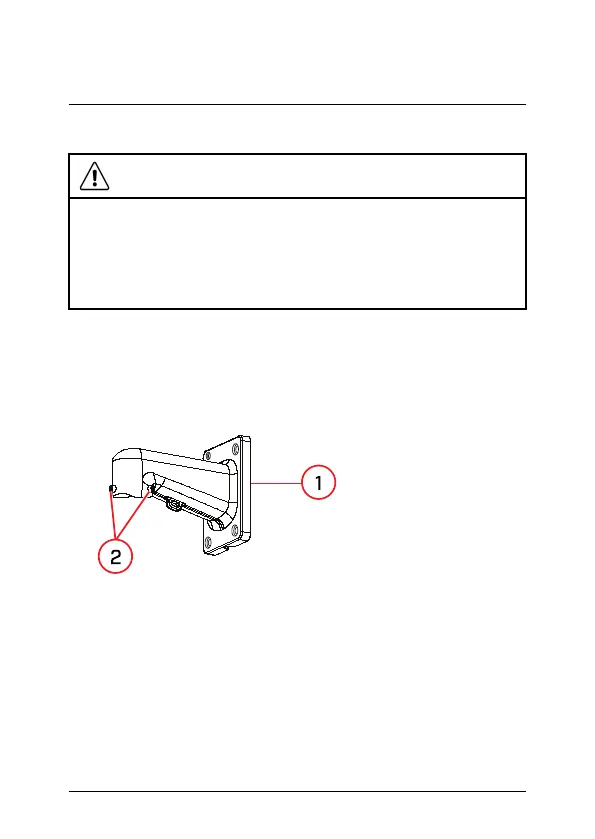
2. Use the included Allen key to attach the M6x14 screws (3x) to the
wall mount. Do not tighten all the way.
1. Wall Mount
2. M6x14 Screws (3x)
3. Use the included wall mount to mark holes for the mounting
screws (4x) and cables. Drill holes (drill bit size – 3/8”) to a depth
of 2.8”/70mm in the mounting surface where marked.
4. Insert the included anchors (4x) into the holes and tap them into
the wall with a hammer.
#; r. 4.0/47037/47040; en-US 14
 Loading...