4 Installation
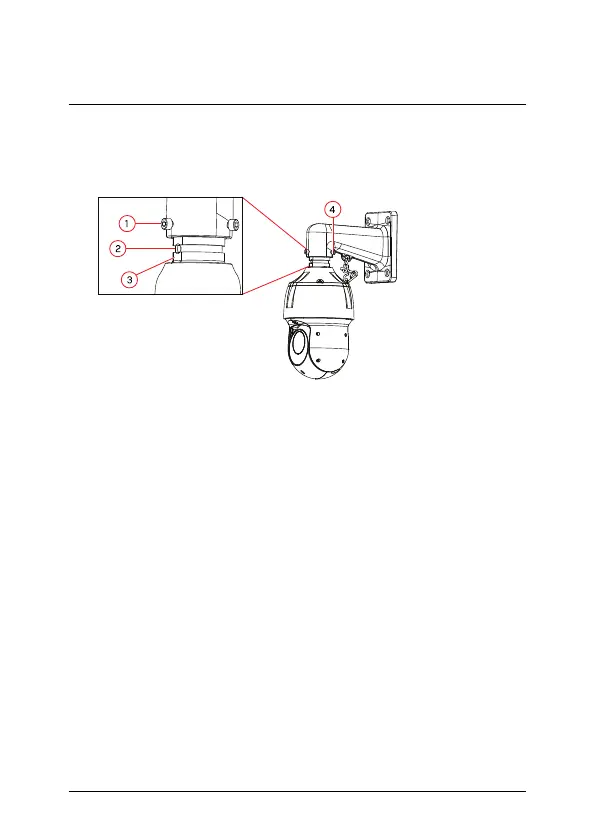
10. Push the camera into the wall mount with the flat surfaces aligned
on the inside. This will allow the M6x14 screw (1) on the wall
mount to align with the hole on the camera.
1. M6x14 screw (1) on the flat surface (inside) of the wall mount.
2. Hole on the camera.
3. Flat surface on the camera.
4. M6x14 screw (2x).
11. Use the included Allen key to tighten the M6x14 screw (3x) to se-
cure the camera.
12. Remove protective vinyl sheet covering the camera lens once in-
stallation is completed.
#; r. 4.0/47037/47040; en-US 17
 Loading...