38
GIPAM User Manual
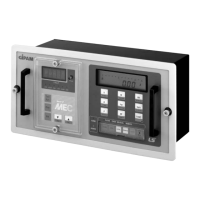
② GIPAM <---> GIPAM
9 Maintenance
9-1. Troubleshooting
NO Condition Cause Proper Step
1
If all the indicators on
the front have been off.
- The supplied power is under
the rated Voltage(DC 110V)
- The polarity of power supply
is connected in the opposite.
- Trace to the cause of
Voltage drop
- Check out the polarity
2
If one of the Error Code
is displayed on the LCD in
Measuring part as below.
- "ERR 0"
- "ERR 1"
- "ERR 2"
- "ERR 3"
- "ERR 4"
- PT Ratio set is wrong
- CT Ratio set is wrong
- Errors of Input circuit or
the power in Analog circuit
- an obstruction of the
inside communication
- CPU is out of order
- Check out DIP S/W #2
- Check out DIP S/W #1
- Check the Power circuit
- Check the contact of
Main CPU
- Check out CPU on the main
board or working voltage
3
If one of the Error Code
is displayed on the LCD in
Protection part as below.
- "ERR 1"
- "ERR 2"
- "ERR 3"
- Errors of Input circuit or
the power in Analog circuit
- Errors of the Back-up Data
(Calibration Data)
- an obstruction of the inside
communication (RS-232C)
- Check out the working
voltage or components
(Clamp Diode etc.)
- Set the calibration
mode again.
- Check the ccontact of
Main CPU]
4
Inaccuracy of displayed
Voltage
- PT Fuse is down - Check out PT Fuse
5
Inaccuracy of displayed
Current
- CT rating is inappropriate -Check out the CT rating
6
Inaccuracy of displayed
power
- The phase sequence of
voltage or Current is incorrect
- Check out the wiring
7
If "E.1" is displayed on
the LCD in Measuring part
- Errors of Data Communication
- Check the contact of
Main Board
TX0
TX1
RX0
RX1
COM
TX0
TX1
RX0
RX1
COM
TX0
TX1
RX0
RX1
COM
TX0
TX1
RX0
RX1
COM
GIPAM #1
GIPAM #2 GIPAM #3
---------
Terminal
Resistor
120Ω
 Loading...