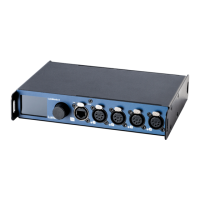
1.3 Connection
CONNECTION TO THE NETWORK
To get the LumiNode online in your system, connect either the Eth-
ernet 1 or Ethernet 2 port to a computer, or to a port of an Ethernet
switch. Only Ethernet 2 port on the rear of the unit can be used to
power the unit through PoE. Check the port labelling for a better iden-
tification.
CONNECTION TO THE USB PORT
The LumiNode 1 can be powered through its USB port. Connect the
LumiNode to the USB port of your computer.
The red LED next to the USB port of your device will turn on once the
unit is powered. Once the unit has booted up the led will turn blue.
Additionally, the LumiNode will appear as a new network interface on
your computer. No driver needed, the LumiNode supports Windows,
Mac OSX and Linux OS. Once the network adaptor has been added
please configure a static IP address in the range you are planning
to use for your application in the settings of your operating system.
1.4 LED indicators
There are various LEDs on the LumiNode. Here is a list of the LEDs, the
possible colors and the meaning of each color
DMX PORT STATUS MEANING
DMX Input Green Blinking : Active input
DMX only (output
mode)
Cyan Blinking: DMX activity
DMX + RDM (output
mode)
Blue Blinking: DMX activity
Stream loss Red Source stream lost
Stream recovered Orange Source stream recovered
DMX redundancy Magenta
Magenta
flashing
Output idle
Output active
NETWORK PORT
Left LED (Link) Green Gigabit connection
Blinking: Ethernet Traffic
Orange 100Mbit connection
Right LED (Mode) Blue Default color
Green
flashing
Device booting
Orange
blinking
Firmware upgrade in
progress
Green
blinking
Identify in progress
USB PORT
USB (node1 only) Red Powered from USB or PoE
during bootup
Blue Unit booted and running
Orange
blinking
Firmware upgrade in
progress
Green
blinking
Identify in progress
1.5 Connection to the web interface
The LumiNode IP address is displayed at the rear or on the bottom
of the unit. On the LumiNode 4 and 12 this can also be found on
the LCD display. Set your computer with a compliant IP address
(do not use the same IP address!).
Connect your computer to the LumiNode with a network cable.
Launch your favourite web browser.
Type the IP address of the LumiNode in the address field followed
by enter.
1.6 Reset
When the device is powered up, by default it shows the status
screen with the status of the first 4 ports. In order to reset the
device please follow the following steps:
Press the jog wheel once to enter the Main menu.
Scroll down until you see Toolbox.
Press the jog wheel once to enter the toolbox.
Scroll down until you see Reset.
Press the jog wheel once to enter the reset menu.
A pop-up window opens giving you the option to Preserve IP
settings and Preserve user profiles.
Choose which option you want by using the jog wheel to
scroll between the two options and press the jog wheel to
confirm.
At the bottom of the pop-up window you have the option to
Reset or Cancel.
If you choose Cancel you get a message that the reset has
been cancelled.
If you choose Reset, you get a new screen asking to confirm
the reset command. Once ‘Yes’ is selected the LumiNode will
reset.
How to reset LumiNode through Luminet Monitor:
With a computer connected to the device, open Luminet
Monitor.
Under “Tools” in the menu bar you find “Reset LumiNode”.
Enter the mac address of the device you want to reset. This
can be found on the label with the IP address.
Choose if you want to keep the IP settings.
Choose if you want to keep the profiles.
Click reset.
8
1 | INSTALLATION / 1.3 CONNECTION / 1.4 LED INDICATORS / 1.5 CONNECTION WEB INTERFACE / 1.6 RESET
 Loading...
