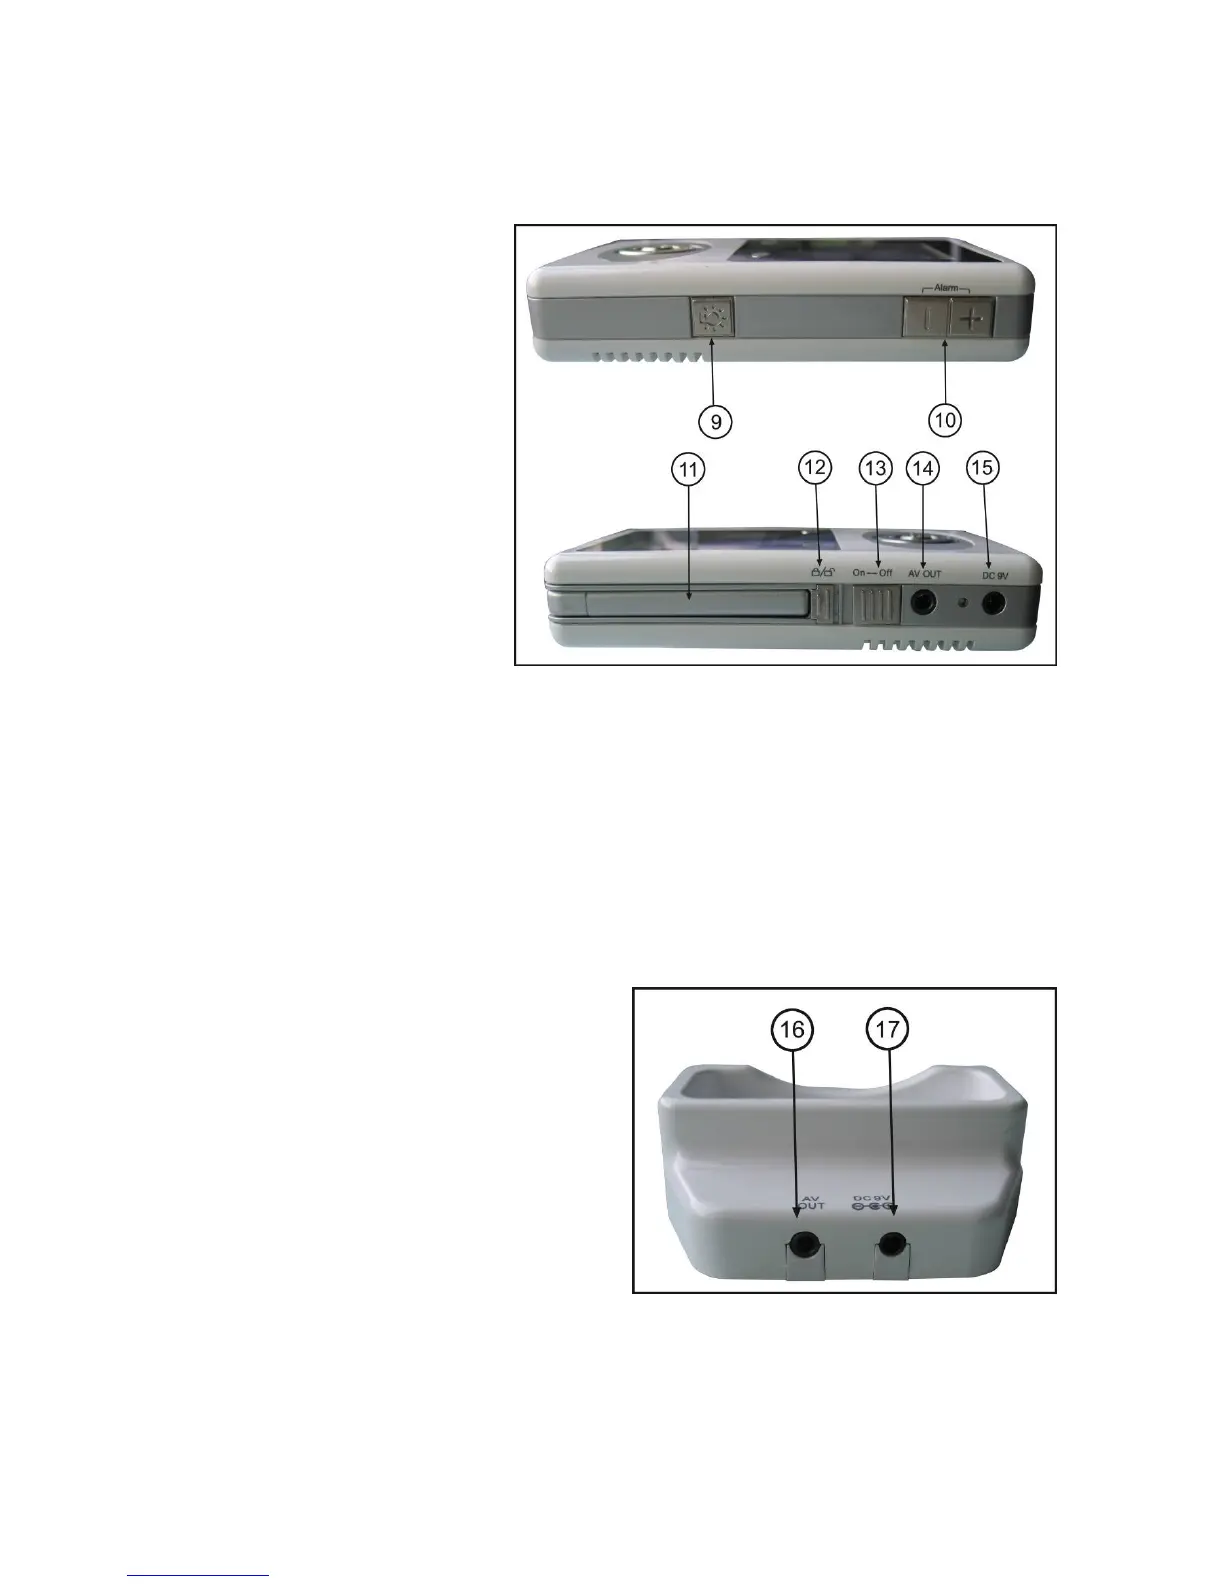
Side Controls
9. Night Light Button – Press to remotely turn night light ON or OFF (for the camera currently being
displayed on the LCD screen).
3
he
connected (power cable as needs to be
en
10. Alarm +/- Button – Press to
increase or decrease the volume of t
audio alarm.
11. Receiver Antenna – receives &
sends signals from or to the cameras*.
12. Antenna Locking Switch – Slide
the switch to unlocking position, the
receiver antenna will pop up. Then you
can adjust the antenna to vertical
position for better signal reception.
13. Power Slide Switch – Slide the
switch to ON or OFF position to switch
on/off the receiver.
14. A/V Out Port (Optional Use) –
Connect the included A/V cable to view video from the receiver on a TV or monitor, or record to a DVD
recorder or VCR. Alternatively, use the A/V out port on the receiver cradle.
NOTE: Using this feature will turn off the LCD screen. The LCD screen will turn back on when the A/V
cable is disconnected.
15. DC 9V Power Input – Connect the included DC 9V power adaptor to power the receiver and/or
charge the receiver battery (when the receiver is not in the cradle).
Receiver Cradle Inputs
16. A/V Out Port – Connect the included A/V cable
to view the receiver picture (when docked) on a TV
or monitor, or record to a DVD recorder or VCR.
(NOTE: The A/V output function will not work if there
is no power cable connected to the cradle. Only one
A/V out port should be used at a time).
17. DC 9V Power Input – Connect the DC 9V power
adaptor (included) to the receiver cradle to power
the receiver and/or charge the receiver (when
docked).
NOTE: When the receiver is docked, and the A/V cable is
connected), the LCD screen on the receiver will be blacked out. The LCD screen will turn back on wh
the A/V cable is disconnected.