BA491201-en
Pos: 61 / Techn ische Dokument ation/ Alle Ger äte/Über schr iften/ Überschri ften 1.1/H/ Überschr ift 1 .1: Hubsä ulen aufste llen, anm elde n und verbinden @ 6\mod_1178277124484_75.docx @ 91204 @ 2 @ 1
Positioning, Logging in and Interconnecting the Columns
Pos: 62 / Techn ische Dokument ation/ Hebetech nik/ 49 Radgr eifer-H ebebü hne n/12 01 MC L/BA/I nha lt: 4912 H ubsä ulen aufs tell en, anm elde n und verb inden @ 6\mod_1178277345406_75.docx @ 91217 @ @ 1
1 Push the support forks completely under the wheels or lift points of the vehicle to be raised.
Use the lift on a hard, level surface only.
2 Connect all columns to be used with the power supply.
It is possible to plug in either each column separately or a combination of not more than four
columns.
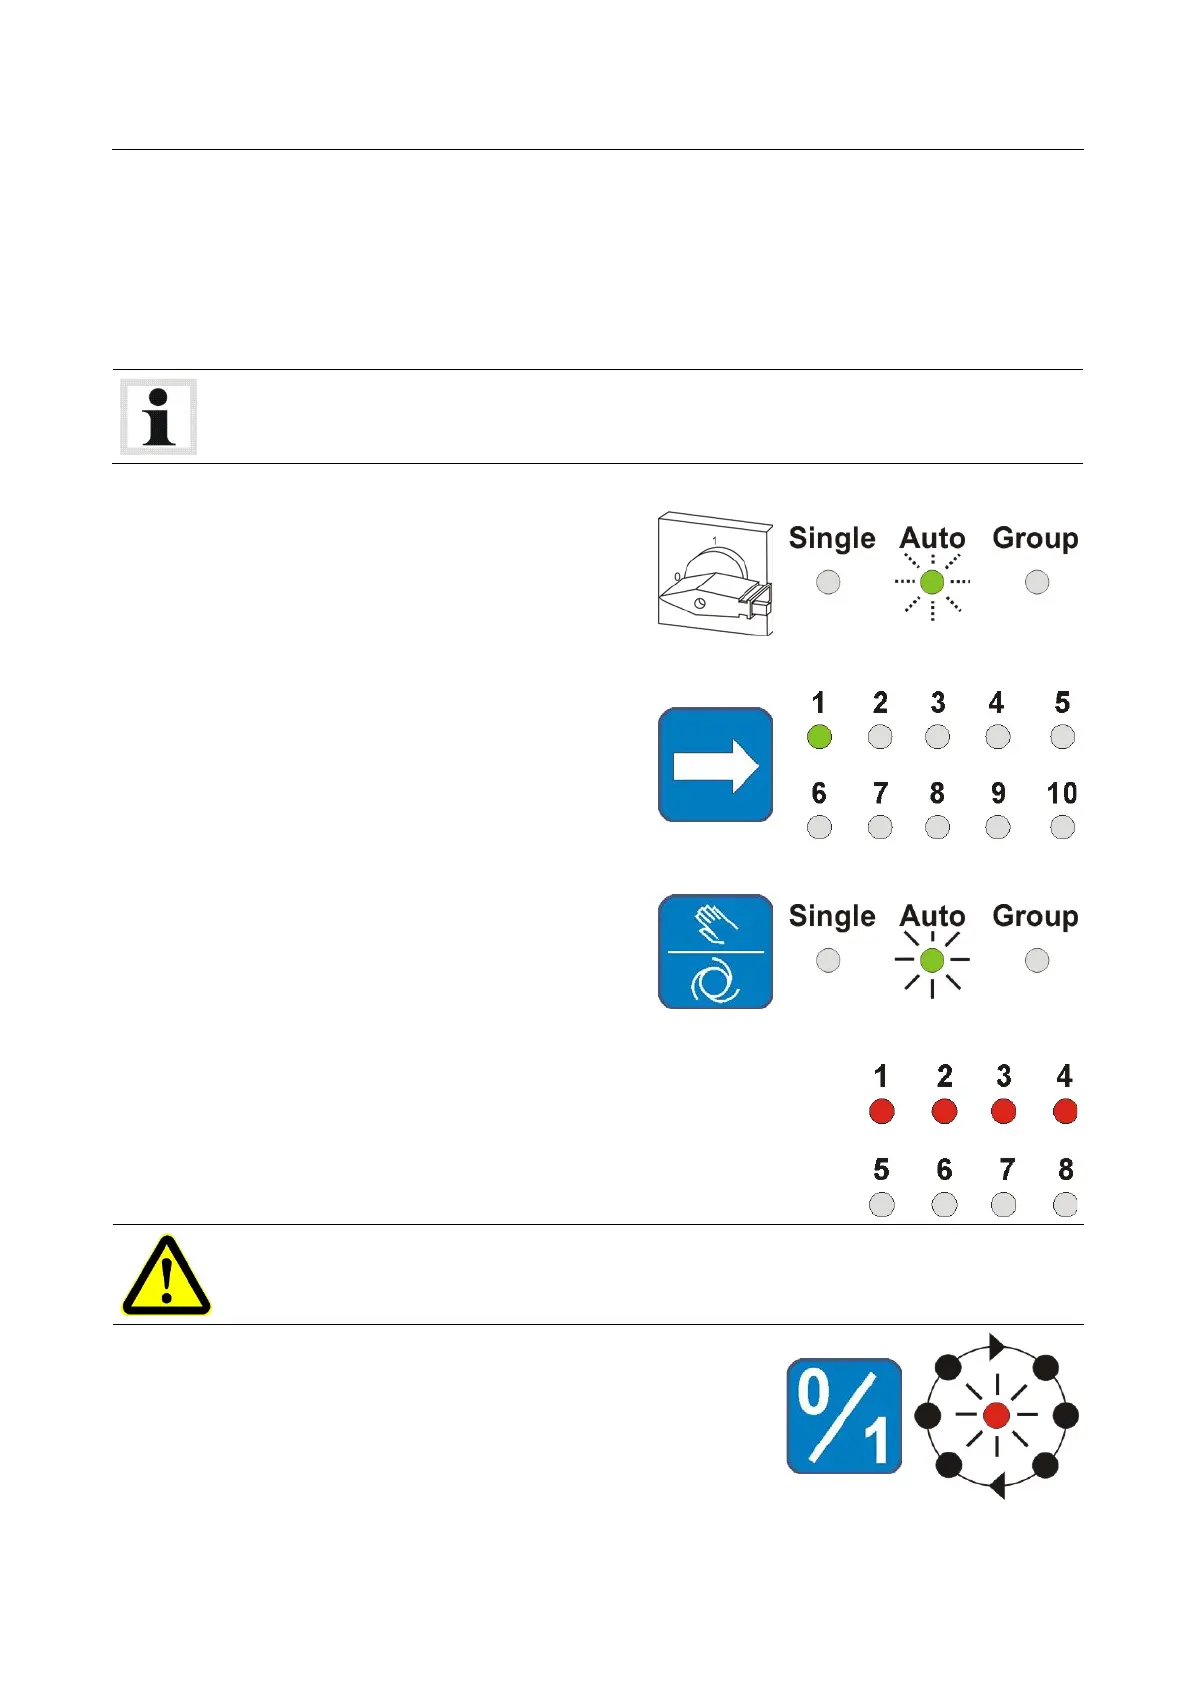
3 Turn the main switch to position 1.
LED "Auto" flashes.
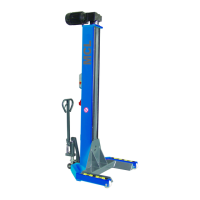
4 Select the transmission channel. All columns
belonging to the same unit must be set to
the same channel.
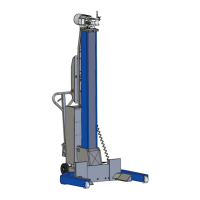
5 Confirm using the operating mode button.
LED "Auto" lights up permanently.
6 Repeat the procedure for all columns.
Number of columns within the unit is displayed.
Before closing the unit check the number of logged-in columns. After closing verify that it
corresponds with the number of columns appearing on the display.
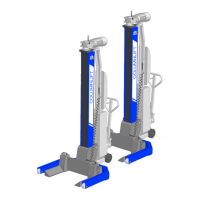
7 Once all columns are logged in, close the unit using button
"0/1".
LED "Column unit" lights up, lift is ready for operation.
Pos: 63 /----- Form at-----/ MAN UE LLE R UM BR UCH Se iten umb ruc h @ 0\mod_1134403577687_0.docx @ 1277 @ @ 1