Installation instructions
Fit the stand in accordance with the stand manufacturer's specification. In addition,
mount the second pedal.
Fit the motor on the table top.
Assemble table top and stand.
Connect treadle and motor lever.
Fit the transmission lever so that the centre hole is located underneath the hole for
the chain that is fixed on to the supporting plate.
Bolt the top section of the sewing machine on to the table top using two bolts. The
fleece must be laid between the top section of the sewing machine and the table top.
Connect the support plate chain to the transmission lever.
Using the long chain, connect the transmission lever to the second treadle.
Fit the V-belt and tension it using the hinged motor bracket.
Fit belt guard as shown in Fig. 11.
Fit the thread stand.
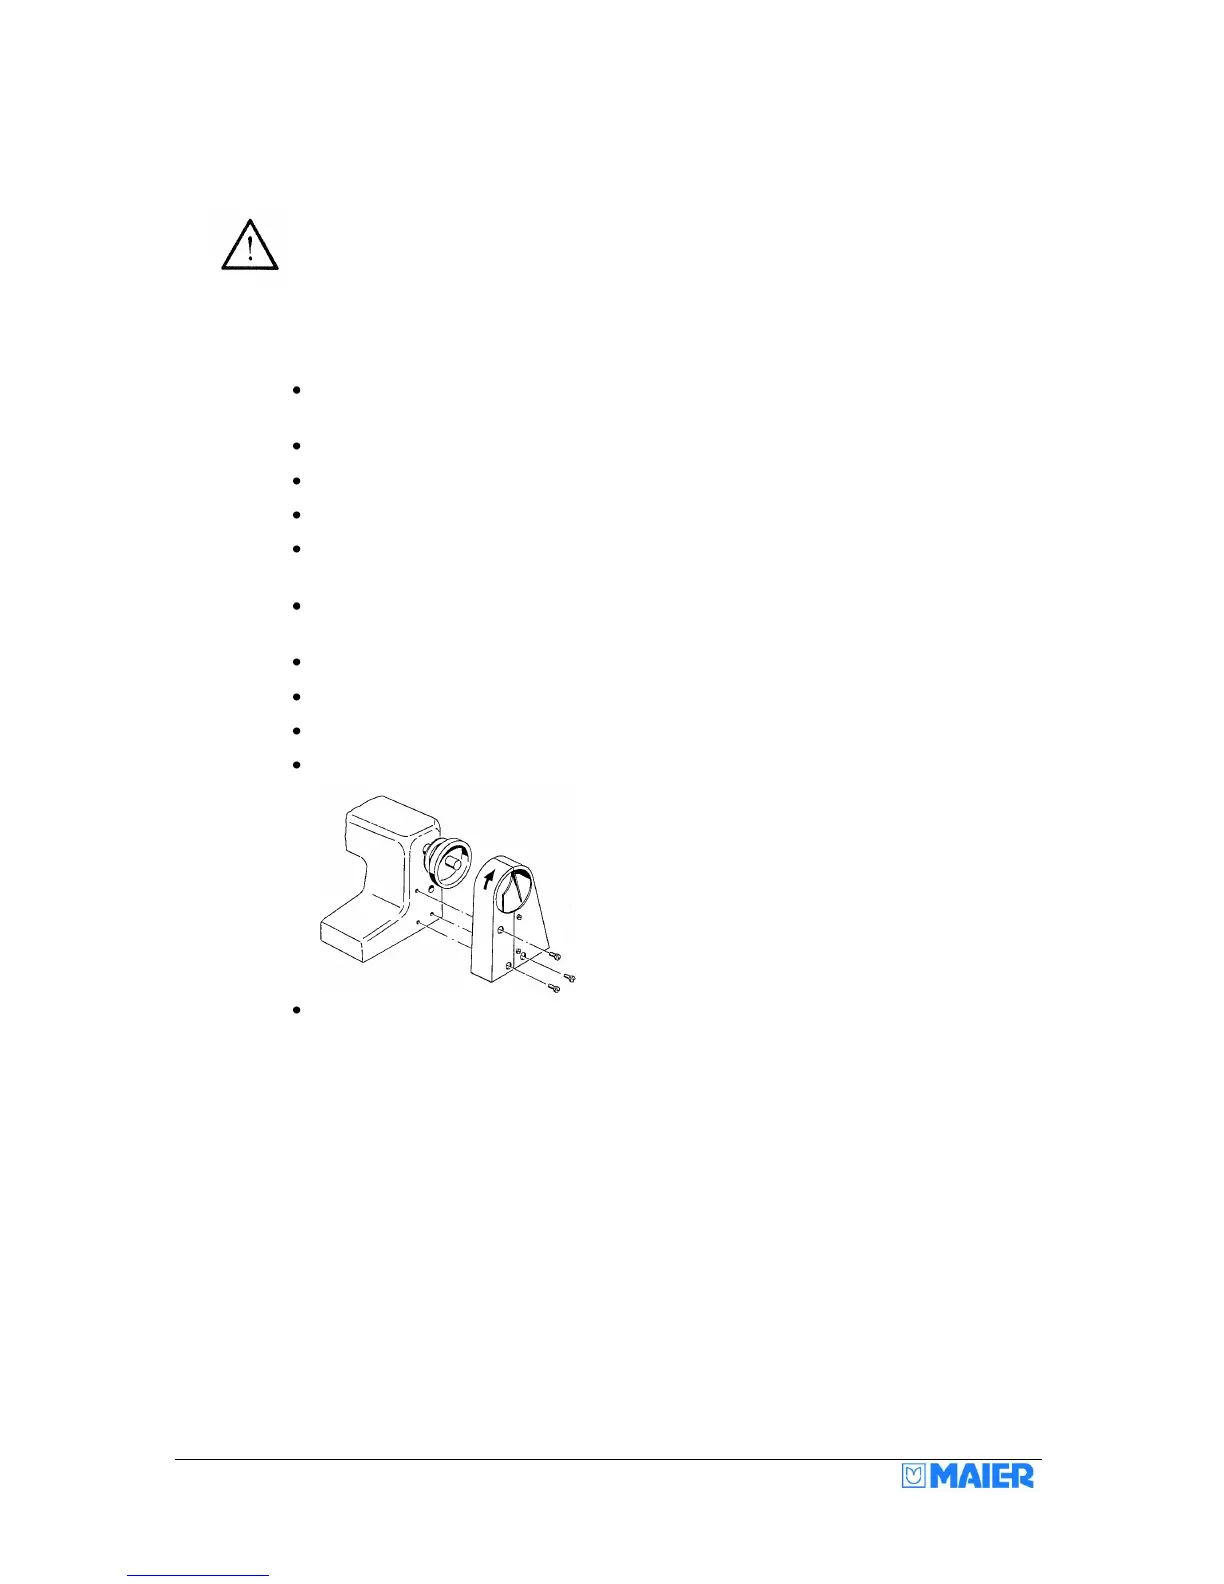
Fitting the finger guard (not on classes 220, 221, 271)
It is essential that the finger guard is fitted, to prevent any finger injury when opening the frame (with
treadle or stop motor).
To do this, remove the ratchet screw, bolt the finger guard onto the table top at a distance of approx
3mm from the supporting plate. Make sure that the supporting plate can move in front of the guard.
Refit the ratchet screw.