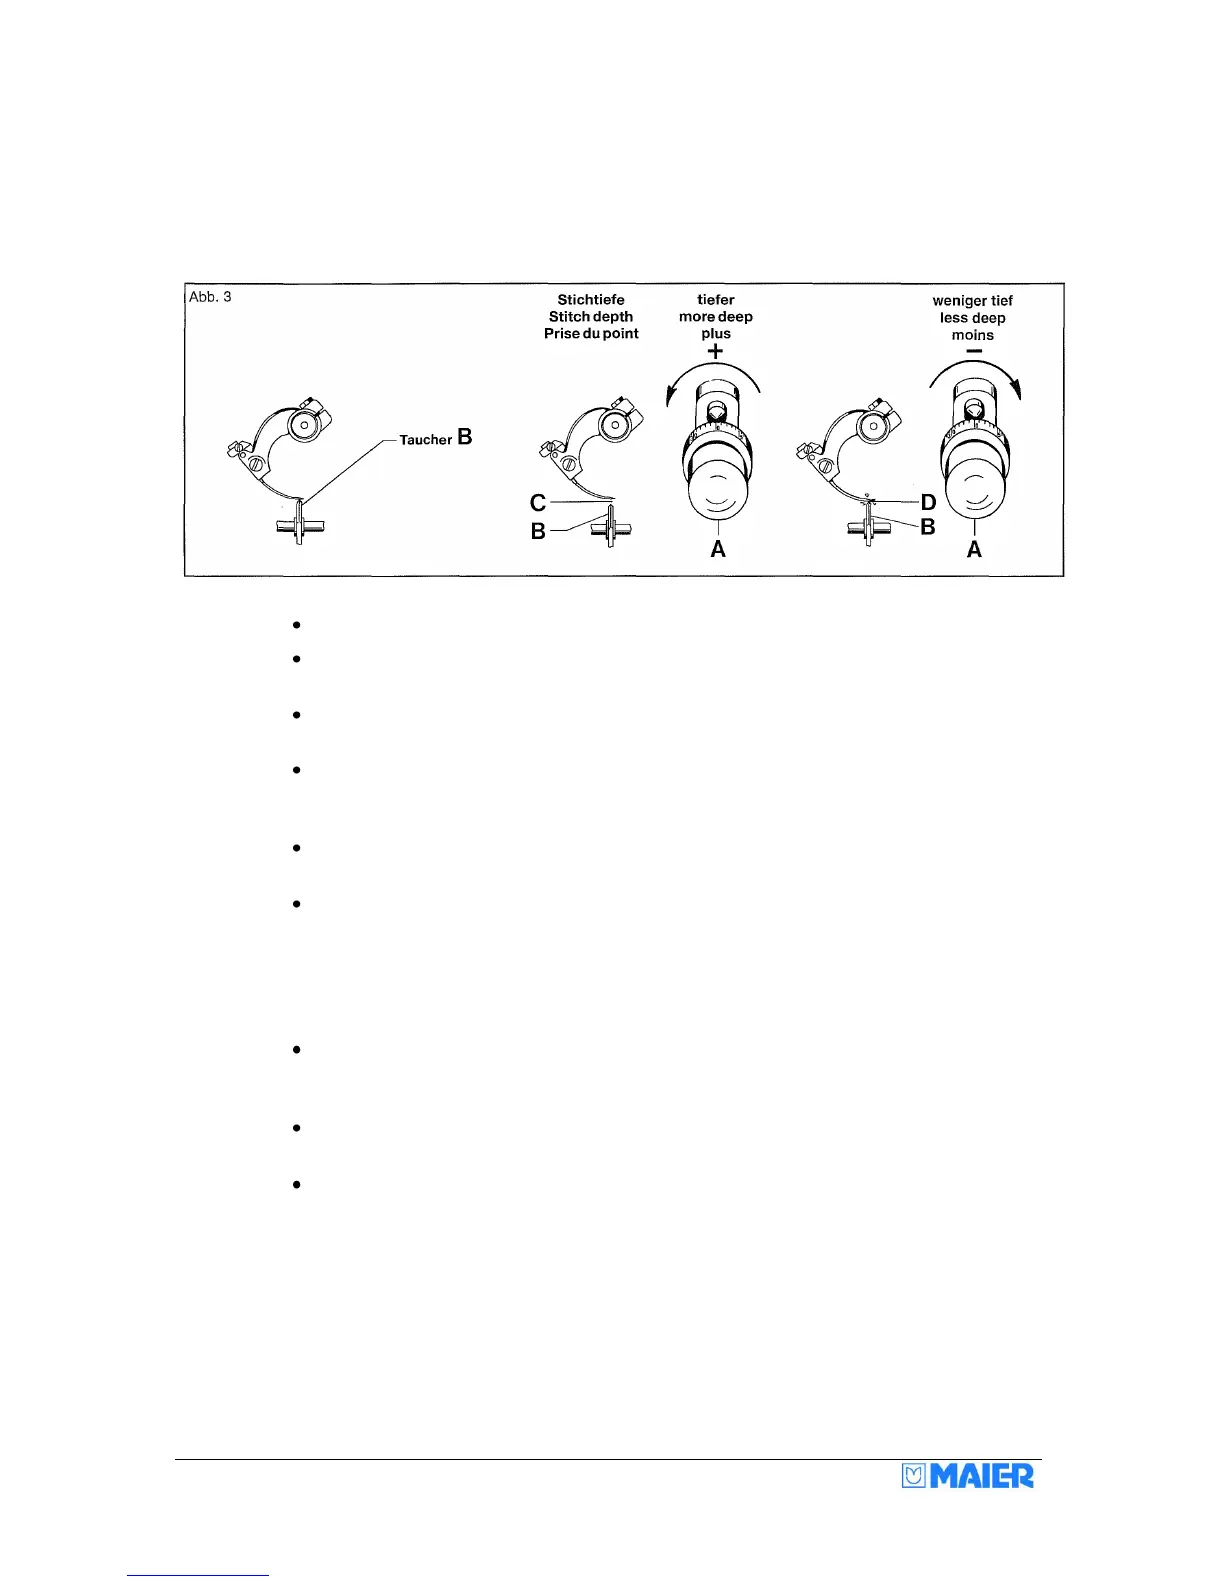
Setting the stitch depth (penetration)
Classes 220, 221, 240, 241, 251, 261, 271
Adjusting screw A for setting the stitch depth is located under the frame plate.
To check the stitch depth, turn the hand-wheel until the needle point is positioned
directly above the plunger (rib shaft) B.
When correctly set, the needle should just pass over the plunger (rib shaft) B without
touching it.
When checking the adjustment, make sure that you do not operate the treadle or
knee-lift lever, as otherwise the adjustment will be incorrect (with the automatic
presser foot device, the associated Bowden cable must be slack).
If the needle passes too high over the plunger (rib shaft) B, as shown in C, turn the
stitch depth adjusting screw anticlockwise.
However, if the needle strikes the plunger (rib shaft) B, as shown in D, turn the
adjusting screw clockwise.
Both the adjusting screw A and the numbers are clearly visible through the small
opening in the frame or swing-out table. If some stitches are missed (shallow
penetration) during sewing, adjust the machine in accordance with C.
However, if some stitches appear on the outside of the cloth, adjust the machine in
accordance with D.
On machines with spring-loaded plunger/rib shaft (classes 251/261/271), accurate
adjustment of the cloth retainers is very important. See page 21 of the operating
instructions for more on this.