Do you have a question about the Malvern Mastersizer X Series and is the answer not in the manual?
Details responsibilities of Malvern personnel, supervisor, and operator regarding instrument access.
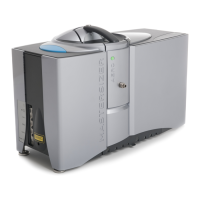
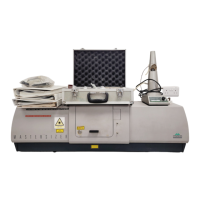
Details the three main components of the optical unit: transmitter, receiver, and sample area.
Details connectors on the transmitter end panel, including power, interlock, and remote sockets.
Explains laser power key, indicator, switch, and the QSpec logo.
Details the beam expander and range lenses, including their functions and available types.
Explains sample cell types (stirred, flow, air), cell pipe connectors, and removable accessory panels.
Describes the receiver unit, its function in collecting scattered light data, and the detector.
Introduces the Windows-based Mastersizer software and its functions.
Identifies key features of the software screen, including the title bar and menu bar.
Introduces the three main software modes: Easy, Menu, and Program mode.
Describes the two main procedures: capturing scattering patterns (measurement) and analysing data using presentations.
Emphasizes the importance of correct measurement procedures and outlines the stages involved.
Explains the initial setup step to inform the software about system parameters like lens type.
Describes the automatic procedure for aligning the laser onto the detector.
Explains the process of measuring background scattering to remove interference.
Details how to add sample and monitor obscuration for correct concentration.
States that the sample scattering pattern is measured after all preceding steps are completed.
Outlines the three steps for data analysis: mode, presentation, and calculation.
Explains the available analysis models and their suitability based on expected result graph shapes.
Details the importance of a structured approach to saving data (records, run numbers, sample files).
Highlights sample preparation as a critical step for accurate measurements and discusses representative sampling.
Emphasizes the importance of clean optics for accurate laser scattering measurements.
Guides the user on selecting the appropriate range lens based on sample size and dispersion method.
Explains how to determine the correct lens based on particle size ranges, including test measurements.
Discusses the second factor in lens choice: the method of sample dispersion.
Explains the purpose of background measurement and when to take a fresh background.
Details checks for instrument connection, power, lens fitting, and beam expander.
Guides on using the "Setup Hardware" dialogue to configure the system.
Describes the procedure for aligning the laser to the detector, necessary after optics changes.
Explains how to perform a background measurement using the "Measure-Background" dialogue.
Explains how the system monitors obscuration to ensure correct sample concentration.
Describes the final step of measuring the sample using the "Measure-Sample" dialogue.
Explains the available analysis models and their suitability based on expected result graph shapes.
Discusses the importance of selecting the correct presentation based on sample optical characteristics.
Describes the different ways to select a presentation via the "Setup Presentation" dialogue.
Explains the final step of calculating the result after choosing optical model and presentation.
Guides on setting up measurement sequences using the "Setup-Measurement Sequence" menu.
| Measurement Principle | Laser diffraction |
|---|---|
| Connectivity | USB, Ethernet |
| Sample Dispersion | Wet or dry dispersion |
| Measurement Range | 0.01 to 3500 µm |
| Data Output | Particle size distribution |
| Software | Mastersizer software |
| Optical Model | Mie theory, Fraunhofer approximation |
| Compliance | ISO 13320 |
| Laser Type | He-Ne gas laser and solid-state blue light source |