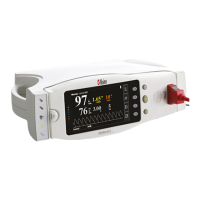
Radical-7 Signal Extraction Pulse CO-Oximeter Service Manual
5-1
5 Performance Verification
Note: Under normal operation, no internal adjustment or recalibration is
required.
5.1 Overview
5.1.1 To test the performance of the Radical-7 pulse oximeter
following repairs or during routine maintenance, follow the
procedure outlined in this section. If the Radical-7 fails any of
the described tests, discontinue its use and correct the
problem before returning the unit back to the user.
5.1.2 Before performing the following tests place the Radical-7
Handheld into the Docking Station, connect the Radical-7 to
AC power and fully charge the Radical-7 Handheld battery
(the AC mains switch must be on). Disconnect any patient
cables or pulse oximetry sensors, as well as SatShare, serial
or Analog Output/Nurse Call cables from the instrument.
5.2 Power-On Self-Test
5.2.1 Connect the unit to AC power and verify that the AC Power
Indicator LED is illuminated. If it is not, verify that the AC
mains switch is on.
5.2.2 Turn the unit on by depressing the Power/Standby Button.
Within 5 seconds all available LEDs are momentarily
illuminated, a 1-second beep tone sounds, and the Masimo
SET logo is displayed.
5.2.3 The Docking Indicator LED, AC Power Indicator LED,
Handheld Battery Charge LED and Docking Station Charge
LED (if Docking Station is equipped with optional battery) are
illuminated and the Radical-7 begins normal operation.
5.3 Key Press Button Test
5.3.1 With the exception of the Power/Standby Button, press each
soft key button and verify that the Radical-7 acknowledges
each key-press with an audible beep tone or by indicating an
associated change on the display.
5.4 Alarm Limit Test
5.4.1 With the monitor turned on, select the Menu Access key and
enter the Alarm menu. Change the desired parameter,
below, to a value two points below the currently selected
value, and accept the change.