V. Assembly and adjustments(continued)
12
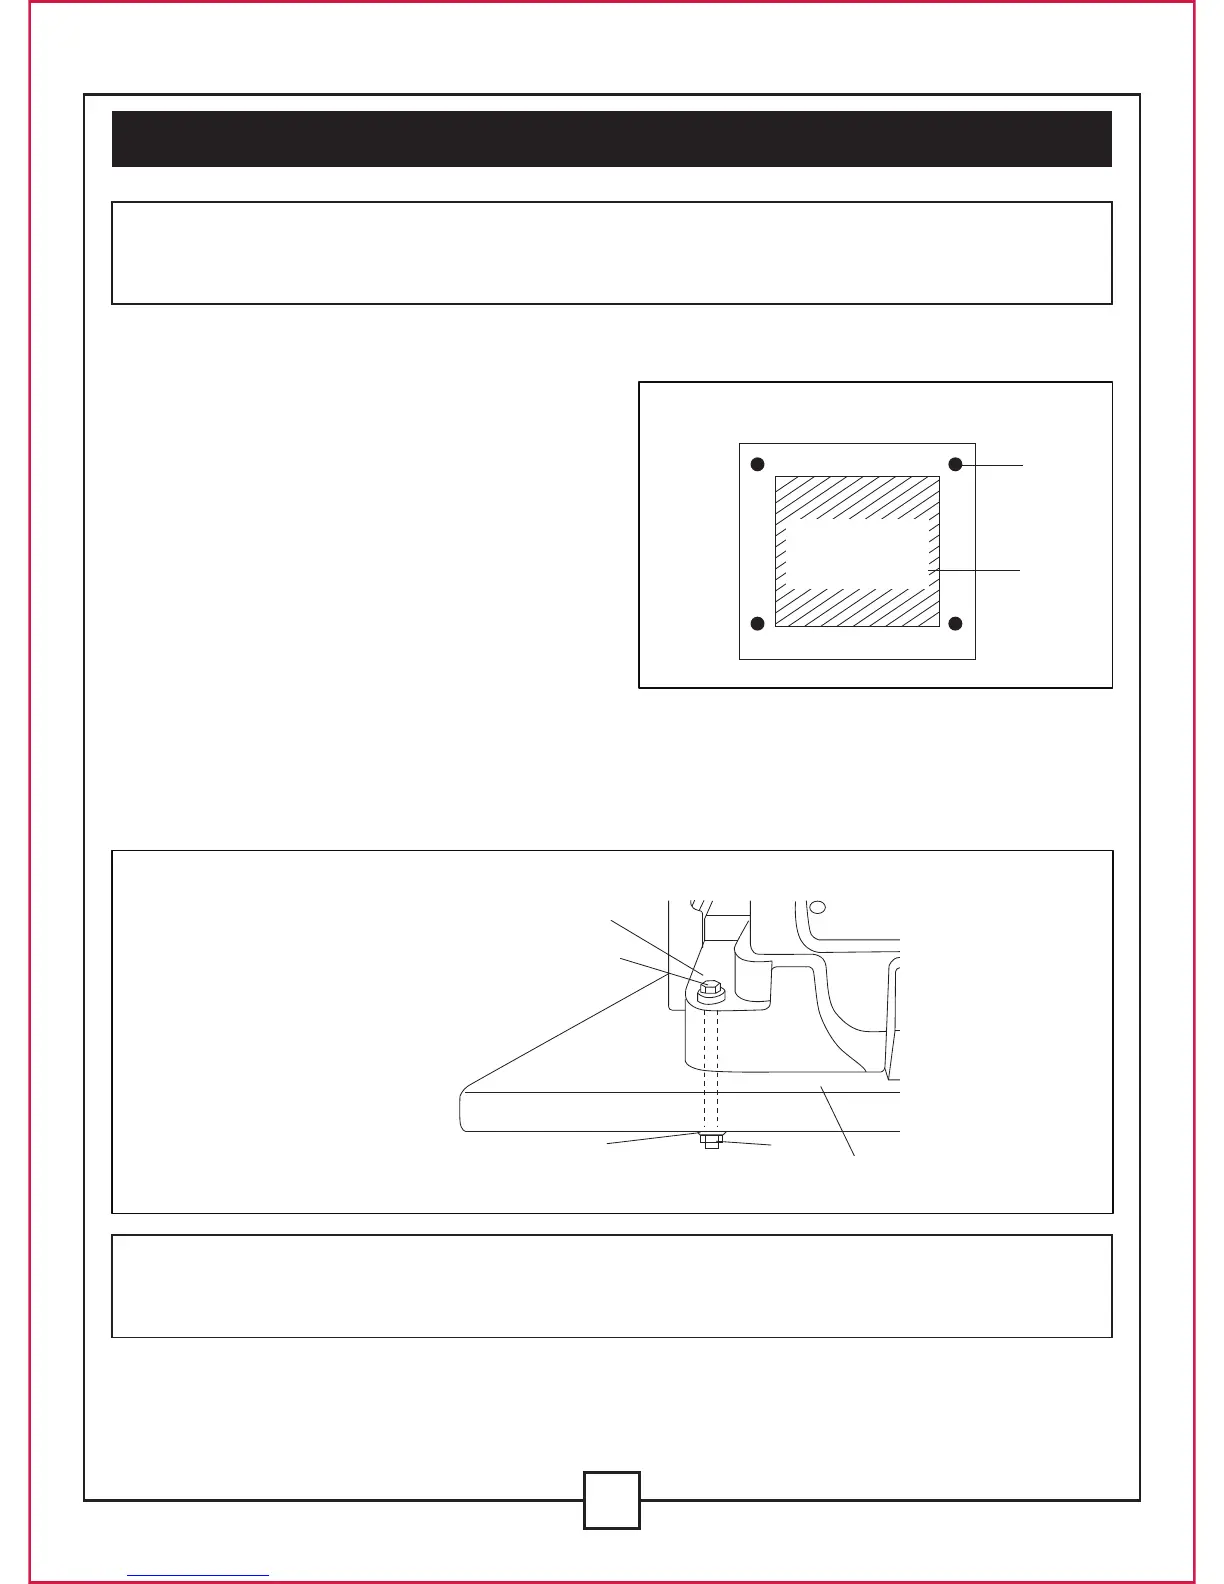
MOUNTING THE SAW TO ANOTHER SURFACE (FIG. 3,3-1)
WARNING: FAILURE TO PROVIDE A SAWDUST FALL-THROUGH AND REMOVAL HOLE
WILL CAUSE SAWDUST TO BUILD UP IN THE MOTOR AREA, WHICH MAY RESULT IN A
FIRE HAZARD OR CAUSE DAMAGE TO THE MOTOR.
IMPORTANT: FAILURE TO PROVIDE A SAWDUST FALL-THROUGH AND REMOVAL HOLE
WILL CAUSE SAWDUST TO BUILD UP IN THE MOTOR AREA, WHICH MAY RESULT IN A
FIRE HAZARD OR CAUSE DAMAGE TO THE MOTOR.
NOTE: If there is a tendency for the stand or workbench to move during operation, the stand or
workbench must be fastened to the floor.
1. If the leg set will not be used, the saw must
be properly secured to a sturdy workbench
using the four mounting holes at the base
of the saw.
2. The surface of the table where the saw is
to be mounted must have a hole that is
large enough to facilitate sawdust fall-
through and removal.
3. Square the saw on the mounting surface,
and mark the locating of the four 3/8”
mounting holes (1).
4. Drill 3/8” holes into the mounting surface.
5. Mark a 11x11” (28 x 28 cm) square (2), centred between the four mounting holes (1).
6. Cut out and remove the square.
7. This opening will allow sawdust to fall through the saw base.
8. Fasten the saw to the work surface, matching the mounting holes of the saw to the holes
drilled in the work surface.
Fig. 3
Fig. 3-1
SQUARE
CUTOUT
1
2
1. Saw base
2. Hex head bolt
3. Workbech
4. Flatwasher
5.Hex nut
1
2
4
5
3

 Loading...