We recommend as a minimum tool kit:
• Socket wrench to fix the main DC cables (½” / 13mm).
• Socket wrench to fix the Safety ground connection (
3
/
8
” / 10mm).
• Flat blade screw driver to fix the screw terminals of the AC wiring.
• Tools to fix the screws / bolts (Ø ¼” / 6mm) with plugs to mount the PowerCombi
Inverter/Charger to a surface.
• Philips screw driver to open the connection compartment.
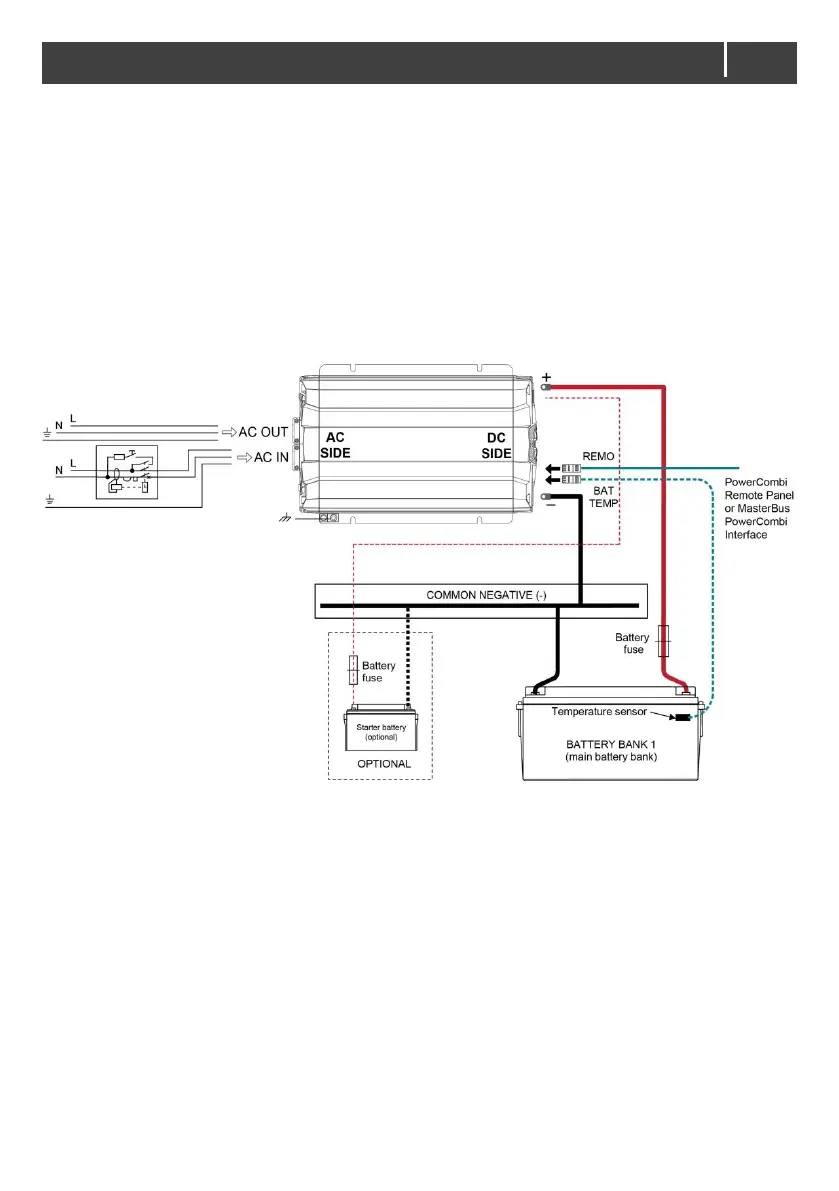
4.6 Connection example
This schematic illustrates the general placement of the PowerCombi Inverter/Charger in a circuit. It
is not meant to provide detailed wiring instructions for any particular electrical installation.
Figure 7: Installation drawing PowerCombi Inverter/Charger
4.7 Installation step-by-step
Step 1. Disconnect power supplies.
Step 2. Mount the PowerCombi with four screws to a solid surface.
Ceiling Mount
Use the screws to mount the product on the wall, and the product mounting requirement is
as follows: the mounting height from the ground to product requires at least 28” [70cm].

 Loading...