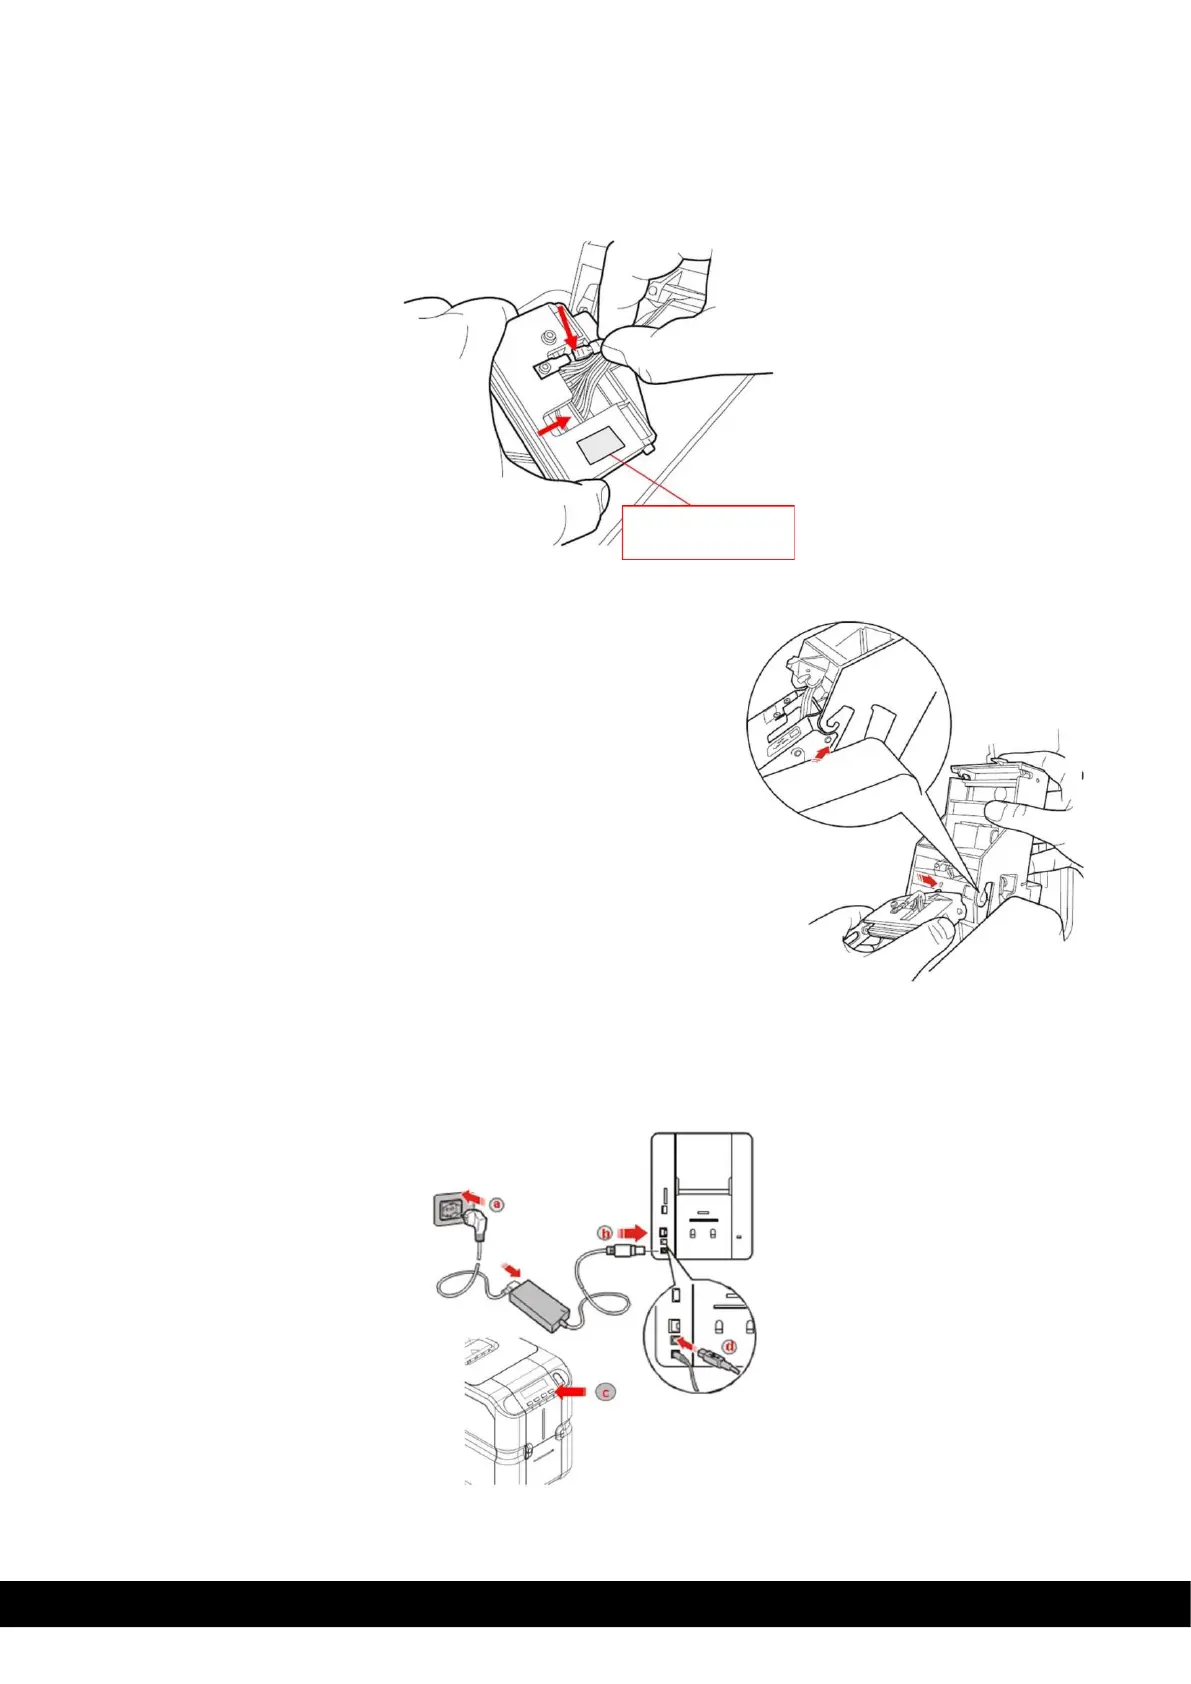
b) Remove the earth wire and the connector, connect these to the new print head and make a note of the
Print HeadSerial No. and Click ‘Next’ to continue in the Printer Manager wizard
5. Insert the new print head.
During re-insertion, press with the sphere present in the tip of the
print head on the point indicated in the figure and rotate it slightly
in order to insert it in its housing and Close the top cover.
Click ‘Next’ to continue in the Printer Manager wizard
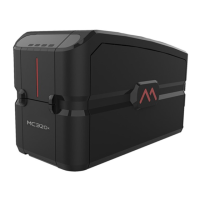
3)
Connect the printer to the power supply, switch on and connect it to a computer with the USB cable
Click ‘Next’ to continue in the Printer Manager wizard