7.4 CONSOLE KEYPAD / OVERLAY REPLACEMENT
1) Remove the console as outlined in Section 7.1.
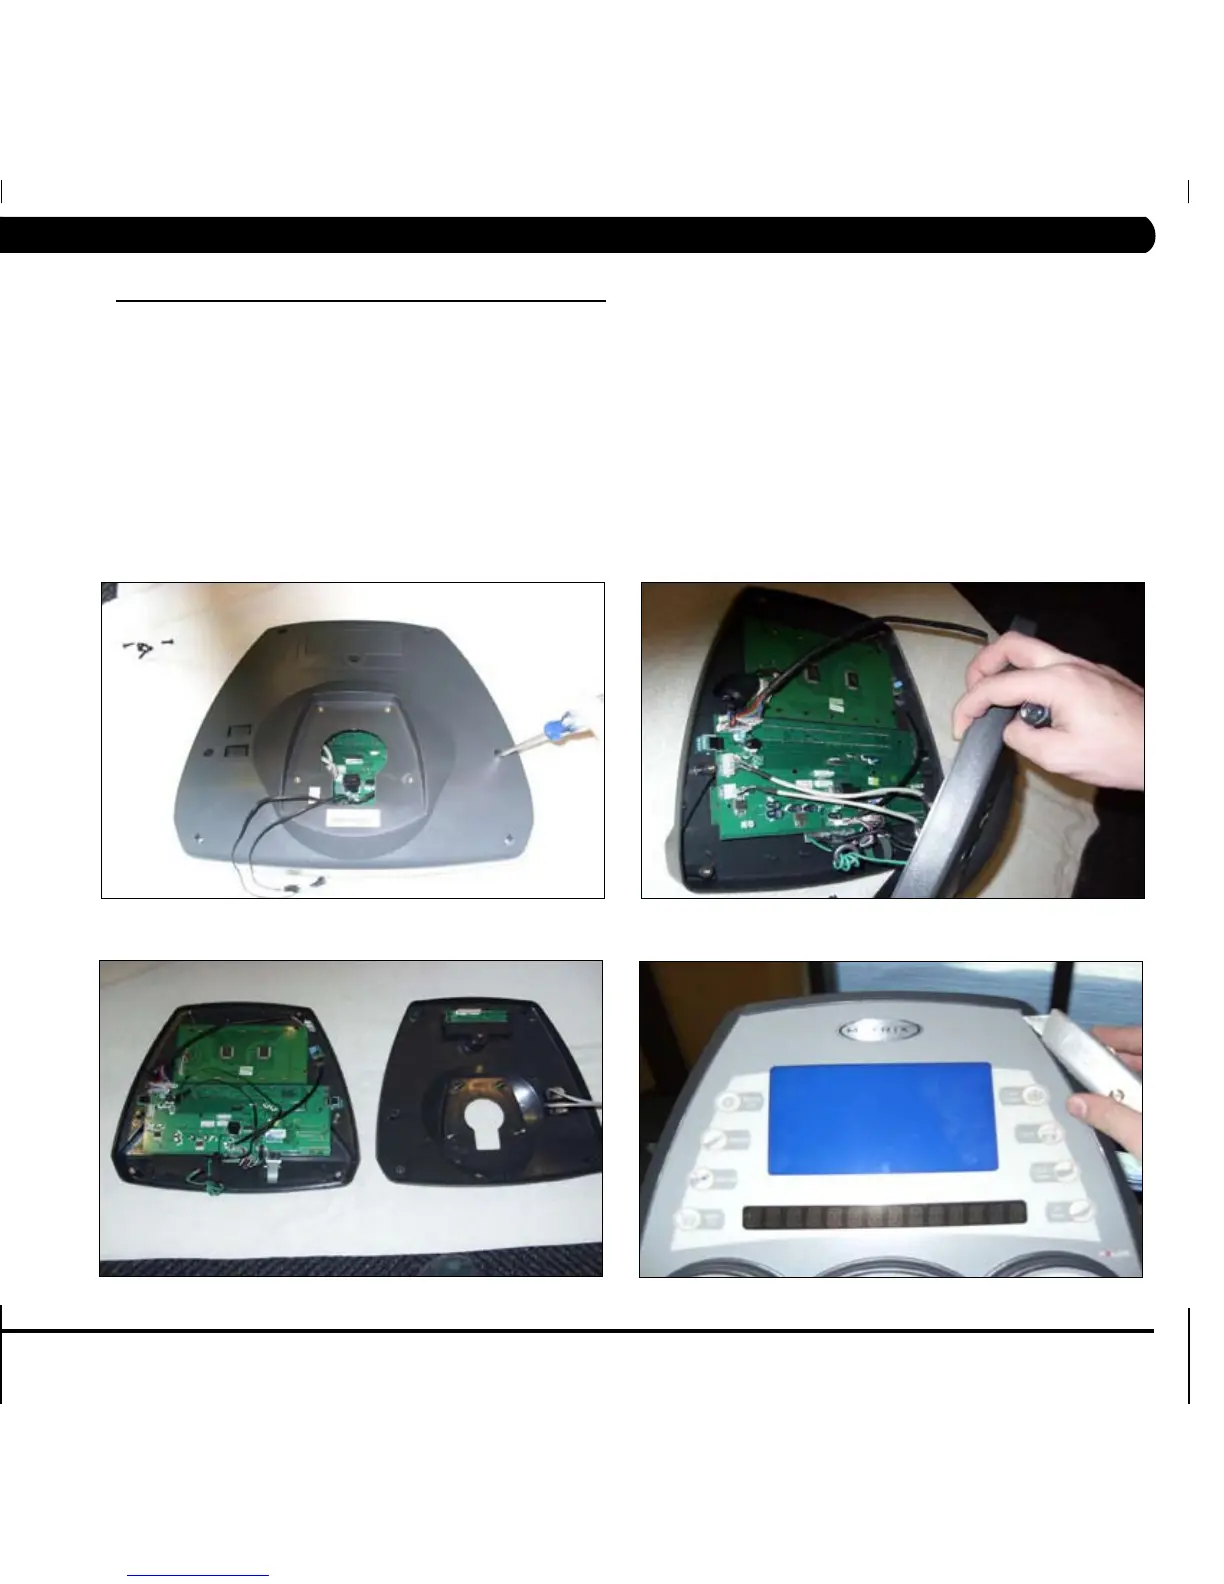
2) Remove the 6 screws holding the console back to the front (Figure A). NOTE: If just replacing an overlay, only complete Steps 4, 8, & 9.
3) Remove the wire connections holding the console back to the front (Figures B & C)
4) Using a razor blade, carefully peel up one corner of the overlay and then remove the whole overlay (Figure D). Remove any access adhesive from the
plastic.
5) Disconnect the appropriate ribbon cable for the keypad that you are replacing (Figures E - G).
6) Again using a razor blade, carefully peel up one corner of the defective keypad and the remove it from the console.
7) Remove the backing from the new keypad (Figure H). Install the new keypad by sliding the ribbon cable through the slot in the console and plug it in
to the appropriate console housing. Be careful to seat the ribbon cable correctly.
8) Remove the backing from the new overlay. Install the new overlay into the console housing over the keypad. Be careful to avoid air bubbles and
misalignment.
9) Test the bike for function as outlined in Section 7.24.
FIGURE A FIGURE B
FIGURE C
FIGURE D
29
CHAPTER 7: PART REPLACEMENT GUIDE
 Loading...