30
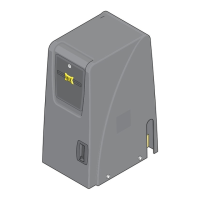
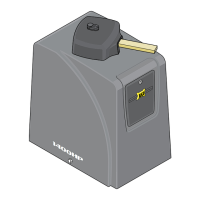
MAX Arm/Ultra Arm V1
EXIT PWR
ALARM
POWER /
SOLAR IN
BATTERY
INPUT
P
S
BATTERY
INPUT
ERROR
BATTERY
IN USE
POWER
B
RESET
ID
PLUG
MODULE
PORT
FIRE DEPT
RADIO GND
RADIO SIGNAL
ID PLUG
ERROR
24VDC OUTPUT
12VDC OUTPUT
GND
GND
GND
LOOP
LOOP PWR
LOOP
CENTER
SAFETY
O
SIN
1
2
3
4
5
6
7
8
9
10
OFF
1
2
3
4
5
6
FAULTS
OFF
EXIT LOOP
MODE A MODE B
12
loops & loop detectors
11
Adjust ERD Reverse sensor
MAX
SENSE
ERD SENSITIVITY
MIN
16
3
1
14 12
9
7
MAX
SENSE
ERD SENSITIVITY
MIN
16
3
1
14 12
9
7
MAX
SENSE
ERD SENSITIVITY
MIN
16
3
1
14 12
9
7
MAX
SENSE
ERD SENSITIVITY
MIN
16
3
1
14 12
9
7
MAX
SENSE
ERD SENSITIVITY
MIN
16
3
1
14 12
9
7
The ERD Sensor - Electronic Reversing Device (Type A) MUST be adjusted for the OPEN and CLOSE gate cycles.
When the gate encounters an obstruction during the CLOSE cycle, it will reverse to the open position and PAUSE the gate.
An input command (press remote button or exit loop) is needed BEFORE the gate will reset and close again.
When the gate encounters an obstruction during the OPEN cycle, it will reverse approximately 6 inches and PAUSE the gate.
An input command (press remote button or exit loop) is needed BEFORE the gate will reset and open again.
For the ERD Sensitivity to function correctly:
• Gate positions must be learned BEFORE adjusting the ERD Sensitivity.
A. Turn knob until blue LED lights up.
Maximum sensitivity reached,
Position 1 - Too sensitive for most gates.
Position 12:
• Typical gate setting.
B. Turn knob counter-clockwise to
reduce gate sensitivity while testing ERD
until desired results is attained.
(LED remains OFF for all but position 1)
IMPORTANT: When satisfied with ERD adjustment, cycle the gate
a few times to make sure that the ERD sensor does not falsely
trigger during normal gate operation. Re-adjust if this happens.
CAUTION: Position 16 results in gate exerting
MAXIMUM force before reversing direction.
Typical Settings:
16 sensitivity setting positions in EACH direction.
NO mechanical hard stops for knobs.
Position 15:
• Heavy gate setting.
• Long gate setting.
Position 16:
• High wind area gate setting.
If alarm sounds while adjusting ERD,
press STOP BUTTON to shut-off alarm.
OPENING CLOSING
ERD
MOTOR
OVER
LOAD
ERD
MOTOR
OVER
LOAD
MAX
SENSE
MAX
SENSE
ERD SENSITIVITY
MIN
3
1
14
16
MIN
16
12
9
7
3
1
14 12
9
7
MOTION CONTROL
OPEN
STOP
CLOSE
Adjust ERD for EACH direction:
In-Ground Loops
Loop Detector Rack
Safety loops wired in series.
Center
Loop
Safety
Loop
Safety
Loop
Exit
Loop
Plug-In Loop Detectors
EDI
Loop Detector
ON
1
2
3
4
5
6
7
8
5 = Optim
u
m
Se
ns.
= Increase Sens.
= Decrease S
ens.
DEFLECTOME
TER
POWER
ON
= Normal
P
ower
OFF= No
Po
wer
LED INDICATORS
DETECT
ON
= Detect
OFF= No
Dete
ct
2 Hz Flash=Delay
Tim
ing
SW1 SW2 Freq
uency
ON ON = Low
ON OFF
=
Medium-Low
OFF ON = M
ed
ium-High
OFF OFF
=
Hi
gh
SW4 SW5 Output B
ON ON = Puls
e
on Entry
ON OFF =
B same as A
OFF ON = Puls
e
on Exit
OFF OFF
=
Loo
p Faul
t
SW3
ON = Fail Secure
OFF
= Fa
il Safe
SW6
ON = 2 Second Dela
y
OFF
= No
Delay
SW7
ON = Nor
m
al Pr
e
s
ence
OFF
= Inf
ini
te Presenc
e
SW8
ON = S
ensitiv
i
ty Boost
OFF
= No
S
ensitivity B
oost
L
oop Fa
ult
1 Flash = Open Loop
2 Flashes= Shorted Loop
3 Flashes
=2
5% ch
ange
of Inductance
Both LED’s
F
lashin
g=
Current Loop Fault
PWR L
ED Flash
ing=
Previous Loop Fault
EDI
Tel: 480.968.6407
DEFLECTOMETER
SENS
R
ESET
POWER
DETECT
EDI
SENS
LMA1800
OPTIONS
1 2 3 4
5
6 7
8
ON
EDI
Loop Detector
Low Current
Draw
OPTIONS
ON
1
2
3
4
5
6
7
8
5 = Optimum Sens.
=
Increase Sens.
=
Decrease Se
ns.
DEFLECTOM
ETER
POWER
ON =
No
r
mal Po
wer
OFF=
No Powe
r
LED INDICATORS
DETECT
ON =
Detect
OFF=
N
o De
tect
2 Hz Fla
s
h=Delay Timin
g
SW1 SW2 Frequency
ON ON = Low
ON OF
F = Medi
um-Low
OF
F ON =
Mediu
m-High
OF
F OFF = High
SW4 SW5 Output B
ON ON = Pulse on Entry
ON OF
F = B
same as A
OF
F ON =
P
u
ls
e o
n E
xit
OF
F OFF
=
L
o
op F
ault
SW
3
ON = Fail Secure
OF
F
= Fail Safe
SW
6
O
N =
2 S
econd
Delay
O
FF = No Dela
y
S
W7
O
N
=
Normal P
r
e
s
e
nc
e
O
FF = Infinite
Pres
en
c
e
SW8
O
N =
Se
nsitivity B
o
os
t
OF
F
=
N
o
S
ensiti
vity Boo
st
Loop Fault
1 Flash = Open
L
oop
2
Flashe
s=
Shorted Loop
3 Flashes=25% change
of In
du
ct
ance
Both LE
D’
s Flashing=
C
u
rren
t Lo
op
Fa
ul
t
PWR
LED
Flashing=
P
rev
io
us
Loop
Fault
EDI
Tel: 480.968.6407
DEFLECTOMETER
SENS
RESET
POWER
DETECT
ED
I
SENS
LMA1800-LP
1
2
3 4
5 6 7 8
ON
External Loop
Detectors
Wire directly to
7-PIN terminal
NOTE: DO NOT set Loop Detectors to
HIGH sensitivity to avoid false trigger.
NOTE: DO NOT select the PULSED output
option for Loop Detectors.
External
Loop
Detector
SAFETYCENTEREXIT
J3
J2
J4 J5
Position gate half-way open and STOP gate.
This gate position will put the most amount of
resistance on the ERD sensor when gate cycles.
STOP Gate
Half-way
CLOSE gate. If ERD sensor triggers, reduce
sensitivity. If sensor does NOT trigger,
sensitivity is set correctly.
CLOSE Gate
1
2
TIP: While Adjusting ERD. . . . .