75
11921 Slauson Ave. Santa Fe Springs, CA. 90670 (800) 227-4116 FAX (888) 771-7713
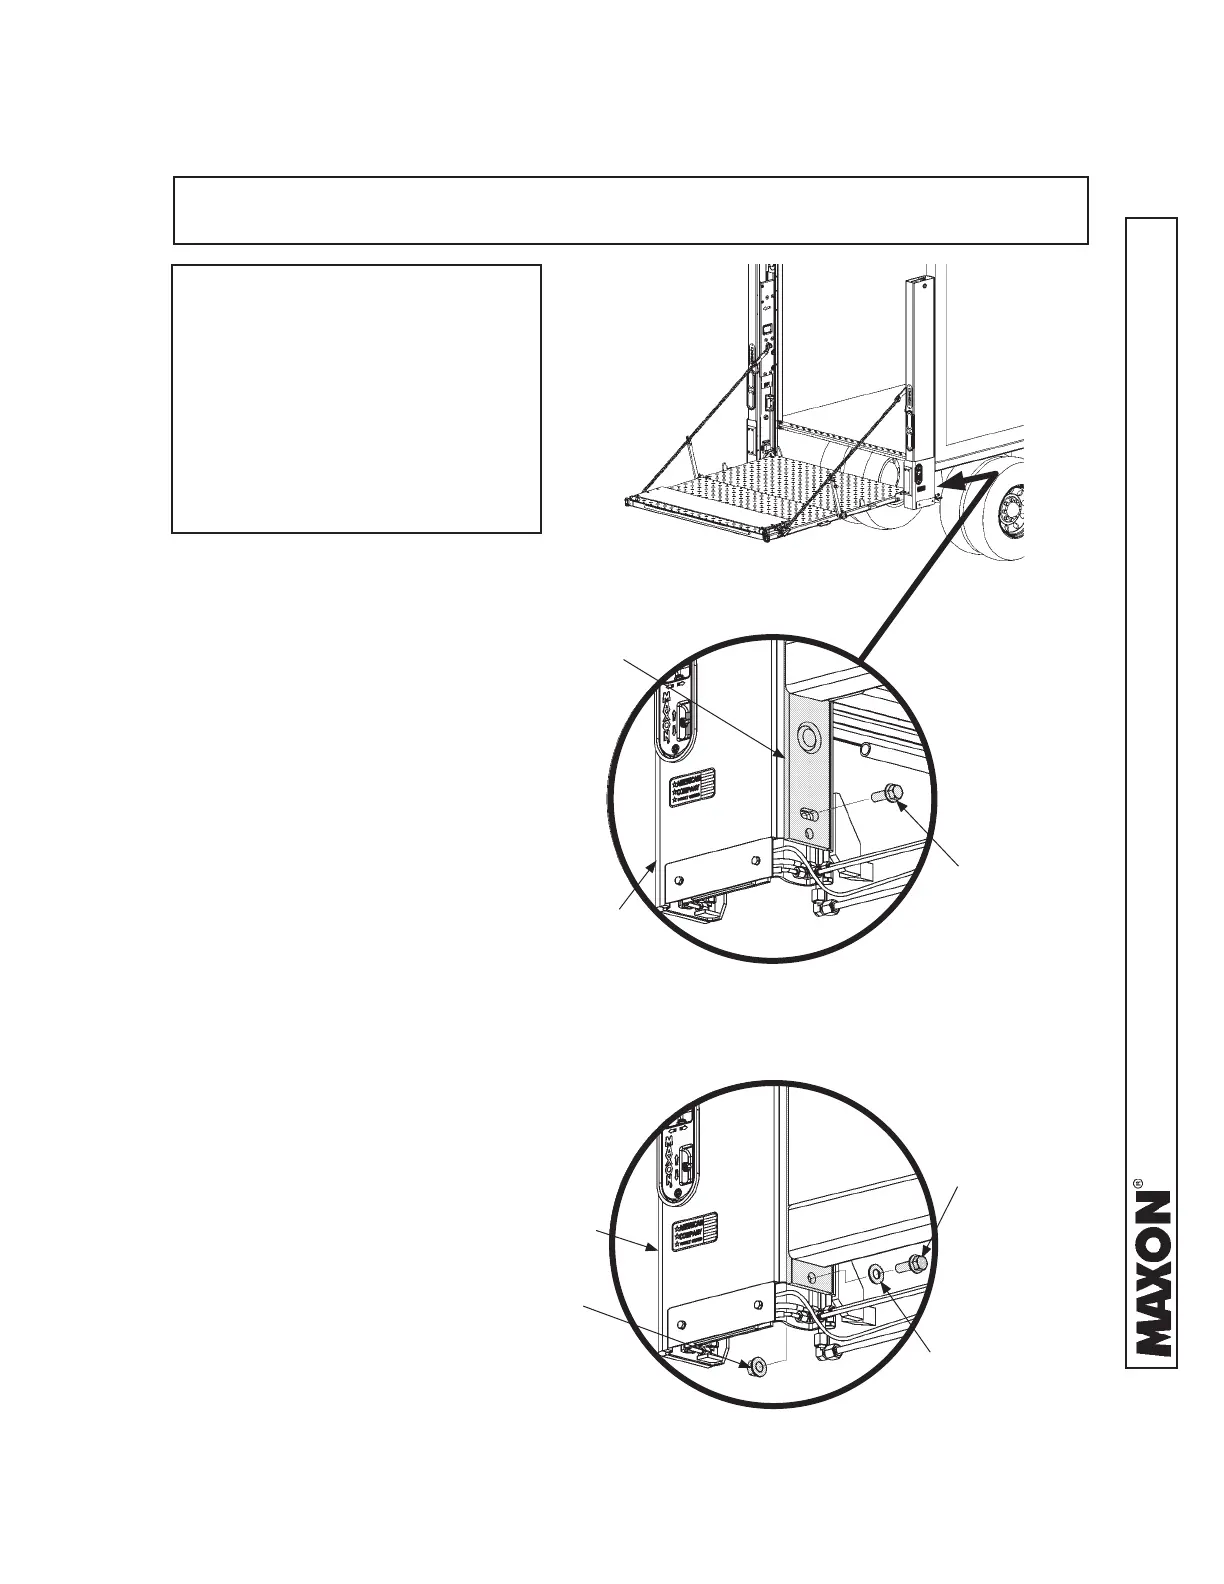
STEP 15 - SECURING COLUMNS - Continued
FIG. 75-1
MOUNTING
PLATE
RH COLUMN
UPPER BOLT HOLE
FIG. 75-1A
6. Torque 5/8”-11 bolts to 170
lb-ft. Repeat for LH column.
NOTE: Skip this step if using the METHOD 3 weld-on version of installation with no
mounting plates.
RH COLUMN
5. Get (2) fl ange hex bolts, (2)
fl ange lock nuts (if needed),
and (2) fl at washers (if need-
ed) from parts bag. Then,
install (1) bolt, (1) nut (if
needed), and (1) fl at washer
(if needed) through mounting
plate and RH column (FIGS.
75-1, 75-1A and 75-1B) Re-
peat for LH column.
LOWER BOLT HOLE
FIG. 75-1B
NOTE: MAXON recommends
using the upper bolt hole
(FIG. 75-1A) to attach
mounting plate. Howev-
er, if the upper hole will
be covered by vehicle
corner post, then use
the lower bolt hole (FIG.
75-1B).
FLANGE HEX
BOLT, 5/8”-11 X
1-3/4” LG.
FLANGE HEX
BOLT, 5/8”-11 X
1-3/4” LG.
FLAT
WASHER, 5/8”
FLANGE LOCK
NUT, 5/8-11”
METHOD 1 & METHOD 2
 Loading...