.. . .
●
A
\
DANGER
A
There are rotating cutting blades Inside the Chipper/
Shredder housing that will cause serious Injury. DO
NOToperate machlneunless Chipper Chute and Shred-
der Hopper are securely installed.
TEP 1: UNPACKING AND CHECKING
ONTENTS
Locate and remove Chipper Chute/Shredder Hopper
assembfy and debris tarnper from carton.
.
Locate qnd,remove parts bag.
Cutafl”fourcorners of carton from top to bottom and lay flat.
Remove bracket from support and cut nylon ties from axle.
Pull the ChipperX3tiredder off of the pallet.
Pmpafy &+ose of discarded ””&rton and pallet.
●
Compare cxmter$s with the contents of parts bag. If any
parts are missing or damaged, contact your local service
dealer or @l for factory service.
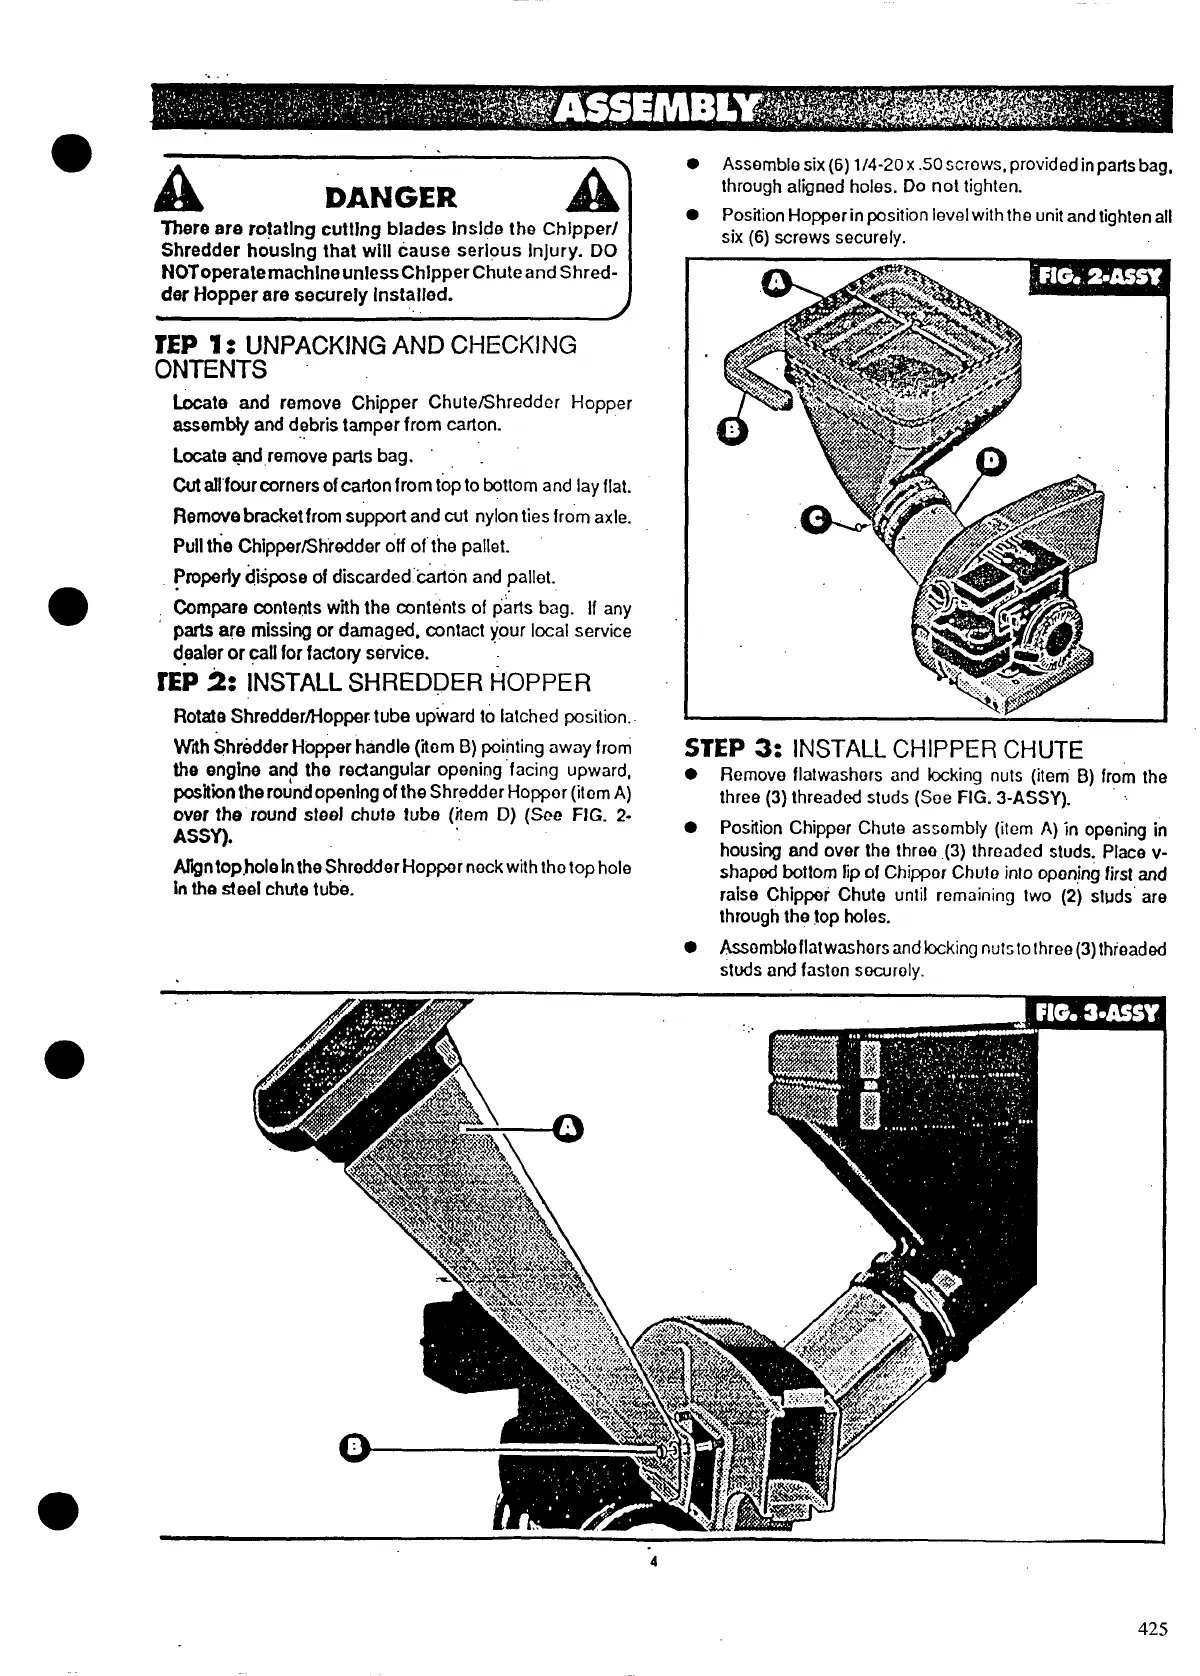
m 2: IIwmu SHREDDER iiOpPER
Rotate Shredder/Hopper tube upward to Ialched Posilion.
Wfih Shredder Hopper handle (iom B) pointing away from
the engine and the rectangular opening “facing upward,
posltiinthe round opening of the Shredder Hoppor (item A)
over the round steel chute tube (item D) (See FIG. 2-
ASSY).
AfIgntopholelnthe Shredder Hopper rmck with tho top hole
In the steel chute tube.
● Assemble six (6) l/4-20x .50 screws, provided inpartsbag,
through aligned holes. Do not tighten.
. Position Hopper in position level with the unit and tighten all
six (6) screws securely.
STEP 3: INSTALLCHIPPER CHUTE
● Remove flatwashors and locking nuts (item B) from the
three (3) threaded studs (See FIG.
3-ASSY). ~~
● Position Chipper Chule assembly (ilem A) in opening in
housing and over the thr~o (3) threaded studs. Place v-
shaped bottom fip of Chipper Chuto into oporjng first and
raise Chipper Chute unlil remaining two (2) sluds” are
through the top holes.
● Assombfoflaf washers and locking nuts to three (3) threaded
. .
studs and faston securely. -
‘4
425