●
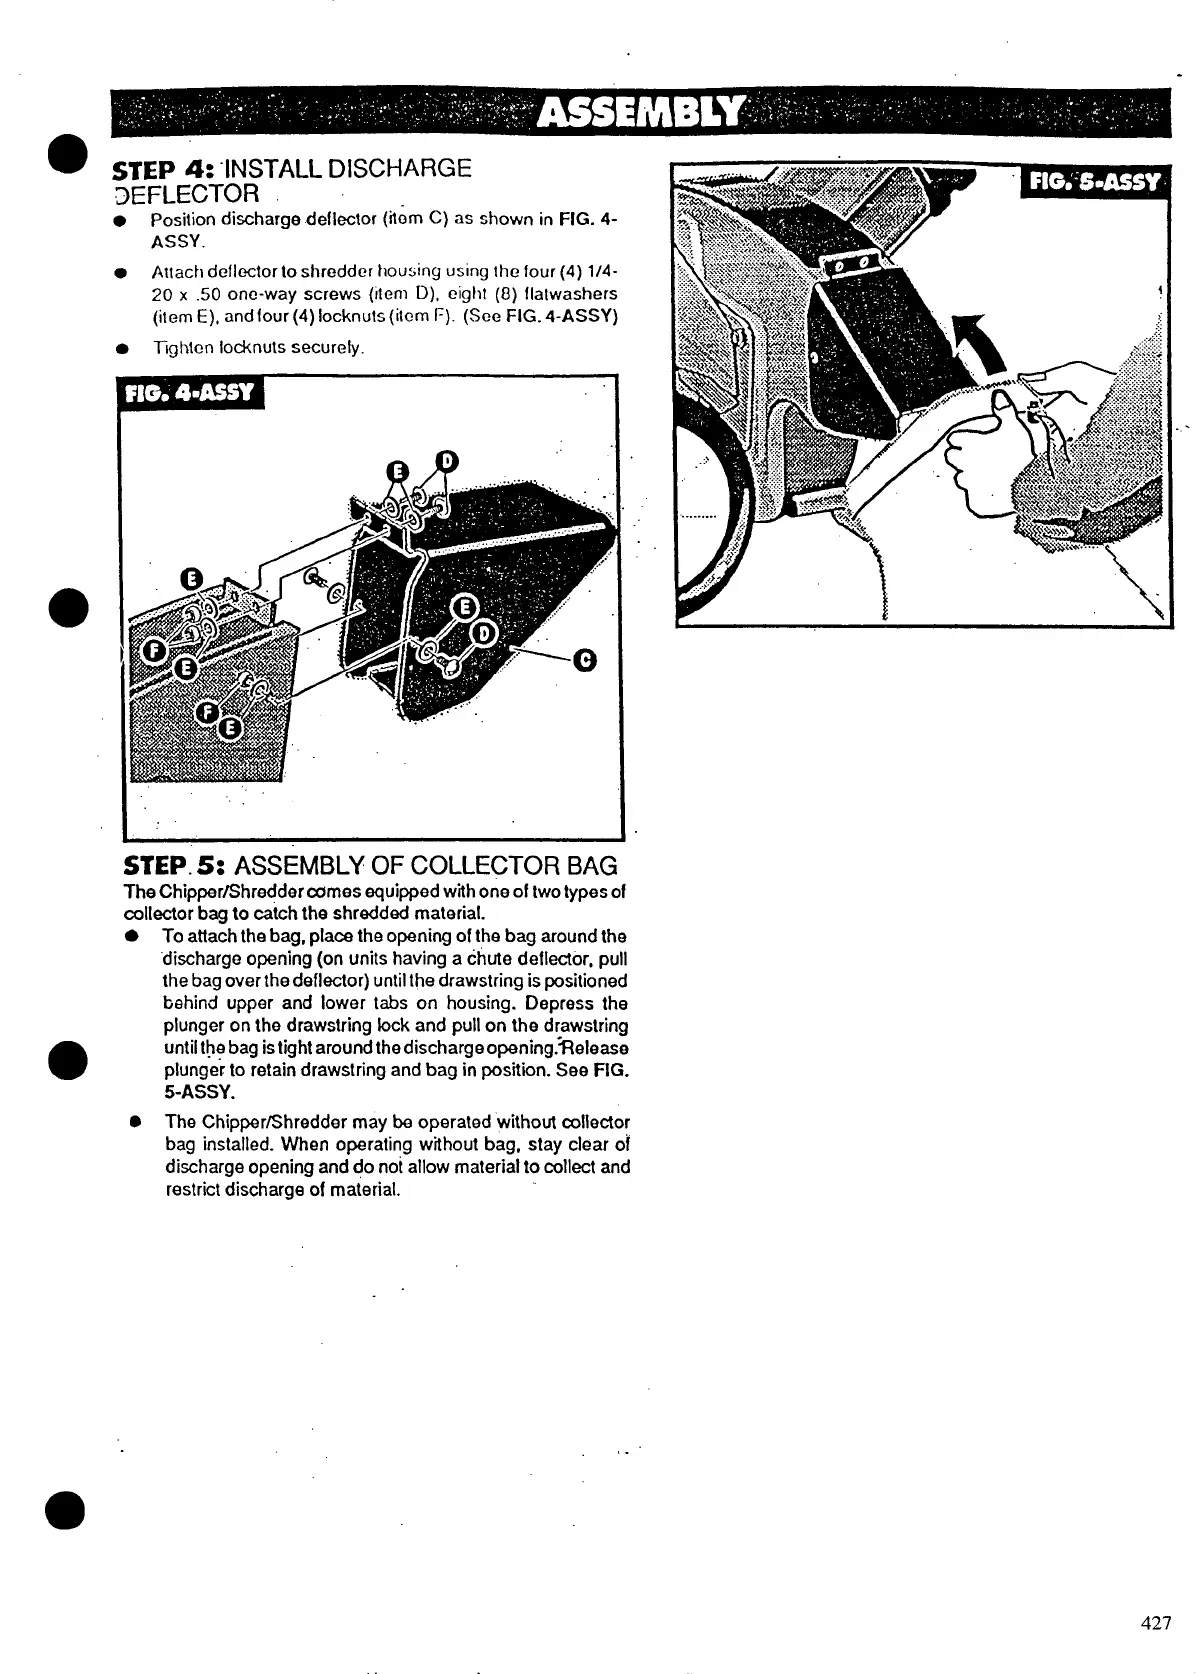
STEP 4: “INSTALLDISCHARGE
3EFLECTOR
● Position discharge deflector (item C) as shown in FIG. 4-
ASSY.
● Attach deflector to shredder housing using
the four (4) l/4-
20
x .50 one-way screws (item D), cighf (!3) !Ialwashers
(item E), and four (4) locknuts (ilem F). (See FIG. 4-ASSY)
●
TQhtcn locknuts securely.
43D’
STEP. 5: ASSEMBLY OF COLLECTOR BAG
The Chipper/Shredder comes equipped with one of two types of
collector bag to catch the shredded material.
. To attach the bag, place the opening of the bag around the
‘discharge opening (on units having a chute deflector, pull
the bag over the deflector) until the drawstring is positioned
behind upper and lower tabs on housing. Depress the
plunger on the drawstring fock and pull on the d~awstring
●
until the bag is tight around the discharge opening.Tielease
plunger to retain drawstring and bag in position. See FIG.
5-ASSY.
● The Chipper/Shredder may be operated “without coflector
bag installed. When operating without bag, stay clear of
discharge opening and do not allow materiaf to collect and
restrict discharge of material.
,.’
427