WebDAQ 504 User's Guide Functional Details
18
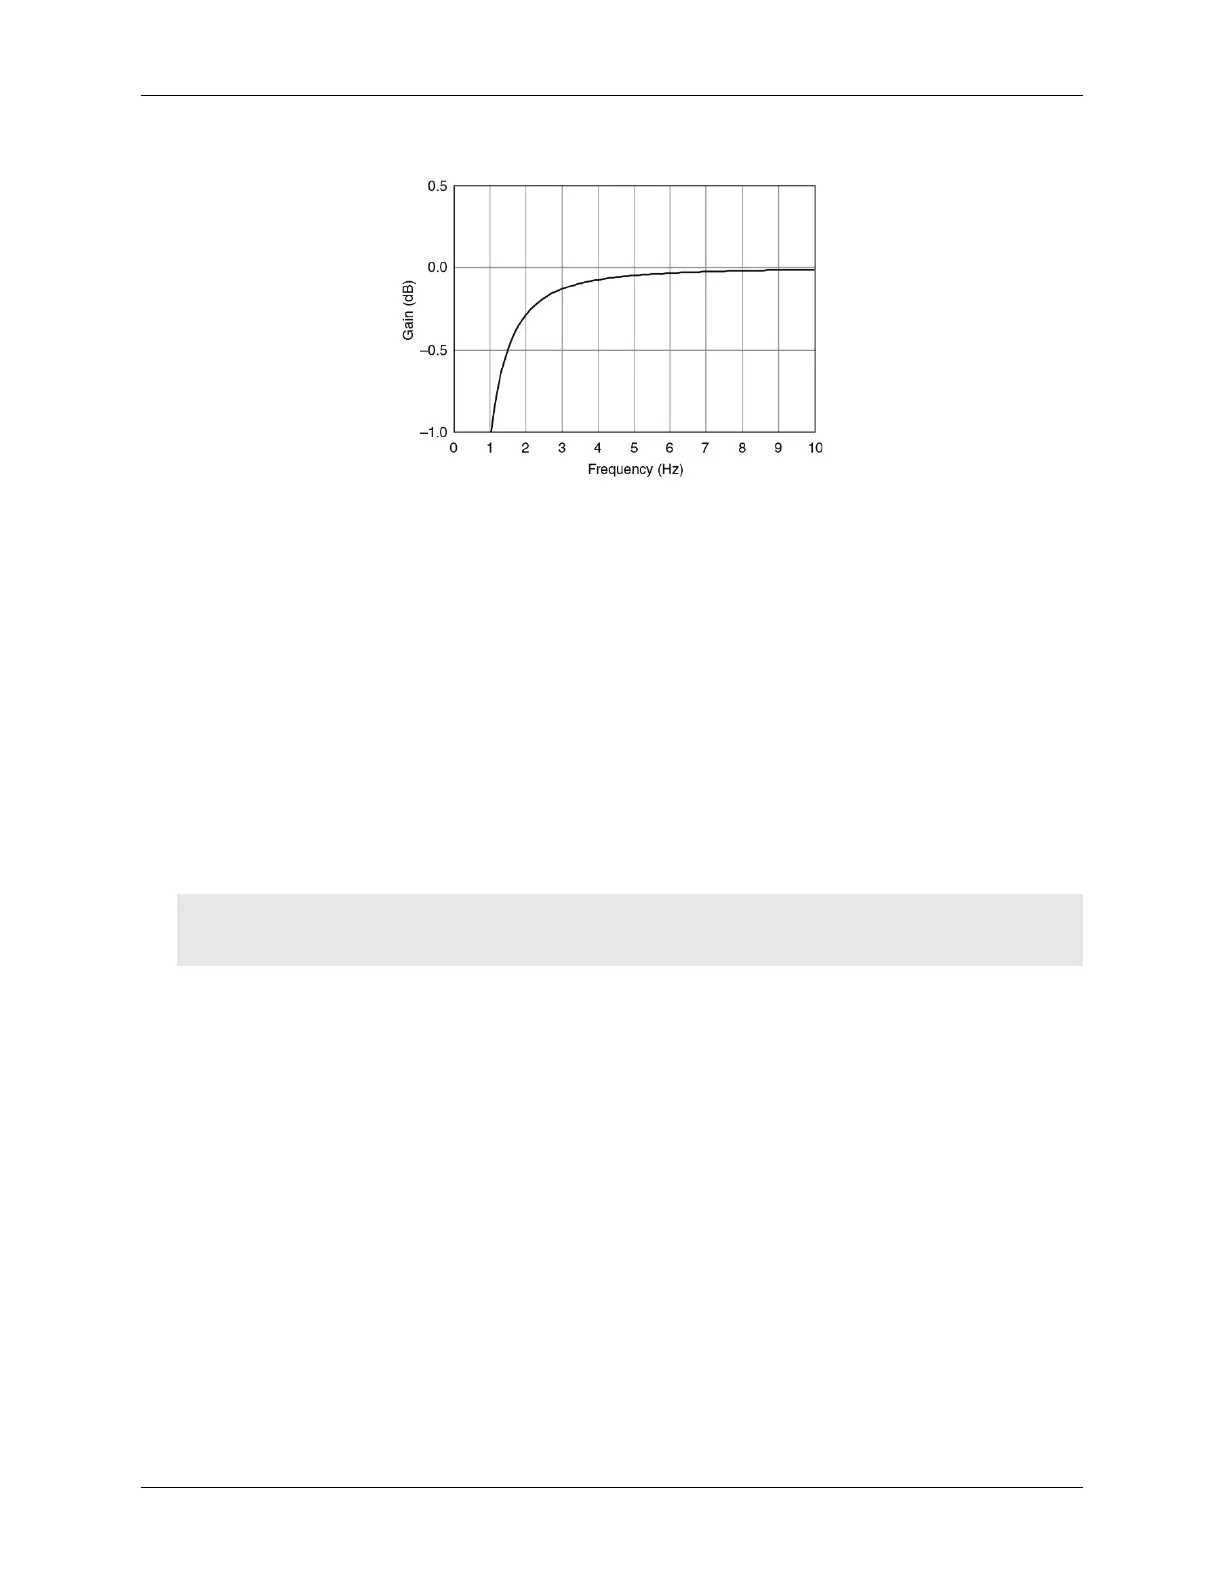
Figure 12 shows the passband at one data rate.
Figure 12. AC cutoff frequency response
Stopband
The filter significantly attenuates all signals above the stopband frequency. The primary goal of the filter is to
prevent aliasing. Therefore, the stopband frequency scales precisely with the data rate. The stopband rejection is
the minimum amount of attenuation applied by the filter to all signals with frequencies within the stopband.
Alias-free bandwidth
Any signal that appears in the alias-free bandwidth of the WebDAQ 504 is not an aliased artifact of signals at a
higher frequency. The alias-free bandwidth is defined by the ability of the filter to reject frequencies above the
stopband frequency, and it is equal to the data rate minus the stopband frequency.
Replacing the battery
A button cell lithium battery provides the time reference for WebDAQ hardware when the device is powered
off. The average lifespan of the battery is approximately 10 years.
Caution! The discharge of static electricity can damage some electronic components. Before removing the
WebDAQ device from its housing, ground yourself using a wrist strap or touch the computer
chassis or other grounded object to eliminate any stored static charge.
Perform the following procedure to replace the battery.
1. Power down the WebDAQ device and disconnect the power supply.
2. On the rear panel, remove the Ethernet cable, power cable, SD card, and any USB devices.
3. Remove the #6-32 ground screw.
4. Remove the nut and washer from the
EXT PWR connector.
5. Remove the two front panel bezel screws and remove the front bezel.
6. Slide out the circuit board with the front panel intact.
7. Remove the battery by sliding it forward toward the slot, and replace with a 3 V button cell battery – type
BR1225, CR1225 or similar.
8. Slide the circuit board back into the enclosure.
9. Attach the front bezel and secure with the two bezel screws removed in step 5.
10. Secure the power connector with the nut and washer removed in step 4, to the power connector, attach the
ground screw, Ethernet and power cables, and any USB devices.
Set the device system clock from the Device window, Device Info tab on the web interface.