Chapter 4 Operation
- 27 -
Click the key to integrate images, data and add diagnostic information,
and then generate case report. See §4.3.10 Case Report for details.
Press the key to connect it to the paired Main Unit. See §4.3.4 Main
Unit Connection for details.
Press the key to set system parameters which include: operator list,
patient list, system date and time of the Main Unit, hospital name and
system version information. See §4.3.12 System Parameter Settings
for details.
4.3.4 Main Unit Connection
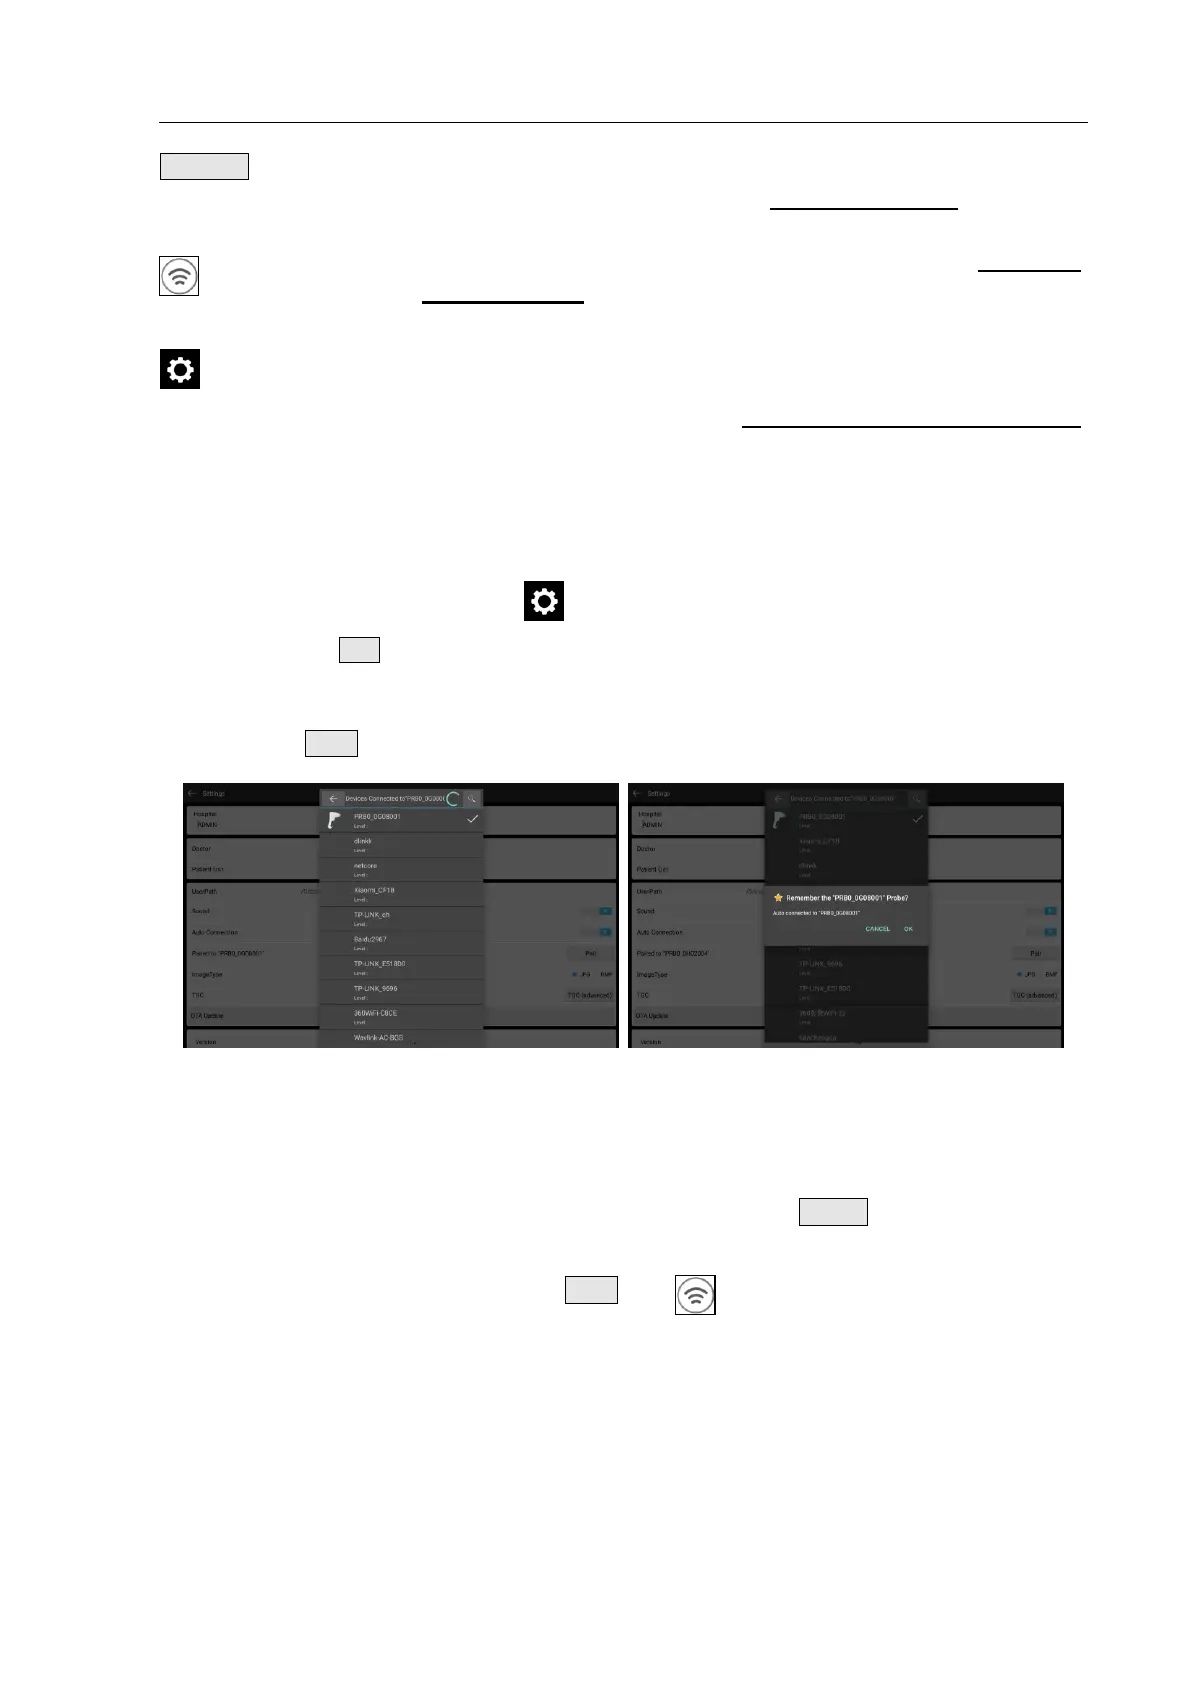
① Initial connection and pairing: the Tablet PC and the Main Unit should be paired when they are
connected for the first time. Click the key to enter the System Parameter Settings interface,
and then click the Pair key to pair them; select from the Main Unit list and click the Main Unit to be
paired, as shown in Fig. 4.22a, and then click ”OK”, they are successfully paired, as shown in Fig.
4.22b. Return to the Main Interface after pairing and there is a prompt of “Connected” on the Main
Interface. The Wi-Fi key turns green as shown in Fig. 4.24, and it is ready to scan.
(a) List of Main Unit (b) Remember the Main Unit
Fig. 4.22 Main Unit List
②
Replace the connected device: If it is already paired, click the UnPair key to reconnect, the
same as the initial connection method.
on the top right corner of the Tablet
③
Reconnection with one click: Click the Wi-Fi key
PC, the Tablet PC connects to the matching Main Unit automatically.
When the connection is successful, the Tablet PC prompts the user with the green icon, as shown
in Fig. 4.24, meanwhile, the Wi-Fi icon on the Main Unit shows the connection status as shown in
Fig. 4. 23; otherwise the icon on the Tablet PC flashes to indicate it is unconnected, meanwhile,
the Wi-Fi icon is not displayed, as shown in Fig. 4. 23b.