Chapter 4 Operation
- 30 -
Click the NEW key on the Tablet PC to create a new patient, and click the OK key will send
patient’s information to the Main Unit, at the same time the Main Unit switches to the <New> mode.
Then, start scanning and the result of scan will be displayed on the Tablet PC; click the SAVE key
to save it in the Tablet PC.
4.3.6 Pre-scan Positioning Mode
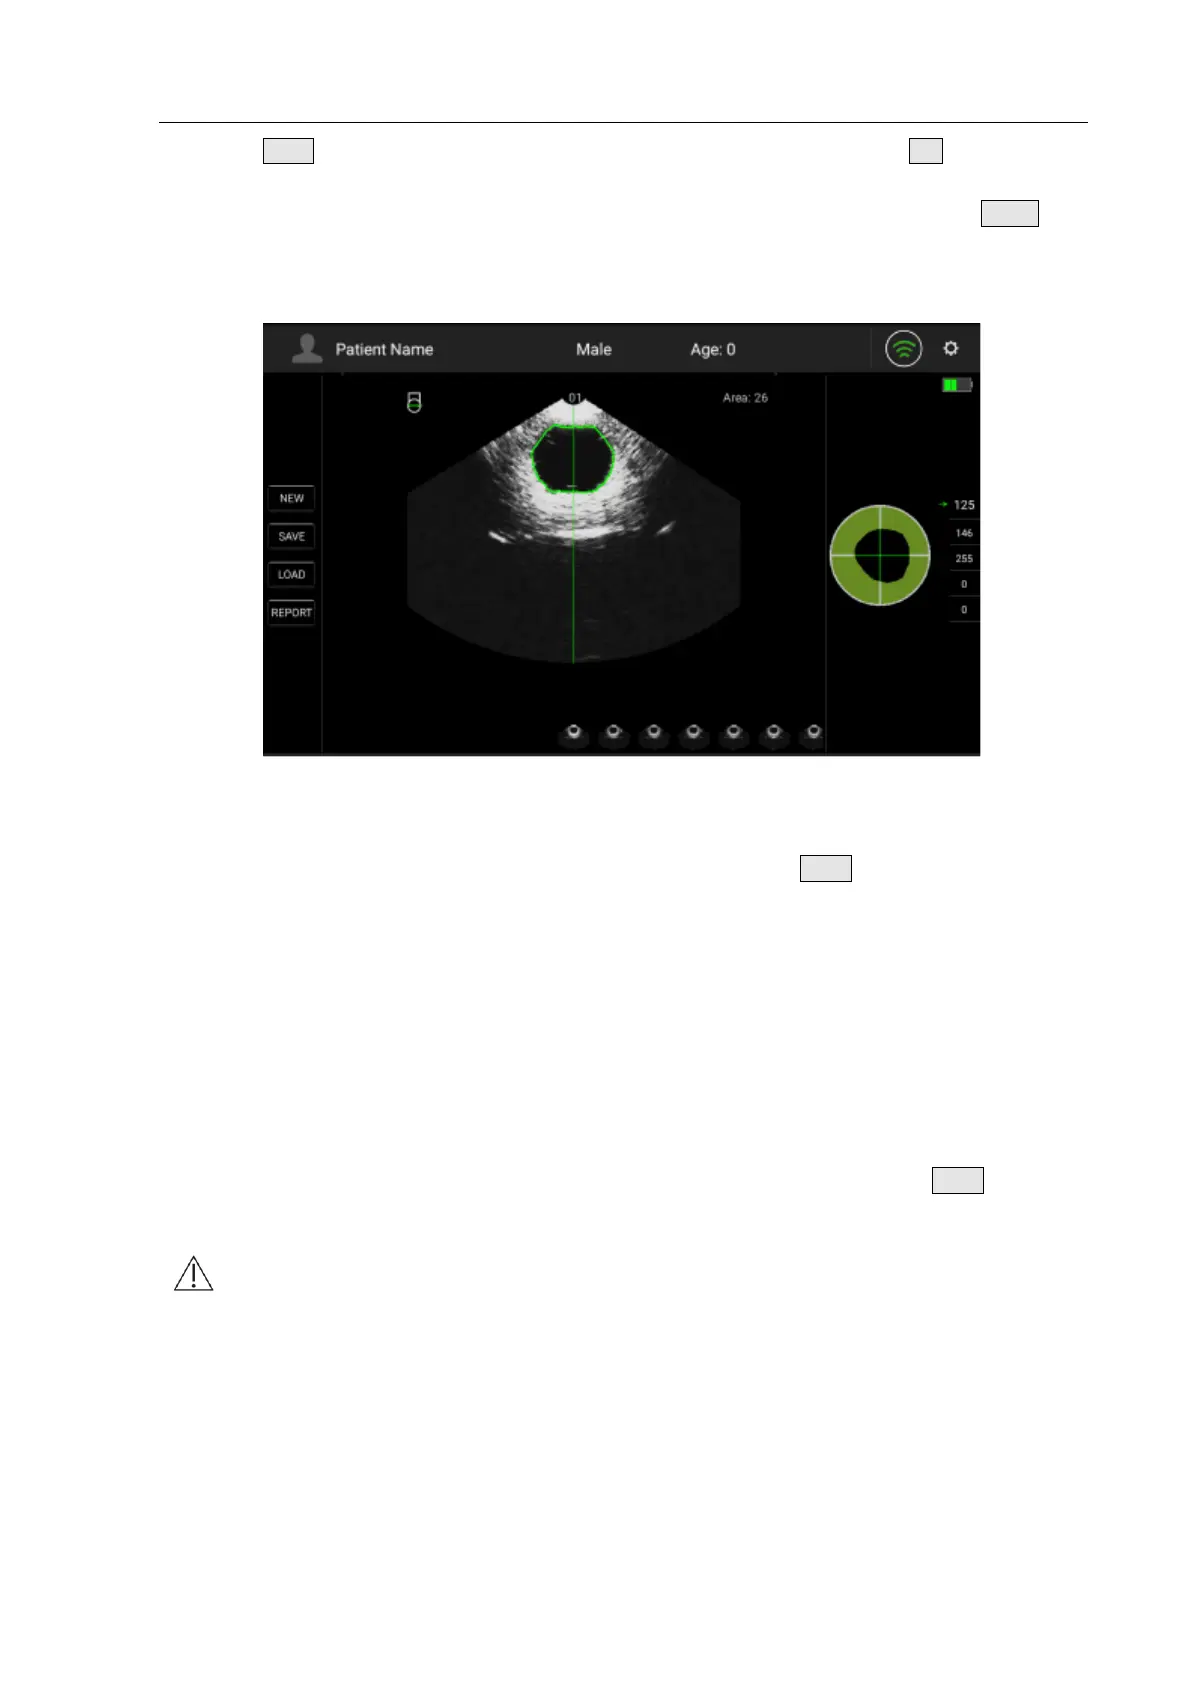
Fig. 4.27 Pre-scan Positioning Mode
The Pre-scan Positioning Mode can help the operator to better position the patient’s bladder for
more accurate calculation results, as shown in Fig. 4.27. Press the Scan button on the Main Unit
without releasing it to enter the Pre-scan Positioning Mode. The green line in the image area is the
center line. The closer the center of the bladder area to the center line and the larger the size of
the bladder area; the more accurate the measurement will be.
4.3.7 3D Scanning Mode
3D Scanning Mode refers to the process that the Main Unit makes a scan and obtains the
bladder’s cross-sectional areas, and then transforms the scanning planes automatically with an
interval of 15°, after continuous scanning on 12 reference planes, calculate the bladder volume
with the volume integral algorithm on the basis of the areas of the 12 reference planes, and then
exit the scanning mode automatically. Enter the 3D Scanning Mode by raising the Scan button on
the Main Unit.
Note: Under 3D Scanning Mode, please hold the Main Unit tightly and steadily till the
end of a scan. Otherwise it may result in inaccuracy of the measurement results.
4.3.8 Bladder Projection Image
To determine whether the measurement position is correct, after scanning, the bladder projection
image will be displayed on the right of the screen. If the projection is close to roundness, basically
located in the center of the scanning area, and does not exceed the scanning boundary, then the
position of the Main Unit is correct and the measured volume value is valid; otherwise, you should