3 0
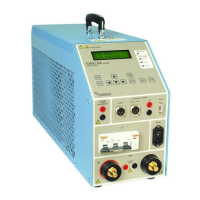
T O R K E L 8 2 0 / 8 4 0 / 8 6 0
P r o g r a m m a E l e c t r i c A B
Z P - B S 0 6 E R 1 0 1
Select “File” and click “Load Software key”. Put
the program diskette into the PC and instruct
TORKEL Win to open the file with extension .key
on the diskette.
Changing the language
used in TORKEL
You can replace one of the languages in TORKEL with
the contents in the language file.
Proceed as set forth in the section
headed“Setting up communication”
Select “TORKEL Commands,” and click “Download
Language”. Insert the Torkel Win CD into your
CD drive and instruct TORKEL Win to open the
desired language file.
2]
1]
2]
Testing with
TORKEL Win
Proceed as set forth in the section headed “Set-
ting up communication”.
Proceed as set forth in the sections headed
”Preparations” and “Setting the current” in
the chapter headed “Conducting a test”. Note,
however, that F1 must be switched on before you
start conducting test with TORKEL Win.
Select test method. Select current or power or
resistance as desired. Set the desired warning
limits and start the test with TORKEL Win.
Proceed as set forth in the section headed “Set-
ting up communication”.
Proceed as set forth in the sections headed
”Preparations” and “Setting the current” in
the chapter headed “Conducting a test”. Note,
however, that F1 must be switched on before you
start conducting test with TORKEL Win.
Select test method. Select current or power or
resistance as desired. Set the desired warning
limits and start the test with TORKEL Win.
Viewing the results
Select the ”RESULT” submenu via which you can
read the values that were valid at the end of the
last test. Voltage and discharged capacity are
displayed in the first line.
Press the vertical up arrow key (
) key to view
current and time. You can scroll up and down
among the displayed items with the vertical ar-
row keys (
or
).
Press <ENTER> to leave the sub-menu.
1]
2]
3]
4]
5]
6]
1]
2]
3]


 To Next Page