40
MELBOURNE INSTRUMENTS – NINA V 1.3.0
41
MELBOURNE INSTRUMENTS – NINA V 1.3.0
Sequencer
Nina has a 16 step sequencer. The sequencer notes
and settings are stored with each Preset. Each step is
polyphonic, so can record chords or single notes.
The sequencer settings are accessed by pressing
the SEQ Key. The REC Key is used to record a new
sequence and the RUN Key to run it. The Sequencer
is triggered by playing a note, and the sequence is
transposed to start playing from the note you play. The
sequencer can free-run (when the Hold setting is On)
or run only when you hold down a note (when the Hold
setting is O).
The sequencer is a step sequencer so it records the
notes but not the velocity, duration, or control changes.
Recording a Sequence
To record a new sequence, press the REC Key. Play one
or more notes at the same time. When you release all
notes, this will record one step and move to the next.
Keys 1-16 LED will show the current step, stepping
forward as you play. Notes can also be played using the
internal KBD function.
To nish the sequence, press REC again.
To insert a rest (silence for 1 step), press the currently
illuminated Key from 1-16. For example, when you press
REC, Key 1 will illuminate to show that is the current step,
if you press 1, then a rest will be placed at step one, and
it will move to step 2.
To insert a tie (hold a note for a number of steps), press
the step one or more ahead of the currently illuminated
step. For example, when you press REC, Key 1 will illuminate,
if you press 2, then Keys 1 and 2 will illuminate, and the next
note you play will play at step 1 and tie for step 2.
Playing a Sequence
Press the RUN Key to run the sequencer. If the Hold
setting is ON, it will free-run. If it is OFF then it will play
once if you press a key, or continue to cycle through the
sequence when you hold down a note. The sequence will
be transposed to play from the note you play, at any step
in the sequence.
KBD
The KBD key activates the internal keyboard. This makes
the 1-16 Keys into a simple 16 note keyboard. The keys
are in semitone steps, and the sharps and ats are shown
where the LEDs are ON.
When KBD is pressed and the keyboard is turned on, the
KEYBOARD menu is shown. This has 2 options. The First
Note option, sets the bottom note of the 16 keys. The
default is middle C, which is note number 60 or C4 in
MIDI note numbers.
The KBD MIDI Channel option sets the MIDI operation.
The internal keyboard works by sending notes to a MIDI
channel internally in the synthesizer. Which sounds are
played by these notes depends on the multi-timbral MIDI
setup as dened in the LAYER menu (see page 32).
All Notes O
In the situation where a hung note persists or another
anomoly or external device causes unwanted audio
output, the KBD switch will turn all notes o when held
down for more than two seconds.
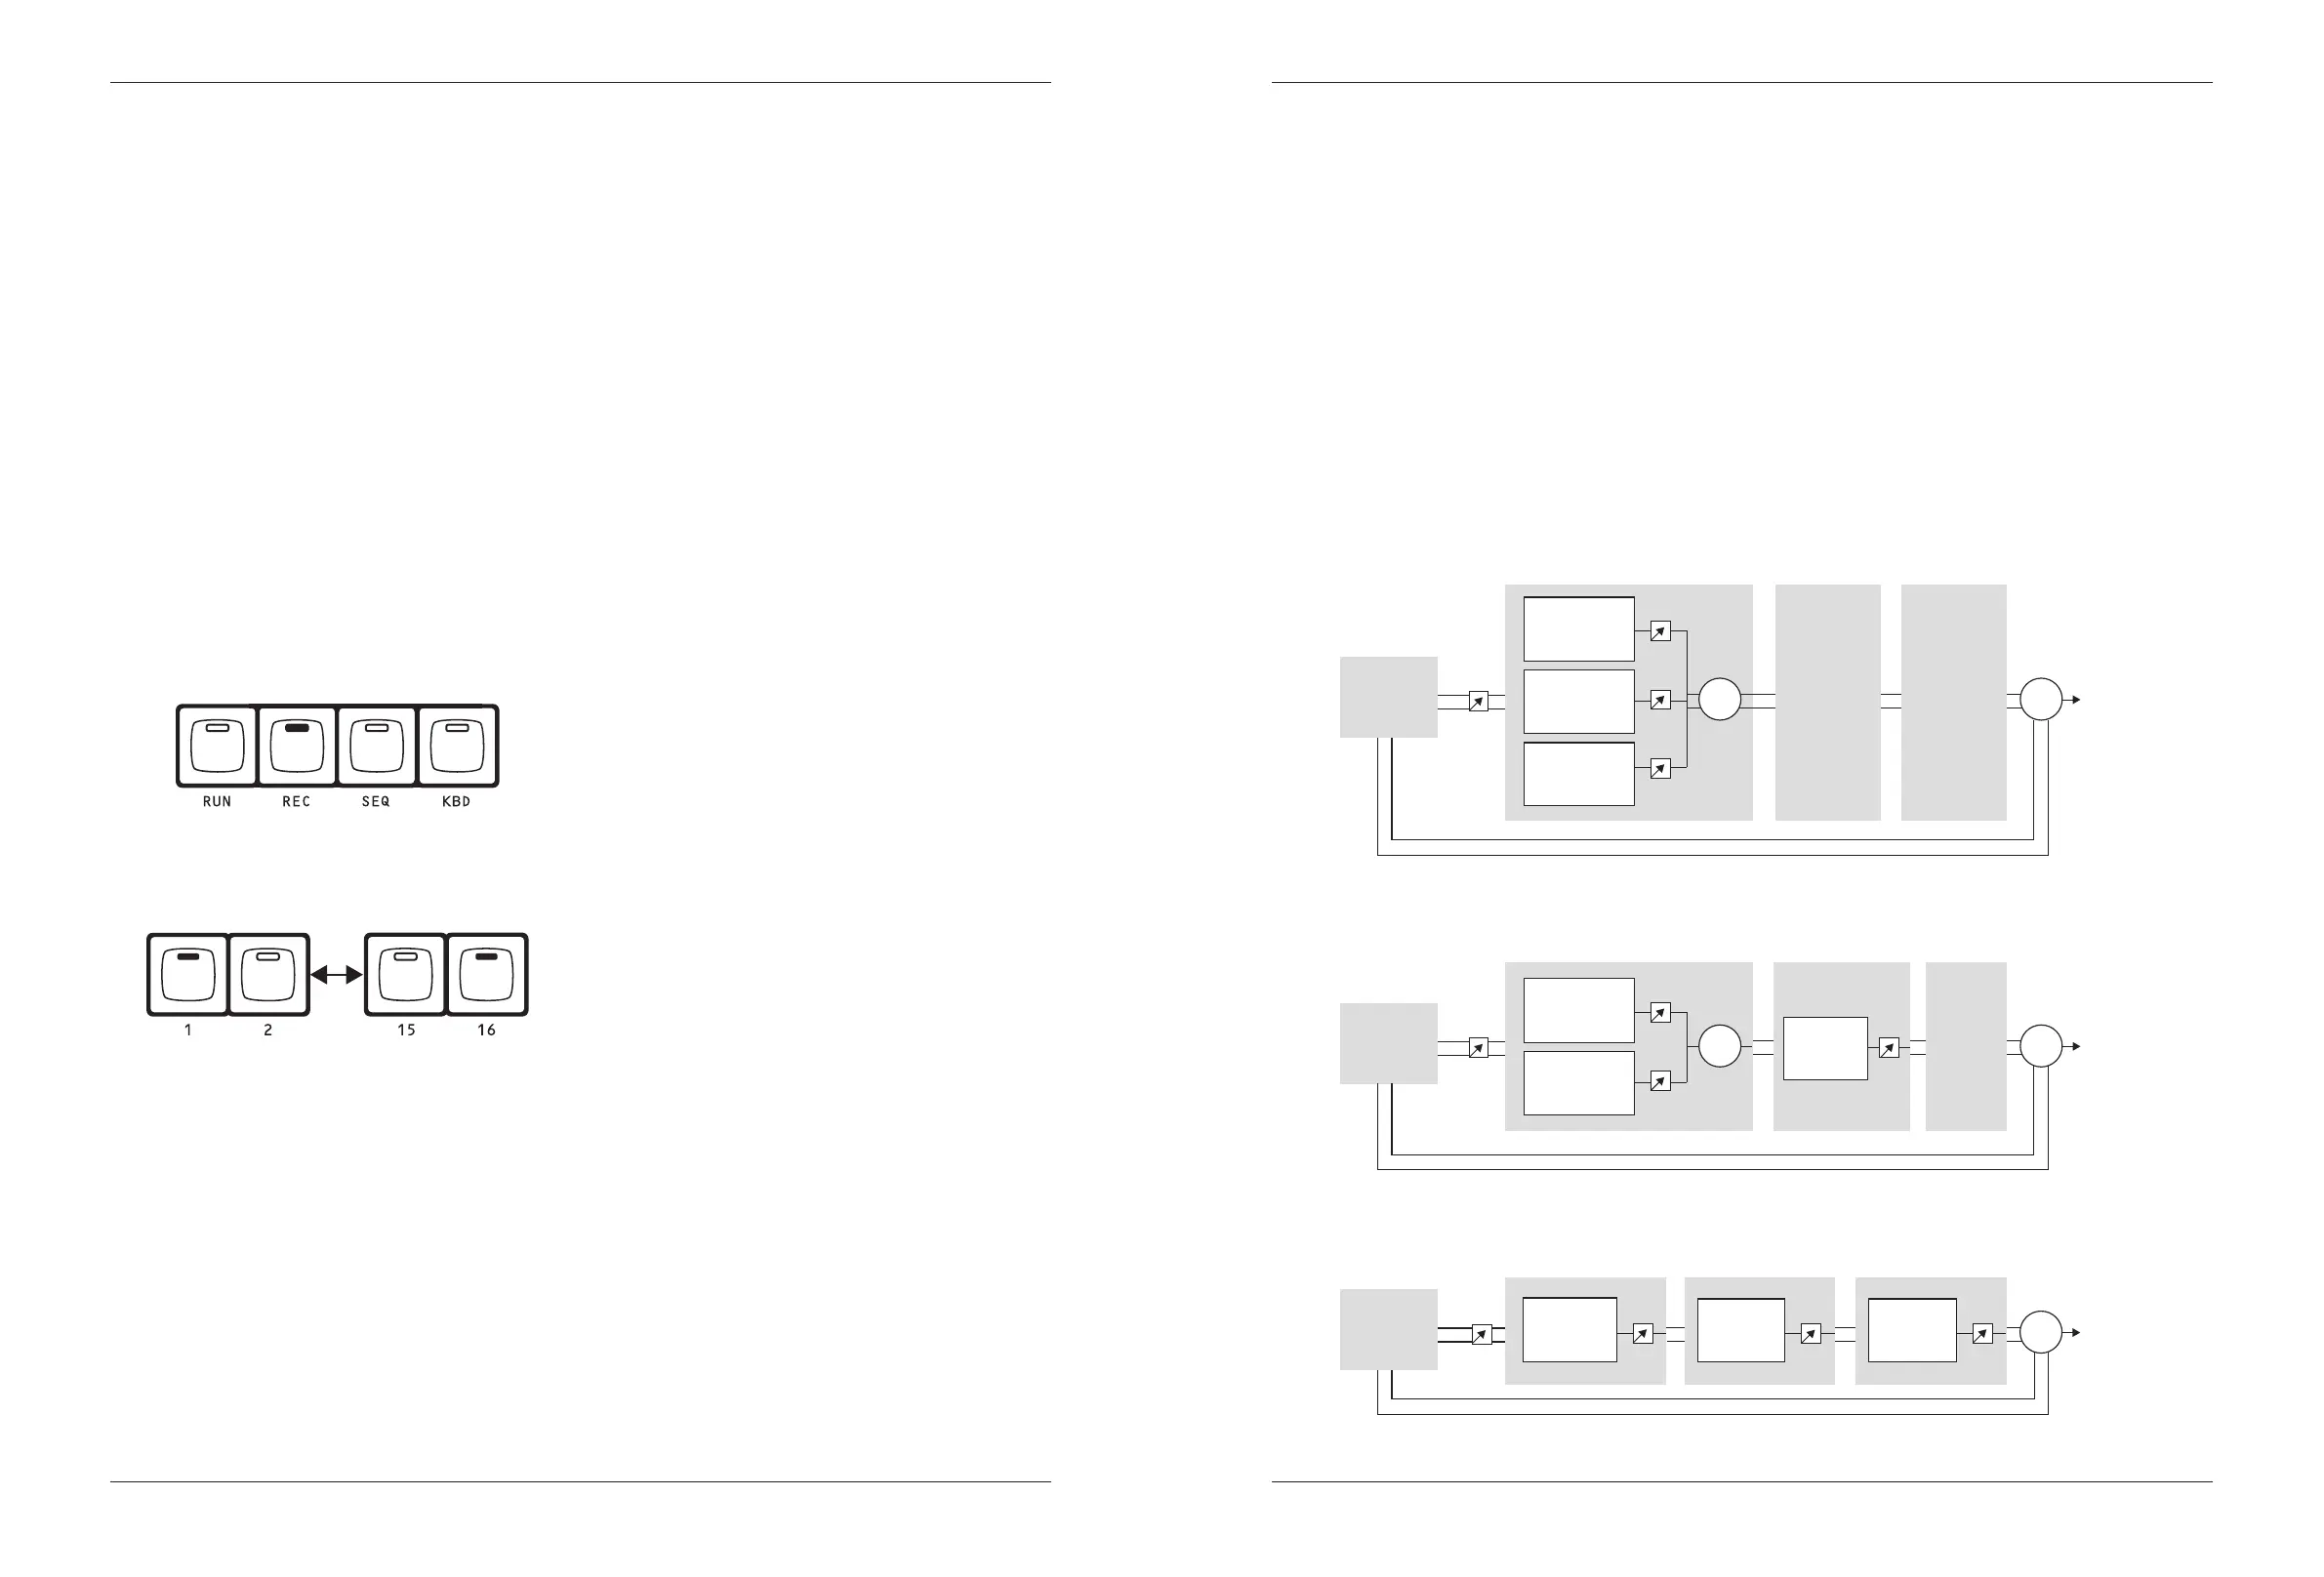
Eects
Nina has three digital eects processors. The three eects
can be placed in any order and each eect has its own
wet/dry mix level. The main channel 1 and 2 mix is sampled
with a 96kHz, 24 bit ADC, processed in stereo by the
eects and then added back to the outputs The Eects
menu is displayed when the EFFECT Knob is used (unless
LOAD, SAVE, LAYER or MOD is already active).
There are 3 ‘slots’ which are used to set the order of
eects processing. The main left and right sound output is
feed into slot 1 then slot 2 and nally slot 3. Eects placed
in the same slot are processed in parallel and then mixed
together. This is shown in the diagram below:
In the g. 1, the analog sound is fed into chorus, delay and
reverb all in slot 1,
The eects conguration is saved in the Presets, not in
the Layers. In Multi-Timbral Layer the eects are dened
by the Preset in Layer 1.
If you switch to layers 2, 3 or 4, you will always be using
the eects settings on Layer 1. If you want to save the
eects conguration, you will need to save the Preset on
Layer 1.
Level
Level
Slot 1
Output
Slot 2
Slot 3
+ +
Analog
Synth
Output
L
R
Level
Level Level
Slot 1
Output
Slot 2
Slot 3
+ +
Analog
Synth
Output
L
R
Level
Slot 1
Fig. 3
Fig. 2
Fig. 1
Output
Slot 2
Slot 3
+
Analog
Synth
Output
L
R
Level
LevelLevel
 Loading...