Care and maintenance
53
GB
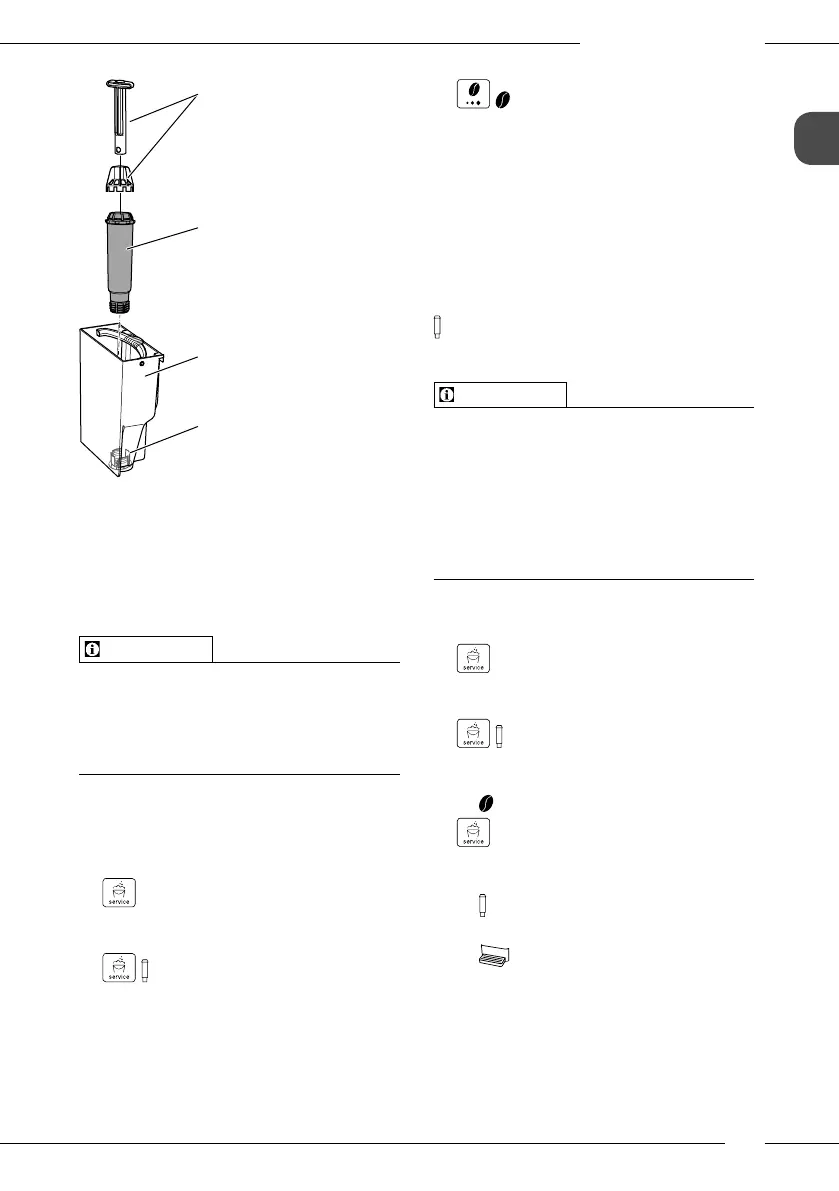
1
32
33
34
Fig. 19: Screwing/Unscrewing the water
lter
The water lter(33) is screwed in and
unscrewed from the thread (32) on the
base of the water tank(1) using the screw-
ing aid(32).
Information
The water lter should not be left standing
dry for a long period of time. When it is
not used for a long time, we recommend
storing the water lter in a vessel lled
with tap water in the refrigerator.
Inserting the water lter
Requirement: The appliance is ready for
operation.
1. Press the "Service" button for
more than 2seconds to call up Service
mode1.
2. Press the "Service" button
repeatedly unit the display for the lter
programme appears.
3. Press the "Coee strength"
button until one bean lights up.
4. Follow the instructions from step 3 in
section Changing the water lter.
Changing the water lter
In order to maintain a constant eect of
the water lter, we recommend changing
the water lter every 2months – or when
the device requests you to do so.
The Filter display light requests you to
change the water lter.
Information
The water hardness cannot be set if you
use a water lter. The water hardness is
automatically set to soft (see sec-
tion6.3 Setting the water hardness on
page45).
Place the water lter into a vessel lled
with fresh tap water for a few minutes
before inserting it.
Requirement: The appliance is ready for
operation.
1. Press the "Service" button for
more than 2seconds to call up Service
mode1.
2. Press the "Service" button
repeatedly unit the display for the lter
programme appears.
» One bean lights up.
3. Press the "Service" button for
more than 2seconds to start the lter
programme.
» The Filter display ashes until the
lter programme is nished.
» The Drip tray display lights
up and requests you to empty the
drip tray and the coee grounds
container.
4. Empty the drip tray and the coee
grounds container.
 Loading...