Care and maintenance
60
ENGLISH
ATTENTION
A water lter may be damaged if it is
screwed in during the descaling pro-
gramme.
Remove the water lter when the appli-
ance requests you to do so (see
Fig. 25,
page60).
Place the water lter into a vessel lled
with tap water during the descaling
programme.
The water lter can be reinserted and
reused when the descaling programme
is complete.
Requirement: The ready symbol appears
on the display.
1. Press the "menu/ok" button for 2sec-
onds.
» The menu appears on the display.
2. Navigate to the Care > Descaling menu.
3. Use the arrow buttons to select Start
and conrm with "menu/ok".
4. Follow the further instructions on the
display up to the end of the descaling
programme.
» The ready symbol appears on the
display.
9.8 Setting the water hardness
The set water hardness inuences the fre-
quency of descaling. The harder the water,
the more frequently the appliance has to
be descaled.
Information
The water hardness cannot be set if
you use a water lter (see section9.9,
page60).
Determine the water hardness with the
enclosed test strip. Observe the instruc-
tions on the test strip packaging and in the
table Water hardness range, page62.
Requirement: The ready symbol appears
on the display.
1. Press the "menu/ok" button for 2sec-
onds.
» The menu appears on the display.
2. Navigate to the Settings > Water hard-
ness menu.
3. Use the arrow buttons to select the
water hardness range and conrm with
"menu/ok".
4. Exit the menu with the Exit command.
» The ready symbol appears on the
display.
9.9 Using a water lter
The use of a water lter extends the ser-
vice life of the appliance and the appliance
has to be descaled less frequently. The
water lter contained in the scope of deliv-
ery lters calcium and other pollutants out
of the water.
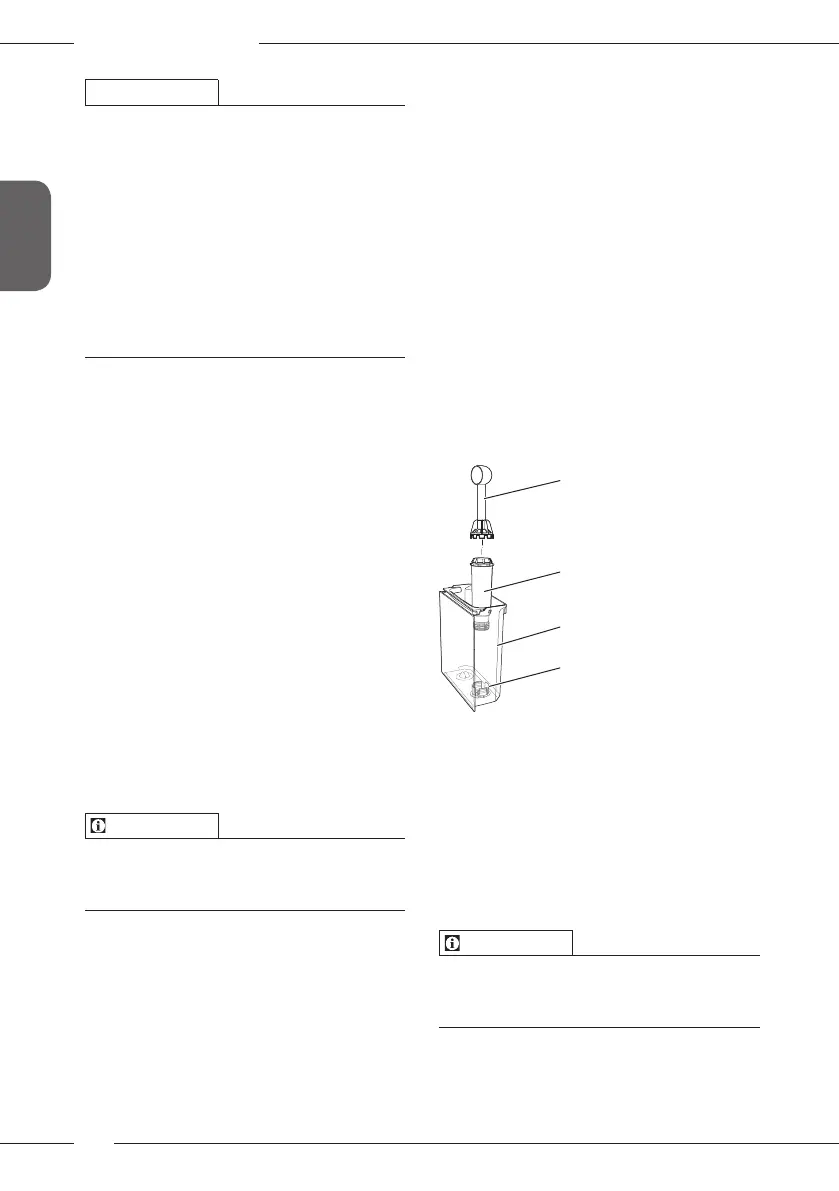
1
46
47
48
Fig. 25: Screwing/unscrewing the water
lter
The water lter(47) is screwed into and
unscrewed from the thread(46) on the
base of the water tank(48) using the
screwing aid at the end of the enclosed
coee spoon(1).
Inserting the water lter
Information
Place the water lter into a vessel lled
with fresh tap water for a few minutes
before inserting it.
Requirement: The ready symbol appears
on the display.
 Loading...