85-03-01120 M27 Page 54
WARNING: It is of the utmost importance that the correct burner orifices be installed for both the rear
and front burners.
1. Turn off gas supply at the appliance service
valve if gas line has been connected to this
appliance.
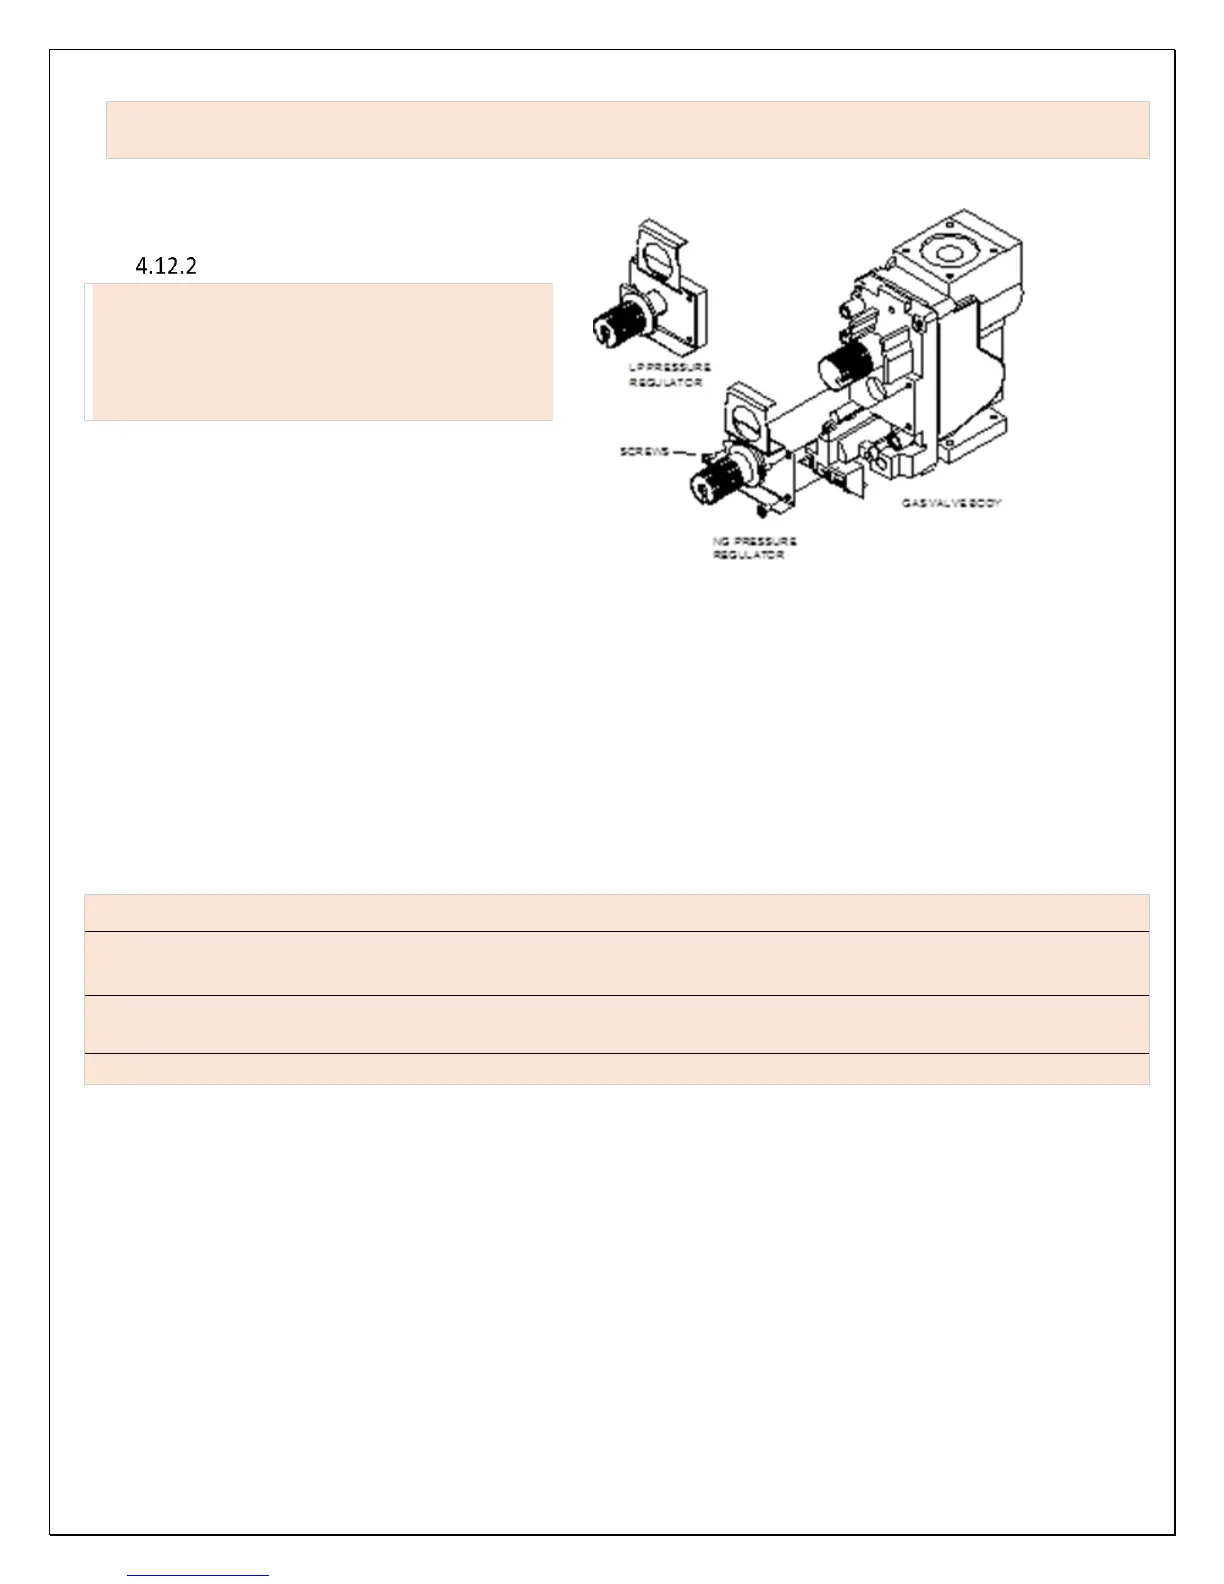
Pressure Regulator Conversion
WARNING: Failure to position the parts in
accordance with these diagrams or failure to
use only parts specifically approved with this
appliance may result in property damage or
personal injury.
2. Using a ¼” flat blade screwdriver, remove 3
screws that secure the NG Pressure Regulator
to the gas valve body and remove NG Pressure
Regulator. Identify the pressure regulator
spring that is located in the center of the black
rubber gasket. Discard both the black rubber
gasket and spring.
3. Install the new LP Pressure Regular onto the
gas valve body in the same position and
orientation as the NG Pressure Regulator you
removed in Step 2, above. The LP Pressure
Regulator can only be mounted in one
position. Secure the LP Pressure Regulator in
place using the 3 screws you removed in Step
2. Tighten down using a ¼” flat blade
screwdriver.
4. Install the enclosed identification label (G) to
the valve body where is can be easily seen.
Warning: Installation should be carried out in a clean environment.
Warning: This modulating conversion kit must only be applied as part of a conversion kit supplied by the
fireplace manufacturer for specific fireplace and type of gas being converted.
Warning: Correct operation of the system cannot be guaranteed if the conversion kit or value have been
dropped or sustained strong impact
Warning: A leak test must be conducted as the final step after conversion to burn LPG.
 Loading...