POWERHEAD
Page 4A-54 90-883728 JULY 2001
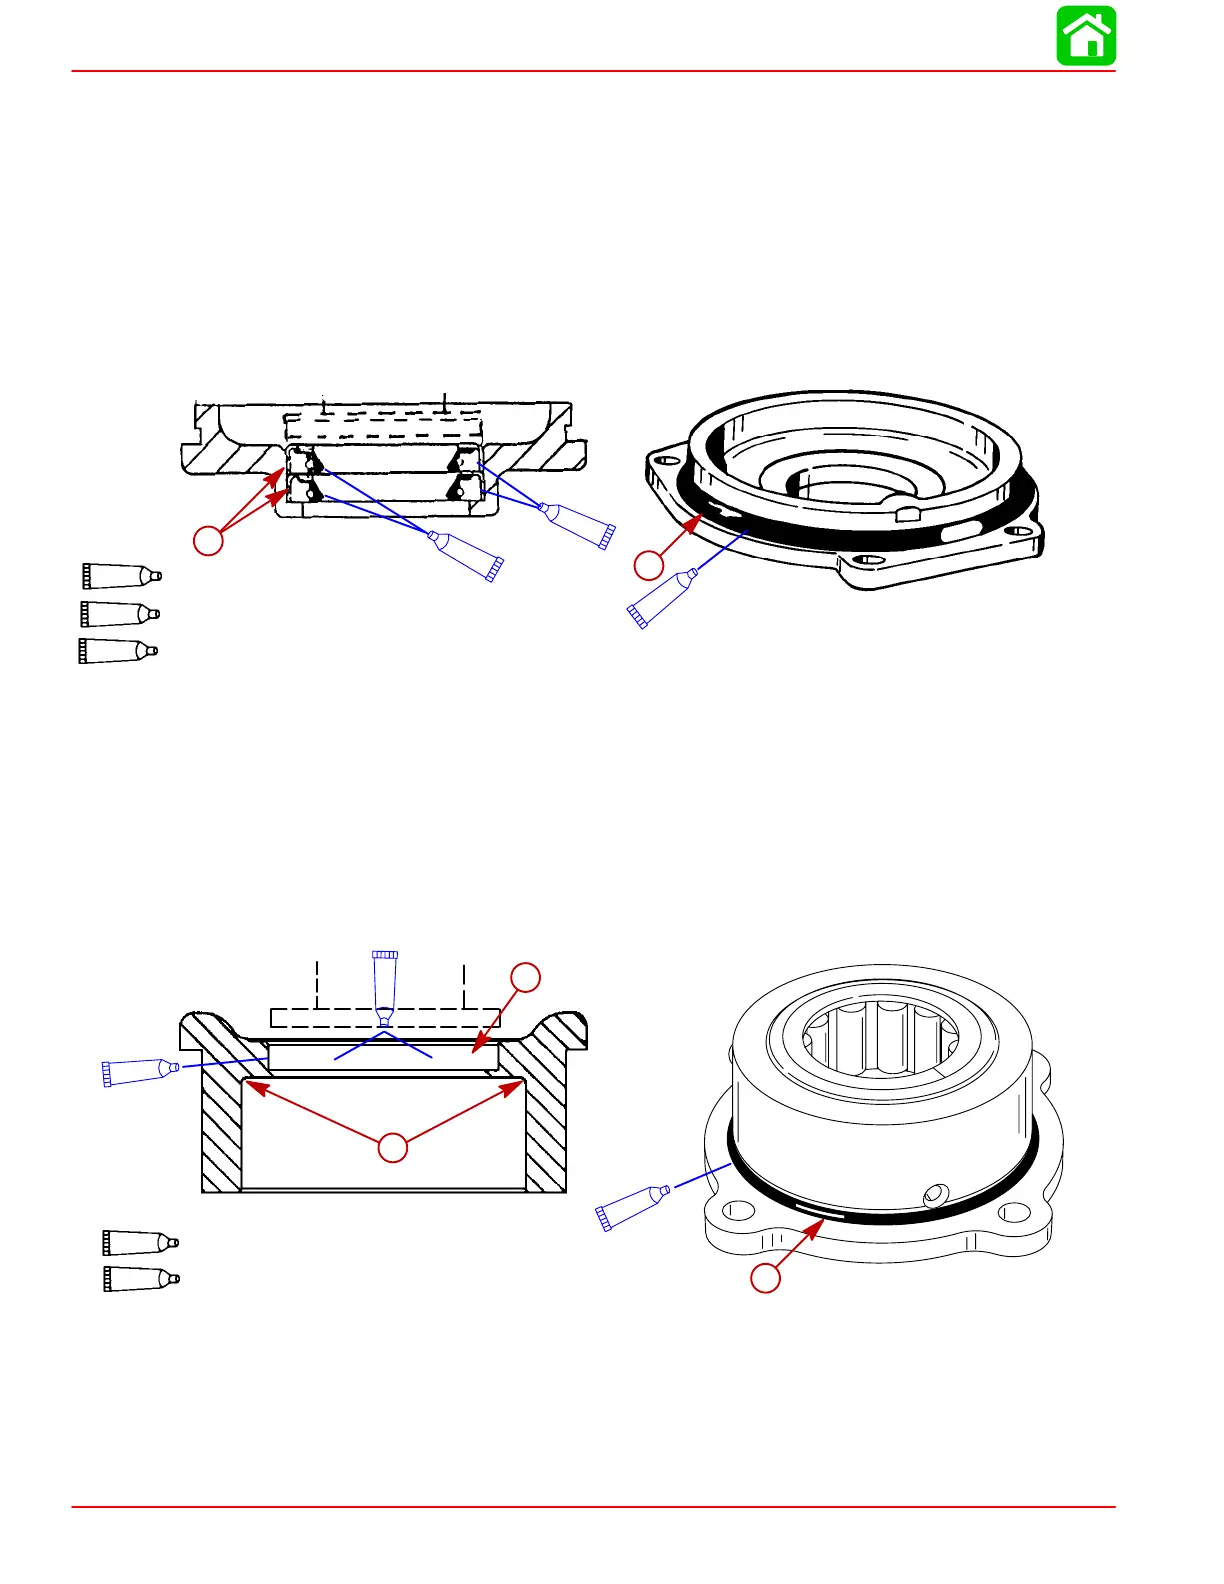
9. Install oil seals into lower end cap as follows:
a. Apply a thin bead of Loctite 271 to outer diameter on 2 lower end cap oil seals (a).
b. Using driver head (91-55919) press one oil seal (lip facing down) into lower end cap
until firmly seated. Remove any excess Loctite.
c. Press second oil seal (lip facing down) until firmly seated on first oil seal. Remove
any excess Loctite.
d. Lubricate oil seal lips with Quicksilver 2-4-C with Teflon.
e. Lubricate O-ring seal surface on end cap with 2 cycle oil. Install o-ring over lower end
cap.
a
51849
b
a
a
7
Loctite 271
7
14
2 Cycle Outboard Oil
14
95
2-4-C With Teflon
95
a-Oil Seal b-O-ring
10. Install oil seal into upper end cap as follows:
a. Apply a thin bead of Loctite 271 to outer diameter of upper end cap oil seal.
b. Use a suitable mandrel, press oil seal into upper end cap (lip facing down) until bot-
tomed out on lip of end cap. Remove any excess Loctite.
c. Lubricate oil seal lip with Quicksilver 2-4-C with Teflon.
d. Lubricate O-ring seal surface on end cap with Quicksilver 2-4-C with Teflon. Install
O-ring on end cap.
b
7
Loctite 271
95
2-4-C With Teflon
95
95
7
58324
c
a
a-Oil Seal
b-Lip of End Cap
c-O-Ring
 Loading...