IGNITION SYSTEM
90-857138R1 MAY 2000 Page 2A-17
Capacitor Charging Coil
REMOVAL
1. Remove flywheel. Refer to “Flywheel” - “Removal” preceding.
2. Remove screw and clamp.
3. Disconnect BLACK/RED and WHITE coil leads from CDI unit leads.
4. Remove screws securing capacitor charging coil, then remove coil.
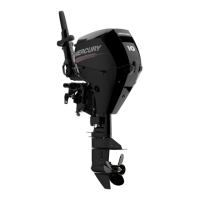
a
b
c
d
56284
a-Screw
b-Clamp
c-Screws (2)
d-Capacitor Charging Coil
INSTALLATION
1. Route capacitor charging coil leads, as shown and place coil over mounting bosses of
crankcase cover.
2. Secure coil with 2 screws. Torque screws to 14 lb-in. (1.6 Nm).
3. Secure coil leads/sleeve, using wire clamp and screw. Tighten screw securely.
4. Connect BLACK/RED and WHITE capacitor charging coil leads to CDI unit leads.
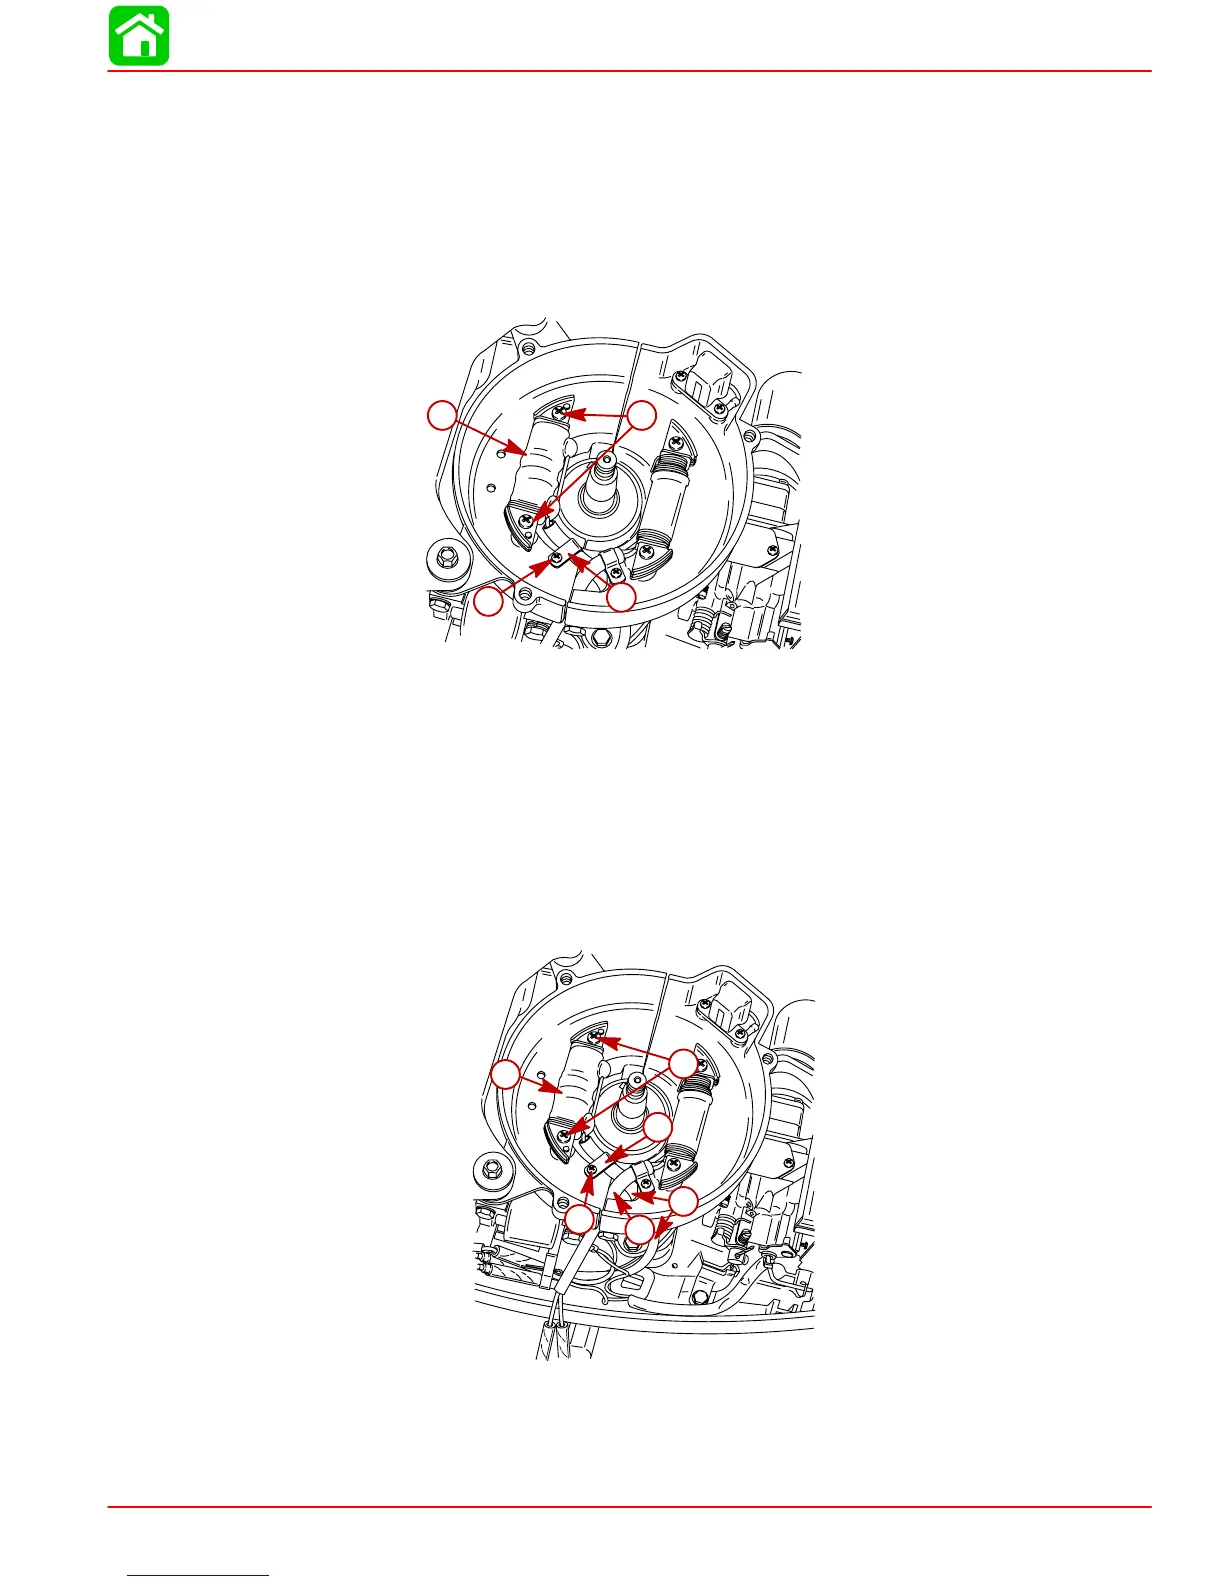
a
b
c
b
d
e
56285
a-Coil Leads
b-Coil
c-Screws (2)
d-Wire Clamp
e-Screw
5. Reinstall flywheel, as outlined in “Flywheel” - “Installation,” preceding.
 Loading...