IMPORTANT: Do not fill up the new filter before fitting it to the mounting bracket; this could cause harmful impurities to
enter the injection system.
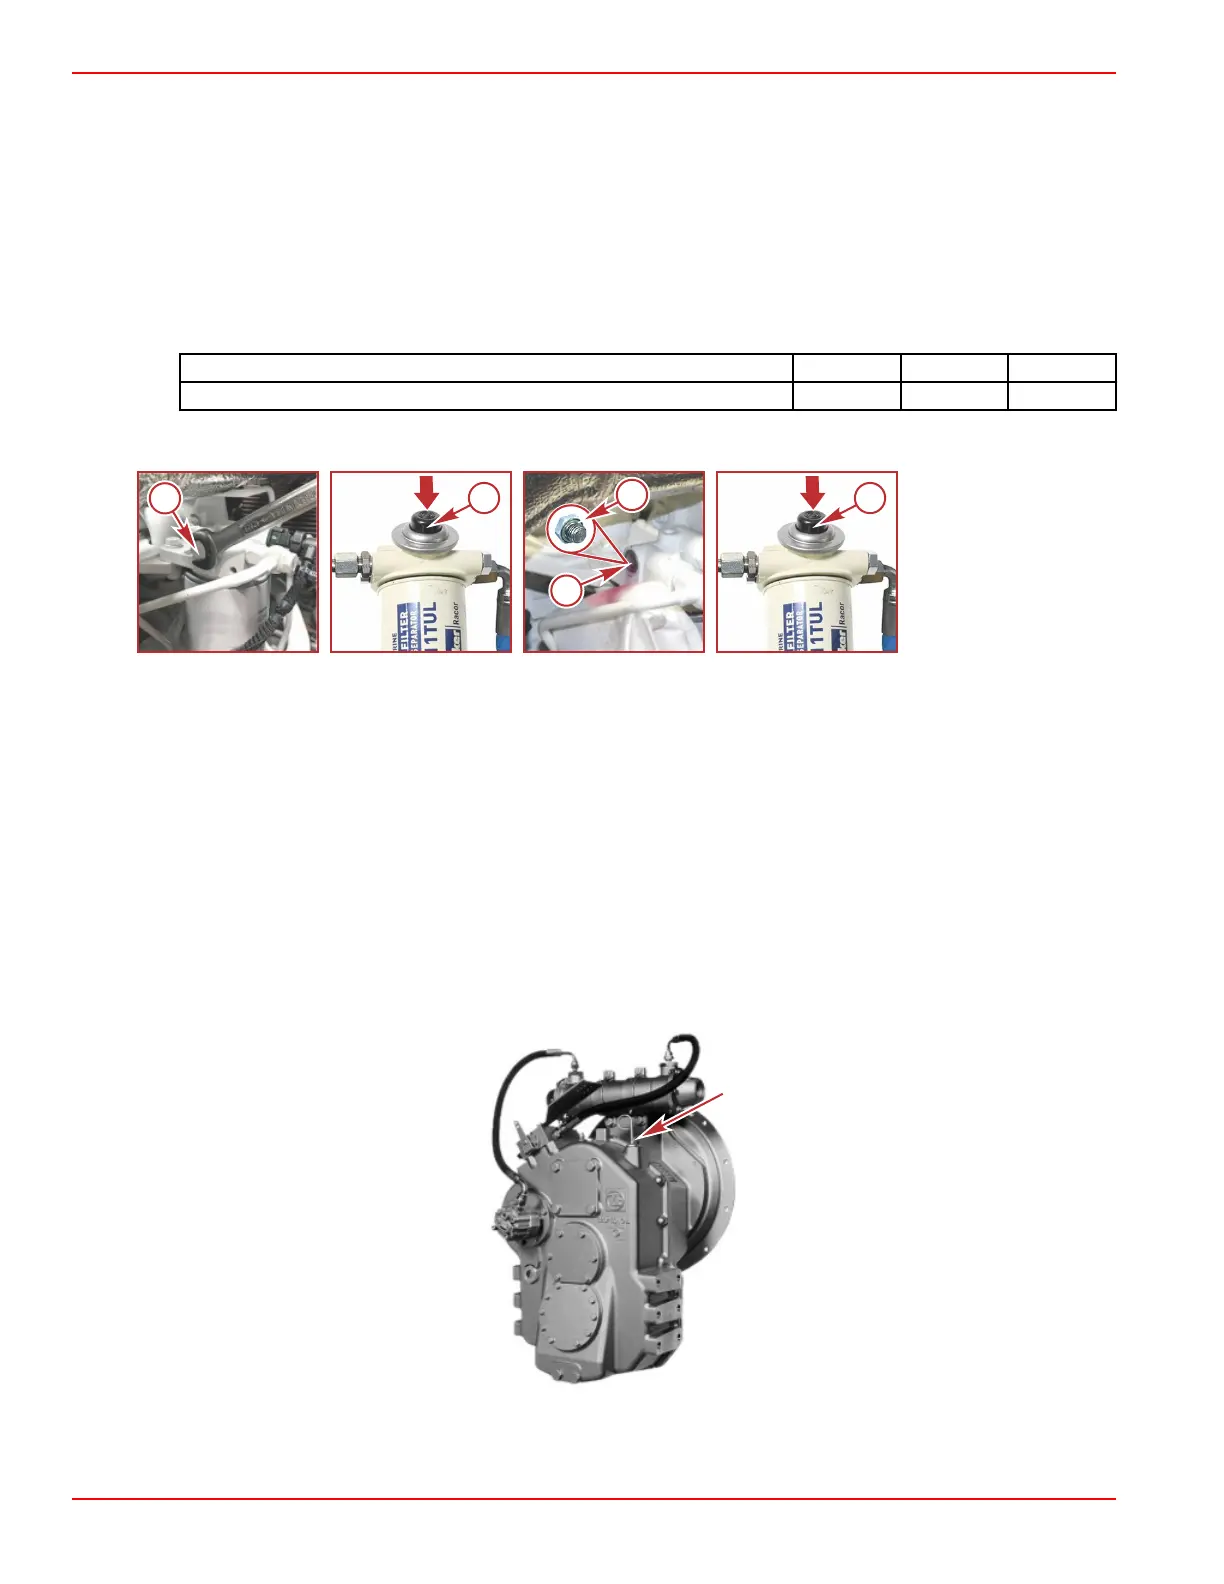
7. Prime the fuel filter as follows:
a. Use a 17 mm wrench to remove the vent plug from the fuel filter mounting head.
b. Prime the filter by pressing the button on the hand primer pump, located on the remote‑mounted prefilter, until an
air‑free stream of fuel flows from the vent port.
c. Use a rag to clean any fuel from the exterior of the parts and bilge. Dispose of the rag in accordance with local,
federal, and international regulations.
d. Ensure the vent plug and O‑ring are intact and the vent port is free of debris. Install the vent plug into the port and
tighten to the specified torque.
Description Nm lb‑in. lb‑ft
Vent plug 24 – 17.7
e. Once the plug is installed, press the button on the hand primer pump a few more times, until it is hard to pump. This
will ensure air is purged from the system.
a - Vent plug
b - Hand primer pump button—located on remote mounted fuel filter
c - Vent plug O‑ring
d - Vent port
8. Connect the battery cables.
9. Start and operate the engine. Check the filter connection for fuel leaks. If leaks exist, check the filter installation. If leaks
continue, stop the engine immediately and contact your Mercury Diesel authorized repair facility.
Transmission Maintenance
Checking the Fluid Level Before Operation
IMPORTANT: Always check the fluid level before starting and operating.
1. Remove the dipstick and wipe it with a clean towel.
ZF 280 IV shown, others similar
2. Insert the dipstick without turning it in.
Section 5 - Maintenance
Page 60 90-8M0117076 eng FEBRUARY 2018
 Loading...