13
INSTALLATION
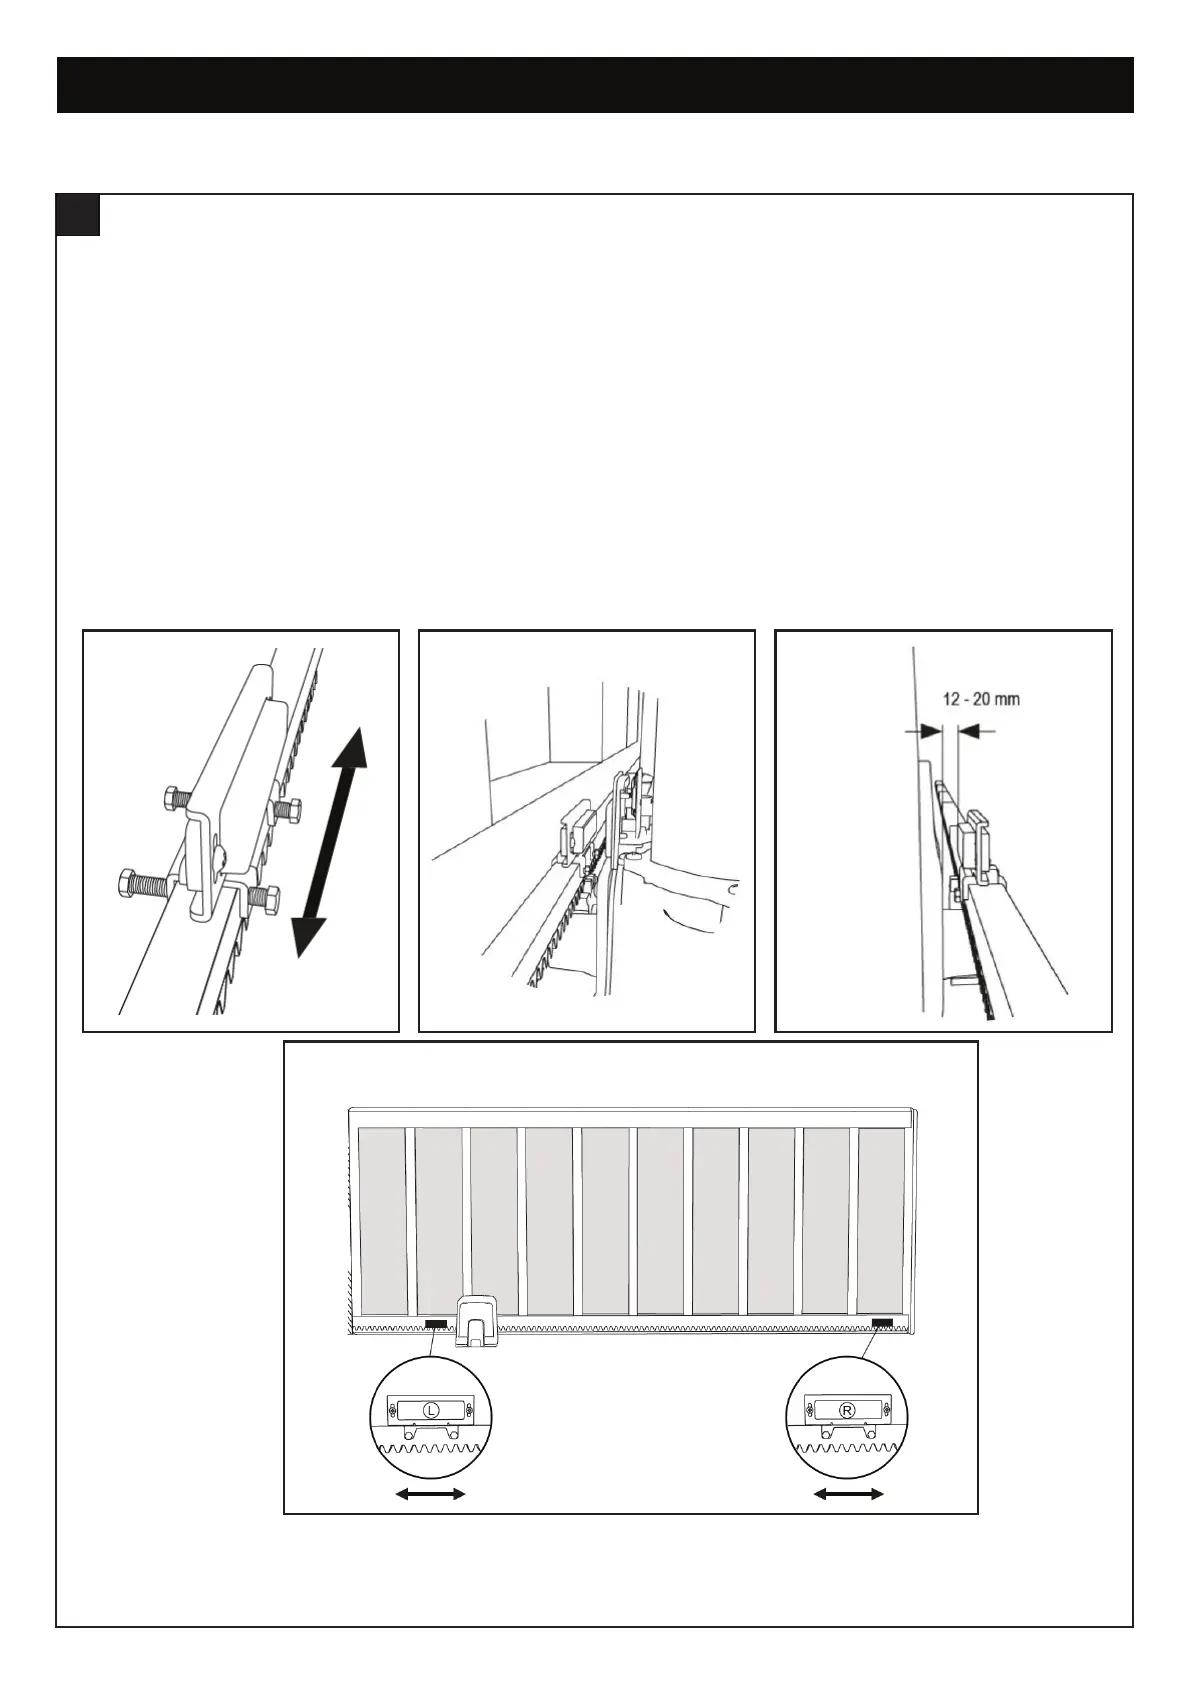
1. Position the limit switch brackets in the approximate open and close positions on the rack. Loosely attach the brackets to the rack.
The magnets are marked "L" and "R". L positioned on the left of the rack, while R is positioned on the right of the rack when
looking from inside the property. When attaching the brackets, ensure that the magnets are 12mm to 20mm from the limit switch
sensor on the opener.
2. Place the housing cover over the opener and move the gate manually to the open and close positions to ensure that the limit
switch brackets do not come into contact with the gate structures or the gate opener. Position the magnets so that they will align
with the sensor mounted on the opener when the gate is approximately 10mm from the OPEN or CLOSED position. This will allow
for the Basic Setup to be completed without the gate hitting the stops too hard.
NOTE: After Basic Setup, fine tuning of the Limit Switch Mounting Brackets to allow the gate to open and close fully.
INSTALLING THE LIMIT SWITCH BRACKETS
11
figure 2
figure 1
figure 3
figure 4
 Loading...