MI 2087 AL2 EasiTEST Measurement instructions
19
Step 4
Select type of involved RCD as follows:
q Press the SELECT key after setting nominal differential current, last set type
starts to blink.
q Select appropriate type using the ▲ and ▼ keys. Standard (General) type (G is
displayed) or selective type (S is displayed) can be selected.
Step 5
Select limit contact voltage value Ulim as follows:
q Press the SELECT key after setting RCD type, last set limit contact voltage
starts to blink.
q Select appropriate value using the ▲ and ▼ keys. 50 V or 25 V can be
selected.
q Press the SELECT key again after selecting the limit contact voltage, to return
to Contact voltage or Fault loop resistance initial menu.
Step 6
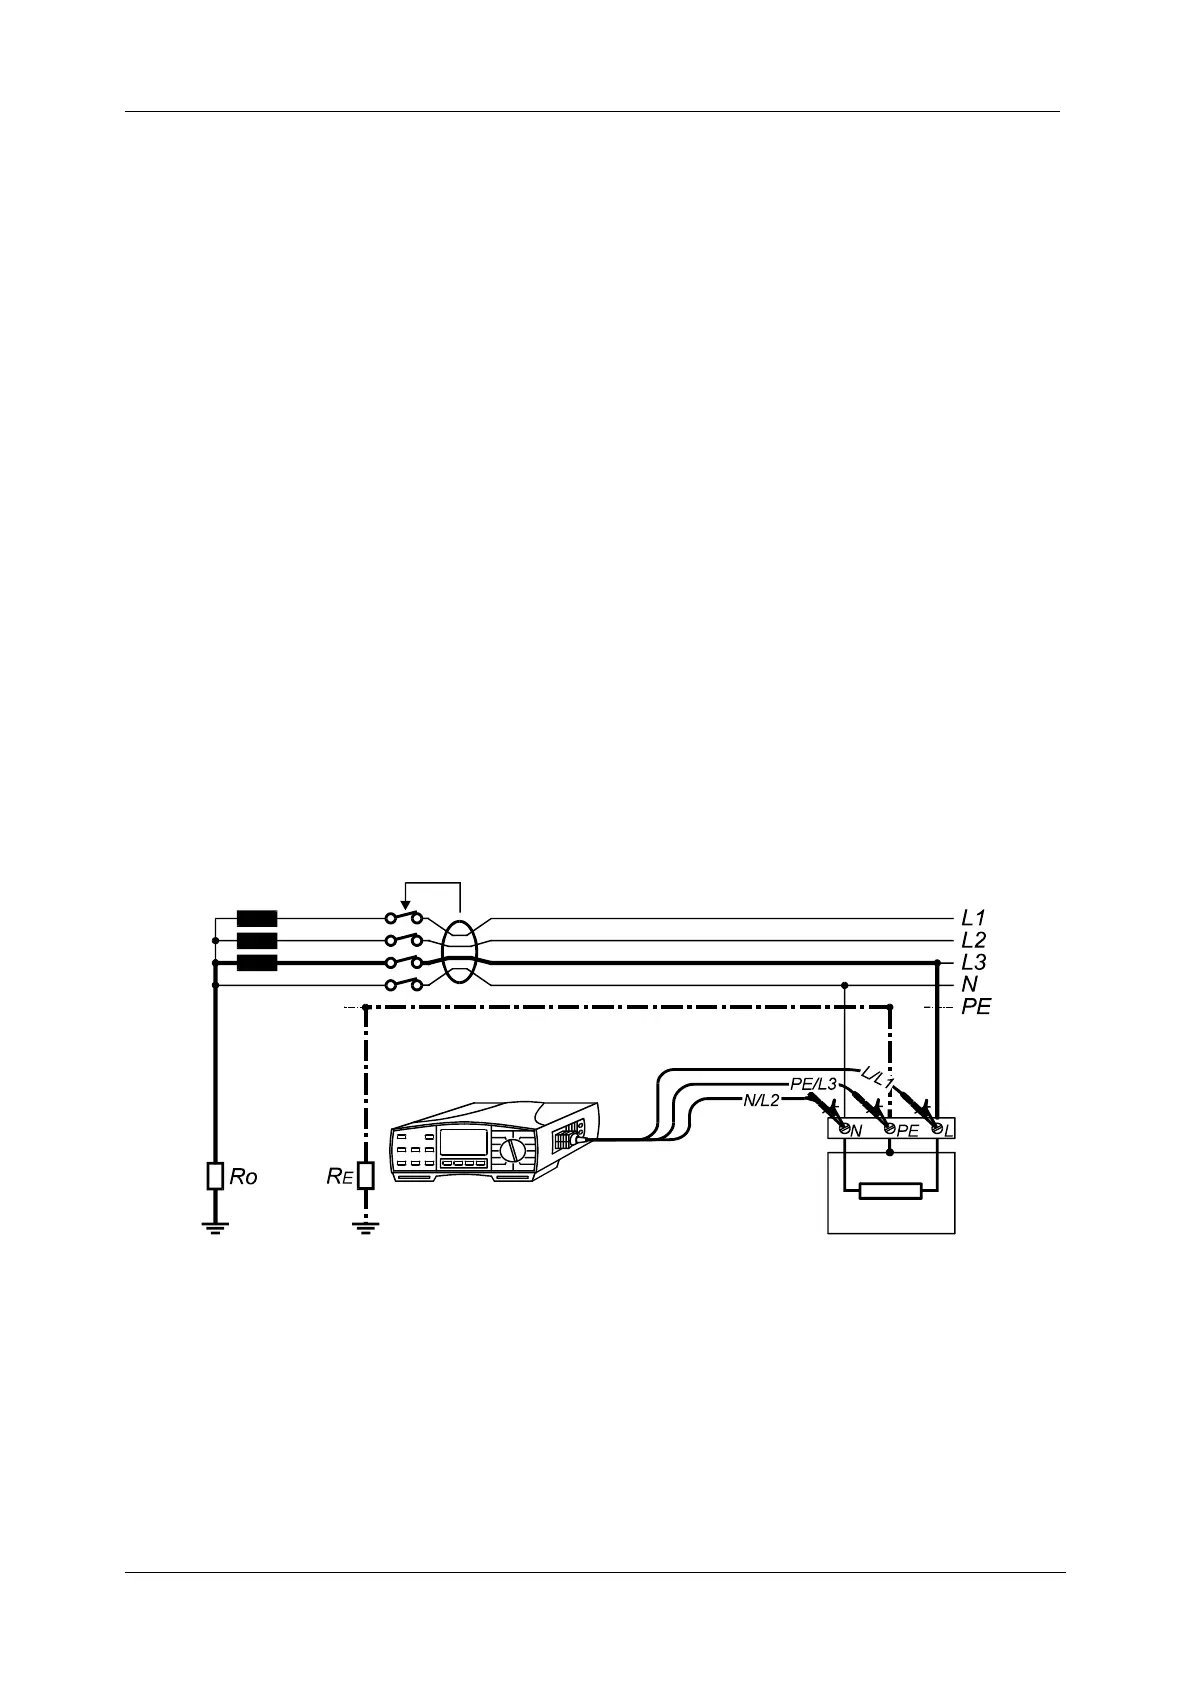
q Connect test cable to tested object (mains outlet or other test terminals)
according to the figure below. “Mains plug” mark will be displayed as soon as
mains voltage appears at test terminals.
Fig. 12: Connection of Universal Test Cable
Step 7 (Uc function is selected)
q Press the START key and release it. Measurement will be carried out and
result (Uc at I∆N - standard RCD or Uc at 2I∆N - selective RCD) will be
displayed.
q Check fault loop resistance subresult and preset limit contact voltage by using
the DISPLAY key.

 Loading...