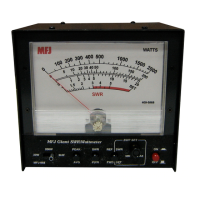
MFJ-259D Instruction Manual HF/VHF SWR Analyzer
18
Example: R1 = 37 ohms. R2 = 66 ohms. 37 x 66 = 2442. The square root = 49.42 ohms.
Line Impedance Using a Potentiometer or Resistor Decade Box:
Limit these measurements to the HF region because stray reactance from a potentiometer or decade box could
become a significant source of error at VHF frequencies. Also, use only non-inductive resistances (no wire-wound
resistors). If needed, you may install a broadband transformer of know performance accuracy to extend the
measurement range.
1.) Connect the DUT to the Antenna connector.
2.) Terminate the far end with a potentiometer or resistance decade box.
3.) Adjust the analyzer's VFO frequency and note only the SWR change (SWR need not be low).
4.) Adjust termination resistance until SWR remains constant over the widest possible range.
5.) The resistance of the termination resistor is the line impedance (or surge impedance of the system).
7.4 Adjusting Tuners
Use a short patch cable to connect the analyzer's Antenna jack to the tuner's 50-ohm input. This connection may also
be made with a manual RF switch to facilitate rapid changeover, provided the switch has >50-dB port isolation.
When using any in-line switch, make sure there is no possible way for the transmitter and the analyzer to become
inadvertently connected!
Important Warning: Always connect the common (rotary contact) of the external RF switch to the tuner. The
switch must connect either the MFJ-259D or the station transceiver to the tuner. Transmitting equipment must
never be configured in a manner where it could accidentally become connected to the MFJ-259D.
1.) Patch the analyzer Antenna jack to the tuner input connector.
2.) Connect the desired antenna at the tuner output connector.
3.) Tune the analyzer VFO to the desired frequency and leave it there.
4.) Select the analyzer's basic SWR, Resistance (R), Reactance (X) Mode.
5.) Adjust the tuner's controls until the analyzer's SWR indicators show unity (1:1).
6.) Turn off and disconnect the MFJ-259D. Re-connect the tuner to the transmitter.
7.5 Adjusting Amplifier Matching Networks
To use the MFJ-259D for testing and adjusting RF amplifiers or other matching networks without applying
operating voltages, see the instructions below. Note that all tubes and other components should be left in position
and connected so that all sources of stray capacitance will remain unchanged.
To measure input circuits: Install a non-inductive resistor equaling the approximate driving impedance of each
individual tube between the cathode of each tube and the chassis.
To measure tank circuits: Install a resistor equal to the tube's calculated operating impedance from the anode to
the chassis using short leads.
The antenna relay (if internal) may be engaged using a small external power supply. Closing the relay will connect
the amplifier’s external RF input and output connectors to the amplifier’s internal RF-matching networks. The
appropriate network may now be adjusted. When the analyzer reads 50 ohms and 1:1 SWR at the operating
frequency with the proper amounts of capacitance to set the system Q, the networks are functioning properly.
Caution: The driving impedance of most amplifiers will change as the input drive level is varied. Do not attempt
to adjust the input network with the tube in an operating condition using the low level of RF generated by the
MFJ-259D stimulus generator!