ELECTRICAL
Jammed starter pinion
In the event of the starter pinion becoming jammed in mesh with the flywheel,
it
can
usually be freed by turning the starter armatu re with a spanner applied
to the shaft extension at the commutator end.
Windshield wiper
Should it be necessary to reposition a wiper arm on the spindle, the
arm
can be
withdrawn when the small spring clip is held clear of the retaining groove.
Replace the
arm
in the required position and pu h it
hard
down
onto
the spindle
until it is secured in position by the retaining clip.
To adjust a wiper blade raise
the retaining clip
(1) and
withdraw the arm. Refit in
the desired position on the
splined shaft (2)
The headlamp light unit
removed, showing the bulb
holder and back-shell, etc.,
with the European-type lamp
inset
Headlamps (except European and sealed-beam types)
To renew the headlamp bulb, remove the screw from beneath the headlamp
and
withdraw the rim;
push
the lamp reflector
and
glass assembly inwards against
the springs,
turn
it anti-clockwise until the locating screws register with the
enlarged ends of the slots,
and
withdraw the light unit. Depress the back-shell
and
turn
It to release the bulb. When
replacing
the bulb ensure
that
the slot in
the bulb flange engages the keyway in the holder.
24
CTRICAL
Refit the light unit by positioning it so
that
the heads of the adjusting screws
pass through the slotted holes in the flange, press the unit inwards, and tur n it
clockwise as far as it will go.
Replace the dust-excluding rubber and refit the rim, locking it in positi n
with the retaining screw.
Headlamps (European type)
The headlamps are fitted with special lenses and bulbs giving an asymmetrical
light beam.
The lamp rims are fitted with rubber dust excluders and rim retaining screws.
These rims can be removed by releasing the retaining screw at the
bottom
of the lamp rim. The bulb is released from the reflector by withdrawing the
three-pin socket and pinching the two ends of the wire retaining clip to clear
the bulb flange. When replacing the bulb care must be taken to see that the
rectangular pip on the bulb flange engages the slot in the reflector seating. Re-
place the spring clip with its coils resting in the base of the bulb flange
and
en-
gaging the two retaining lugs on the reflector seating for the bulb .
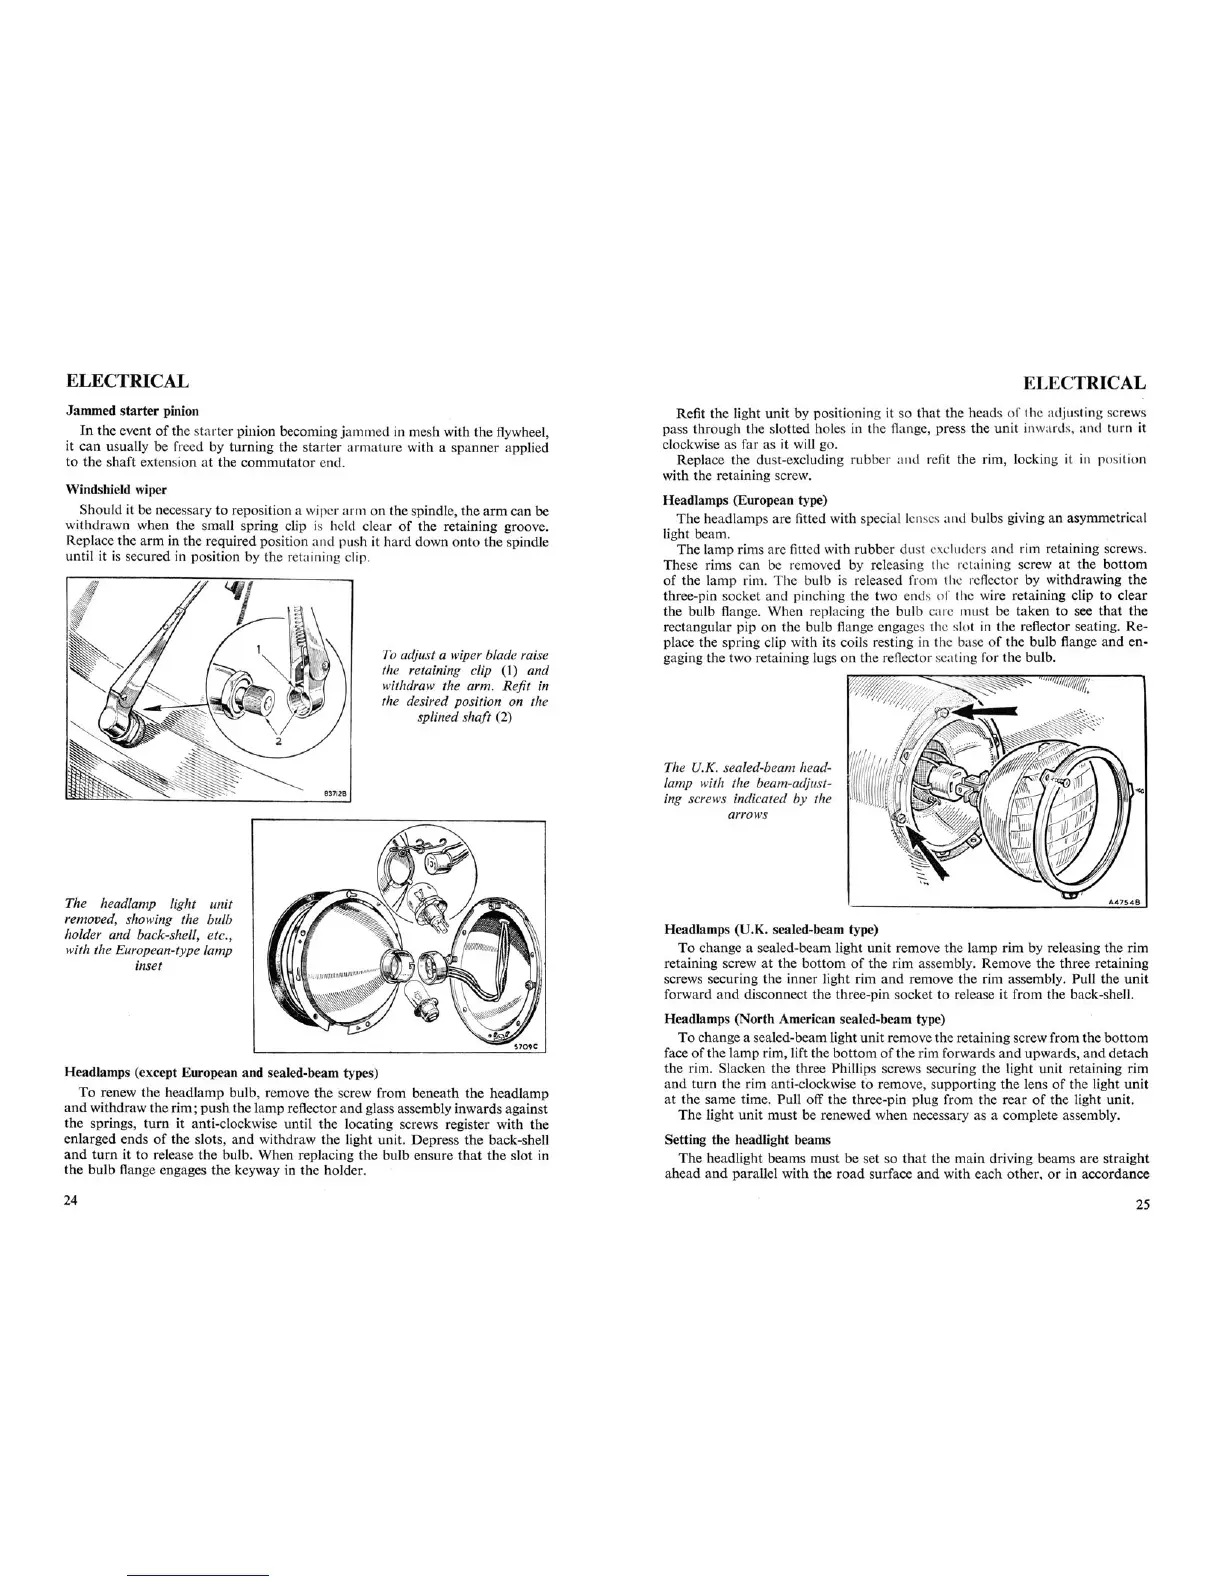
The U.K. sealed-beam head-
lamp with the beam-adjust-
ing screws indicated by the
arrows
Headlamps (U.K. sealed-beam type)
To change a sealed-beam light unit remove the lamp rim by releasing the rim
retaining screw at the bo
ttom
of the rim assembly. Remove the three retaining
screws securing the inner light rim
and
remove the rim assembly. Pull the unit
forward
and
disconnect the three-pin socket to release it from the back-shell.
Headlamps (North American sealed-beam type)
To change a sealed-beam light unit remove the retaining screw from the
bottom
face of the lamp rim, lift the
bottom
of the rim forwards
and
upwards,
and
detach
the rim. Slacken the three Phillips screws securing the light unit retaining rim
and
turn
the rim anti-clockwise to remove, supporting the lens of the light unit
at the same time. Pull off the three-pin plug from the rear
of
the light unit.
The light unit must be renewed when necessary as a complete assembly.
Setting the headlight beams
The headlight beams must be set so
that
the main driving beams are straight
ahead
and
parallel with the
road
surface
and
with each other. or in accordance
25