3: Operating Procedures
12 Portaflow 220 User Manual
(Issue 1.0)
3.1 Setting-up the Instrument
3.1.1 Using the instrument for the first time
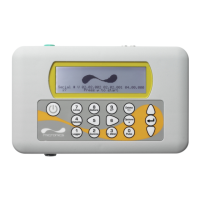
Before you use your Portaflow 220 for the first time you should first charge the battery, then select the display
language and set-up the internal clock, as described below.
Charging the battery
1. Connect the external battery charger to the charger socket at the bottom of the instrument then switch on
the utility supply.
Selecting a language
The first time you switch on the instrument you may be asked to select a user language.
1. Switch on the instrument by pressing the ON/OFF button.
2. If necessary, select the required language using the UP/DOWN scroll keys then press the ENTER key.
Setting the Date & Time
2. The instrument should indicate CHARGING
and an animated battery symbol indicates
that the battery is taking on charge.
3. Leave the instrument on charge for 6.5 hours
before using it for the first time.
CHARGING DD-MM-YY HH:MM:SS
3. The selected language will be the default
when the instrument is next used. To change
the language again select the Change
Language option in the SETUP
INSTRUMENT screen (see below).
4. The initialisation screen will be displayed,
giving details of the instrument’s serial
number and software revision details.
5. Press ENTER to start the instrument.
6. This is the MAIN MENU and is the starting
point for all the operations described in this
chapter.
Note: Data Logger and RS232/USB functions
are not implemented on the PF220.
Serial # V 00.00.00.00.00.00.00. 0000
27 Press
to start
MAIN MENU
DD-MM-YY HH:MM:SS
Quick start
View/Edit Site Data
Data Logger
Setup RS232 /USB
Setup Instrument
Read flow
1. Select Setup Instrument from the MAIN
MENU. The screen shown here should be
displayed.
2. Select Set Date & Time and click ENTER.
3. A flashing cursor should appear under the
first date number. Enter the date sequence
in dd-mm-yy order then press ENTER.
4. Repeat this action to set the time.
5. Select Exit then press ENTER to return to
the MAIN MENU.
SETUP INSTRUMENT
DD-MM-YY HH:MM:SS
Dim: mm
Set Date & Time : dd-mm-yy hh:mm:ss
Calibrate 4-20mA
Pulse status
Backlight : Disabled
Factory settings
Change Language
Exit