Using Quick Calibration
Camera Calibration
3
v4.1.3, April 2012 Visionscape FrontRunner™ User’s Manual 3-15
1. Using the text boxes in Figure 3–11, enter separate X and Y scale
factors. Typically, you would do this if your camera is looking at an
angle, or you know that your camera does not have square pixels.
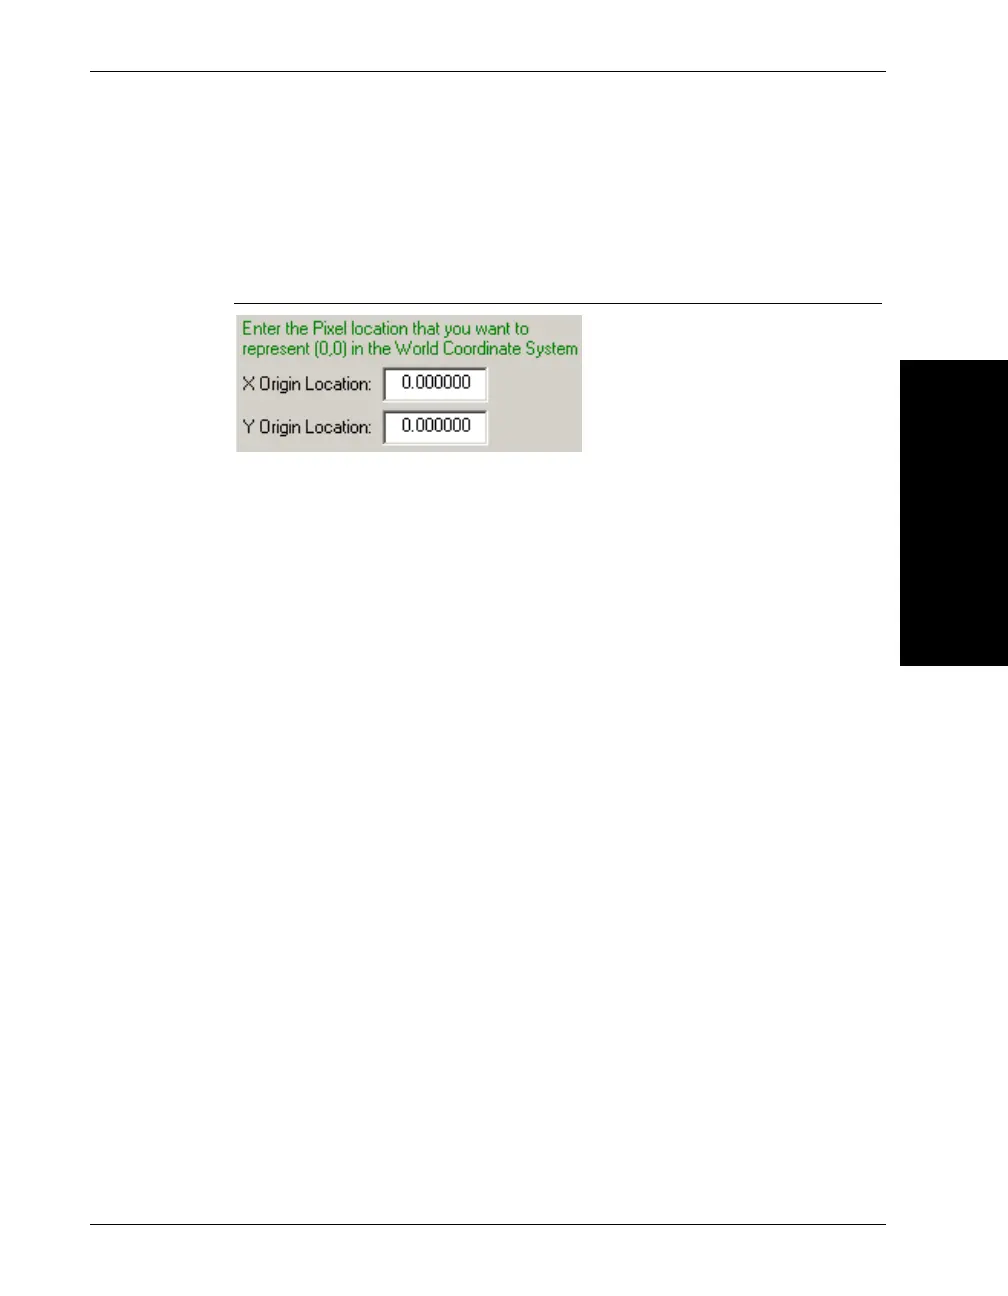
FIGURE 3–12. Enter the Pixel Location Dialog Box
2. Using the text boxes Figure 3–12, set the pixel location in the image
that should be considered (0,0) in the World Coordinate System. In
most cases, you won’t care about this, but if you are trying to get
positional data back from your inspection, then this may be useful to
you.
3. Click Update Matrices once you have entered your values in the text
boxes, and the Calibration Matrices is updated using your new data.
Clicking Clear Calibration resets the Cal Matrices back to the identity
matrix, which essentially means that your Snapshot will no longer be
calibrated. Use this button if you calibrated your Snapshot, but wish to
return to a non-calibrated state.
4. Click Next.
FrontRunner™ displays the Finished screen, as shown in Figure 3–6.