DOC 6501_Release V
ATS-6501 Users Guide
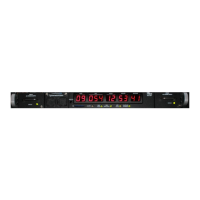
5
2.2 Communicating with the ATS-6501
Operators are capable of communicating with the system through a LAN connection or via one of
the USB Ports when using ATS 6501 OP001 USB to Serial cable to access the command port.
2.2.1 DHCP
The ATS-6501 runs DHCP by default and will therefore automatically be assigned an IP address
if it is connected to a network with a DHCP server. The ATS-6501 will display the current IP
address assigned to the unit in the Date/Time display after pressing and releasing the Display
pushbutton on the front panel. Users can use this IP Address to access the systems command
port.
Note: If the LAN Cable is not connected or the unit does not obtain an IP Address from a DHCP
Server an IP Address is not assigned and the front panel display button will not display an IP
address for the system. Once the LAN cable is connected to the unit it will automatically attempt
to obtain an IP address from a DHCP Server. If this does not work you may need to power cycle
the unit.
2.2.2 Static IP Addresses
If you require a Static IP Address there are two options to set the network information in the
system.
2.2.2.1 Network
If the network has a DCHP Server you can obtain the IP Address (ip addr) by pressing and
releasing the Display pushbutton on the front panel. Telnet into the system using “telnet ip addr
1700”. Once the “ATS-6501>” prompt is displayed run the network_config command to
manually configure the IP address for the unit. See Section (2.2.3).
If the network does not have a DHCP Server, press and hold the front panel display pushbutton
for ~10 seconds until the display shows the IP Address of 192.168.0.1. This temporarily sets the
IP Address of the unit. Telnet into the system using “telnet 192.168.0.1 1700”. Once the “ATS-
6501>” prompt is displayed use the network_config command to manually configure the IP
address for the unit. (See section 2.2.3).
Note: If the LAN Cable is removed and reconnected the unit will attempt to obtain an IP Address
from the DHCP Server. If the default static IP Address (192.168.0.1) was set it may get reset.
Press the Display Button on the front panel again to make sure the IP Address is still set. If not,
press and hold the button until the default static IP Address is set again.
2.2.2.2 Console Cable
This feature allows local users to set the unit up without having to access the system via the
network. Connect a terminal to one of the USB ports on the rear panel using the USB to Serial
adapter cable (94000-115200). Changes can be made using any terminal program (e.g.,
HyperTerm, TeraTerm) from the serial port of a computer/terminal. The communication settings
are 115200 Baud, No Parity, 8 Data Bits, and 1 Stop Bit. Once connectivity is established the
user will see the ATS-6501> command prompt. Execute the network_config command to set the
IP Address, Netmask, Broadcast IP, and/or Default Gateway for the system if you are using a
static IP Address. See Section (2.2.3).
 Loading...