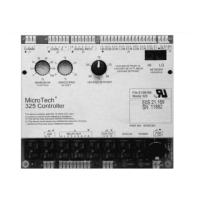
Certified Drawing
IM 613 / Page 17 (Rev. 7/99)
PC Access
A PC equipped with Monitor software is required for master or
slave UVC start-up. For further information, refer to “PC
Connection” in the “Service Information” section of this manual.
Communications Cable Check
1. Be sure that the communication port IDC connectors are
disconnected at every UVC on the network.
2. Check that there are no shorts between any two conduc-
tors in the communications trunk.
Use an ohmmeter to test for shorts at the communication
port IDC connector of the Master UVC. (For the three
combinations of conductor pairs, there should be infinite
resistance between the conductors.) If the conductors are
properly terminated, this check will test for shorts through-
out the network.
Use an ohmmeter to test for shorts at the communication port
IDC connector of the NMP or LMP. (For the three combinations
of conductor pairs, there should be infinite resistance between
the conductors.) If the conductors are properly terminated, this
check will test for shorts throughout the trunk.
Procedure for Each Network UVC
1. Verify that the main power switch is at “Off.”
2. Set the network address.
Each UVC on an NMP or LMP trunk must have a unique
hex address. This address should be specified in the job
submittal drawings. Refer to the submittal drawings and set
the address in accordance with them. (This is a “level 3”
network address.) For further information, refer to “Hex
Switches” in the “Component Data” section of this manual.
3. Apply power to the unit.
Turn the main power switch to “On” and the motor speed
switch to either desired speed, wait 5 minutes until calibra-
tion is complete.
4. Check the status LED.
The status LED should illuminate after calibration. If a wall
sensor package is used, the remote status LED should also
illuminate.
5. Check for proper voltage levels at the Comm B port.
Use a DC voltmeter to test the voltage levels at the Comm
B terminals with respect to ground. The terminals and
acceptable voltage ranges are specified in Table 8.
If the voltage levels are acceptable, go on to step 6.
If no voltage or improper voltage levels are found, the UVC
is defective and must be replaced.
6. Check for proper voltage levels at the communication port
IDC connector.
Use a DC voltmeter to test the voltage levels at the connector
terminals with respect to ground. Test at the connector
terminals corresponding to the communication port terminals
listed in Table 8. Verify that the voltages are within the ranges
specified in the table.
If the voltage levels are acceptable, connect the IDC
connector to the Comm B port.
If no voltage or improper voltage levels are found, verify
that the NMP or LMP is energized and that the
communications trunk wiring is intact.
7. Verify that network communications between the UVC and
the NMP have initiated.
At the network PC, change the operating mode to
unoccupied and check that the status LED responds
accordingly.
8. Verify that the unit ventilator is operating in accordance with
its sequence of operation as outlined in the appropriate
documentation (refer to Table 6).
Since the sensed temperatures are fixed at any given
moment, adjust the UVC heating and cooling setpoints
(at the network PC) to obtain the expected heating or cooling
control actions.
Adjust any other applicable parameters to obtain the
expected UVC control actions.
9. Check that any desired network-executed control features
are working properly (ventilation lockout, demand limiting,
etc.).
10. Review the submittal drawings and make any necessary
changes to the default UVC setpoints and parameters.
11. Check the remote setpoint adjustment pot operation
(if present).
Verify that the expected UVC control action occurs when
the remote pot is adjusted up or down.
12. Check that the exhaust fan interlock option works properly
(if present).
Verify that the OA damper opens when the exhaust fan
interlock relay is energized.