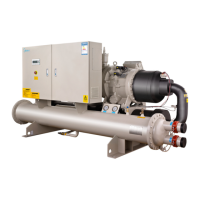
Flooded type water cooled screw chiller (PCB Control) MCAC-CTSM-2012-11
64
Fig.:6.2.1 Fig. 6.2.2
1.
Install all bolts finger tight.
2. Bolt tightening sequence is outlined in Fig. 6.2.2. Follow the numbering or lettering sequence so that
pressure is evenly applied to O-ring.
3. Apply torque in one-third steps until required torque is reached. Load all bolts to each one-third step
before proceeding to next one-third step.
4. No less than one hour later, retighten all bolts to required torque values.
5. After refrigerant is charged to system, check for refrigerant leaks using halogen detector or other
recommended industry practices.
6. Replace evaporator insulation.
Cleaning Heat Exchangers
Check the chiller tightness and whether there’s leak of heat exchange tubes. It is necessary to do
nondestructive inspection for the principal weld (longitudinal and circumferential weld of
evaporator/condenser barrel) of pressure vessel. Inspect and clean cooler tubes at the end of the first
operating season. Tube condition in the exchanger will determine the scheduled frequency for cleaning,
and will indicate whether water treatment is adequate in the water circuit. Too much scale will cause big
loss of capacity and efficiency.
Refer to the following pressure-temperature curve for condition in heat exchangers:
High pressure-cooling water temperature (high pressure beyond 0.6~1.2MPa is abnormal)
Fig.26 High pressure at full load (standard unit)
Bolt specifications
Torque rang (N.m)
Max. Min.
M10 16 24
M12 45 68
M16 95 122
M20 142 210