Flooded type water cooled screw chiller (PCB Control) MCAC-CTSM-2012-11
71
accessories.
8) Remove the M14 bolts securing the discharge line flange located between compressor and oil
separator.
In the same way, remove the bolts securing the suction line flange between evaporator and compressor
if there is no suction service valve. If there is suction service valve, remove the bolts securing the suction
valve to compressor.
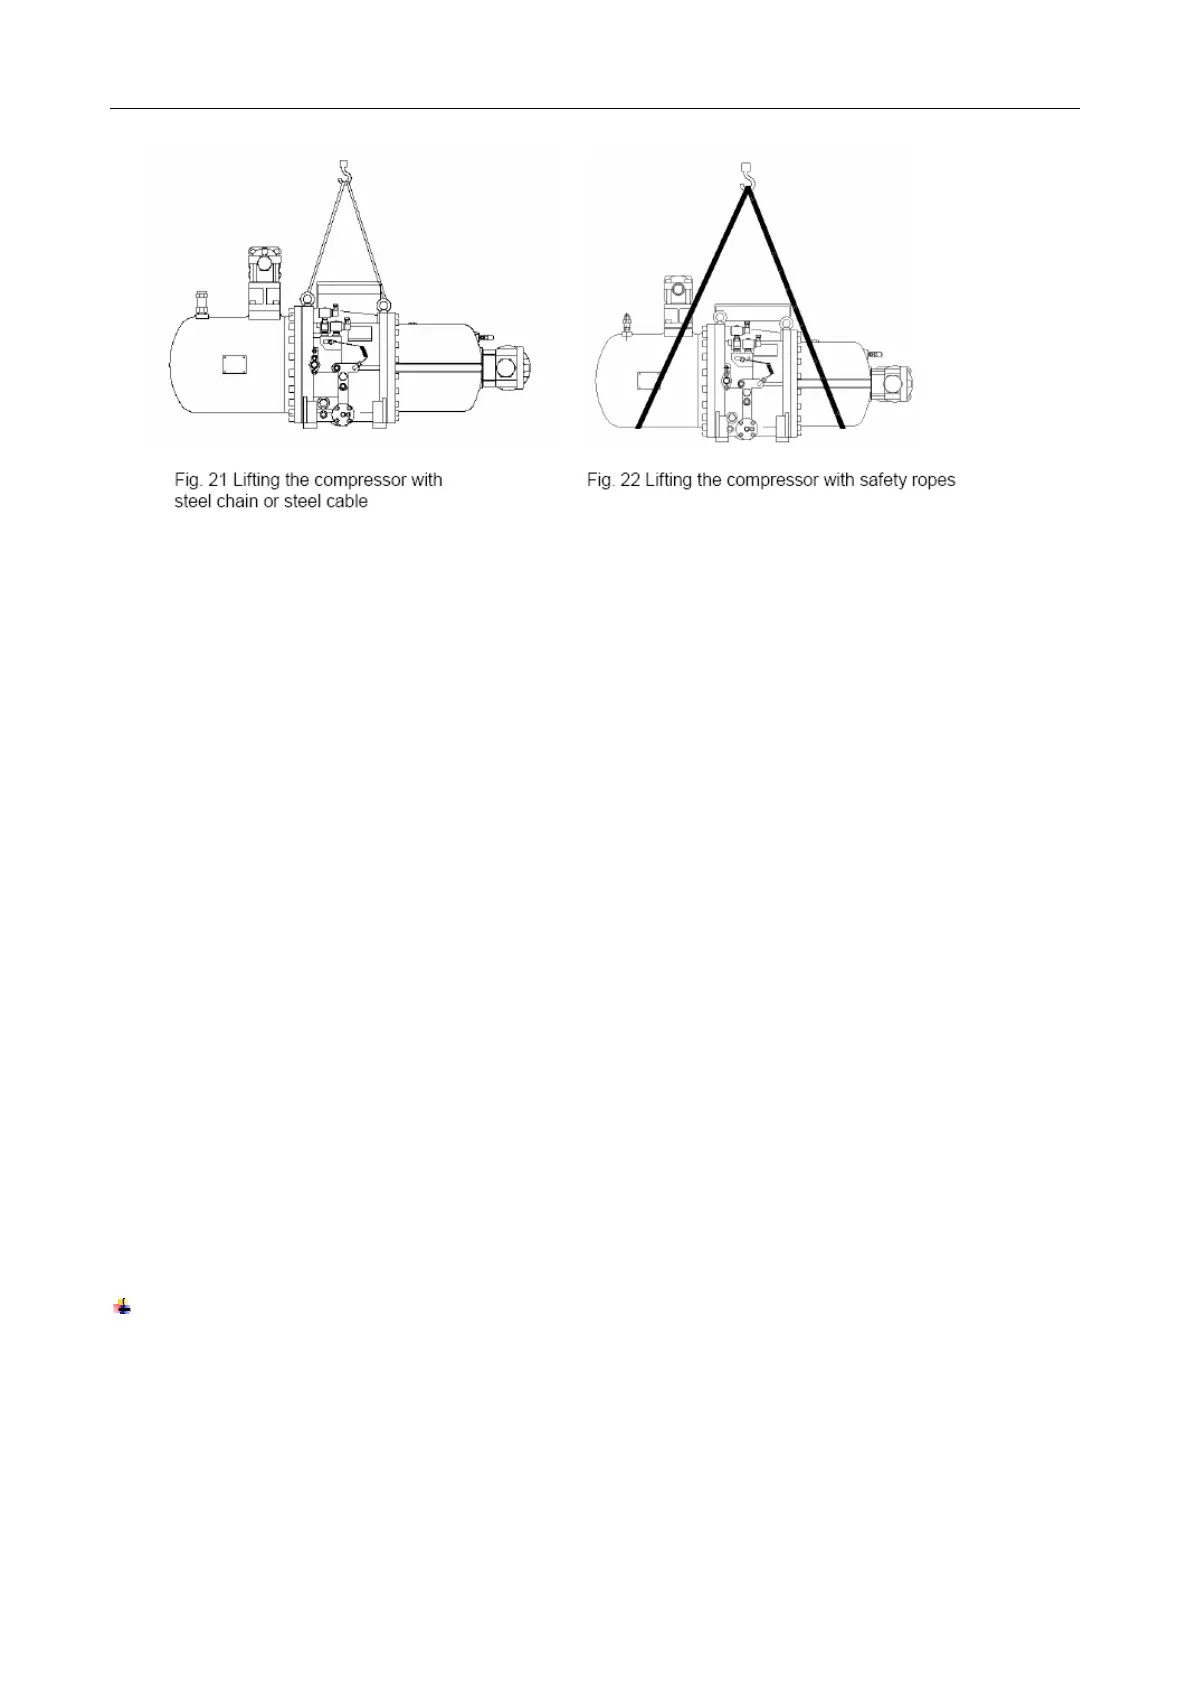
9) Save all the hardware as it will be needed to install the replacement compressor. When there’s no
interfere with compressor, remove compressor from evaporator.
Compressor reinstallation
Install the new compressor to the mounting bracket; connect all the accessories removed before back to
the new compressor, including gas pipes, oil pipes, pressure switches, power cables and control cables,
etc. All these must be reinstalled to the same place as per uninstallation procedure.
IMPORTANT: the power cable must be connected to compressor correctly as per marks on the cables.
Wrong connection may cause reversal rotation and serious damages.
1) Leak check the compressor and refrigerant lines with nitrogen. Repair any leaks found. Remove
nitrogen from system. Evacuate compressor and refrigerant lines. Refer to the Refrigerant
Charging/Adding Charge and Oil Charging/Low Oil Recharging sections on pages for recharging
procedures.
2) Open all shutoff valves and check the circuit and all fittings and joints. Repair any leaks found.
3) Restore main and control power to the machine. Confirm all the possible alarms and reset on the
screen alarm page.
Moisture-Liquid Indicator
Clear flow of liquid refrigerant indicates sufficient charge in the system. Note, however, that bubbles in
the sight glass do not necessarily indicate insufficient charge. Moisture in the system is measured in
parts per million (ppm), changes of color of indicator are:
Green—moisture is below 80 ppm;
Yellow-green (chartreuse)—80 to 225 ppm (caution);
Yellow (wet)—above 225 ppm.