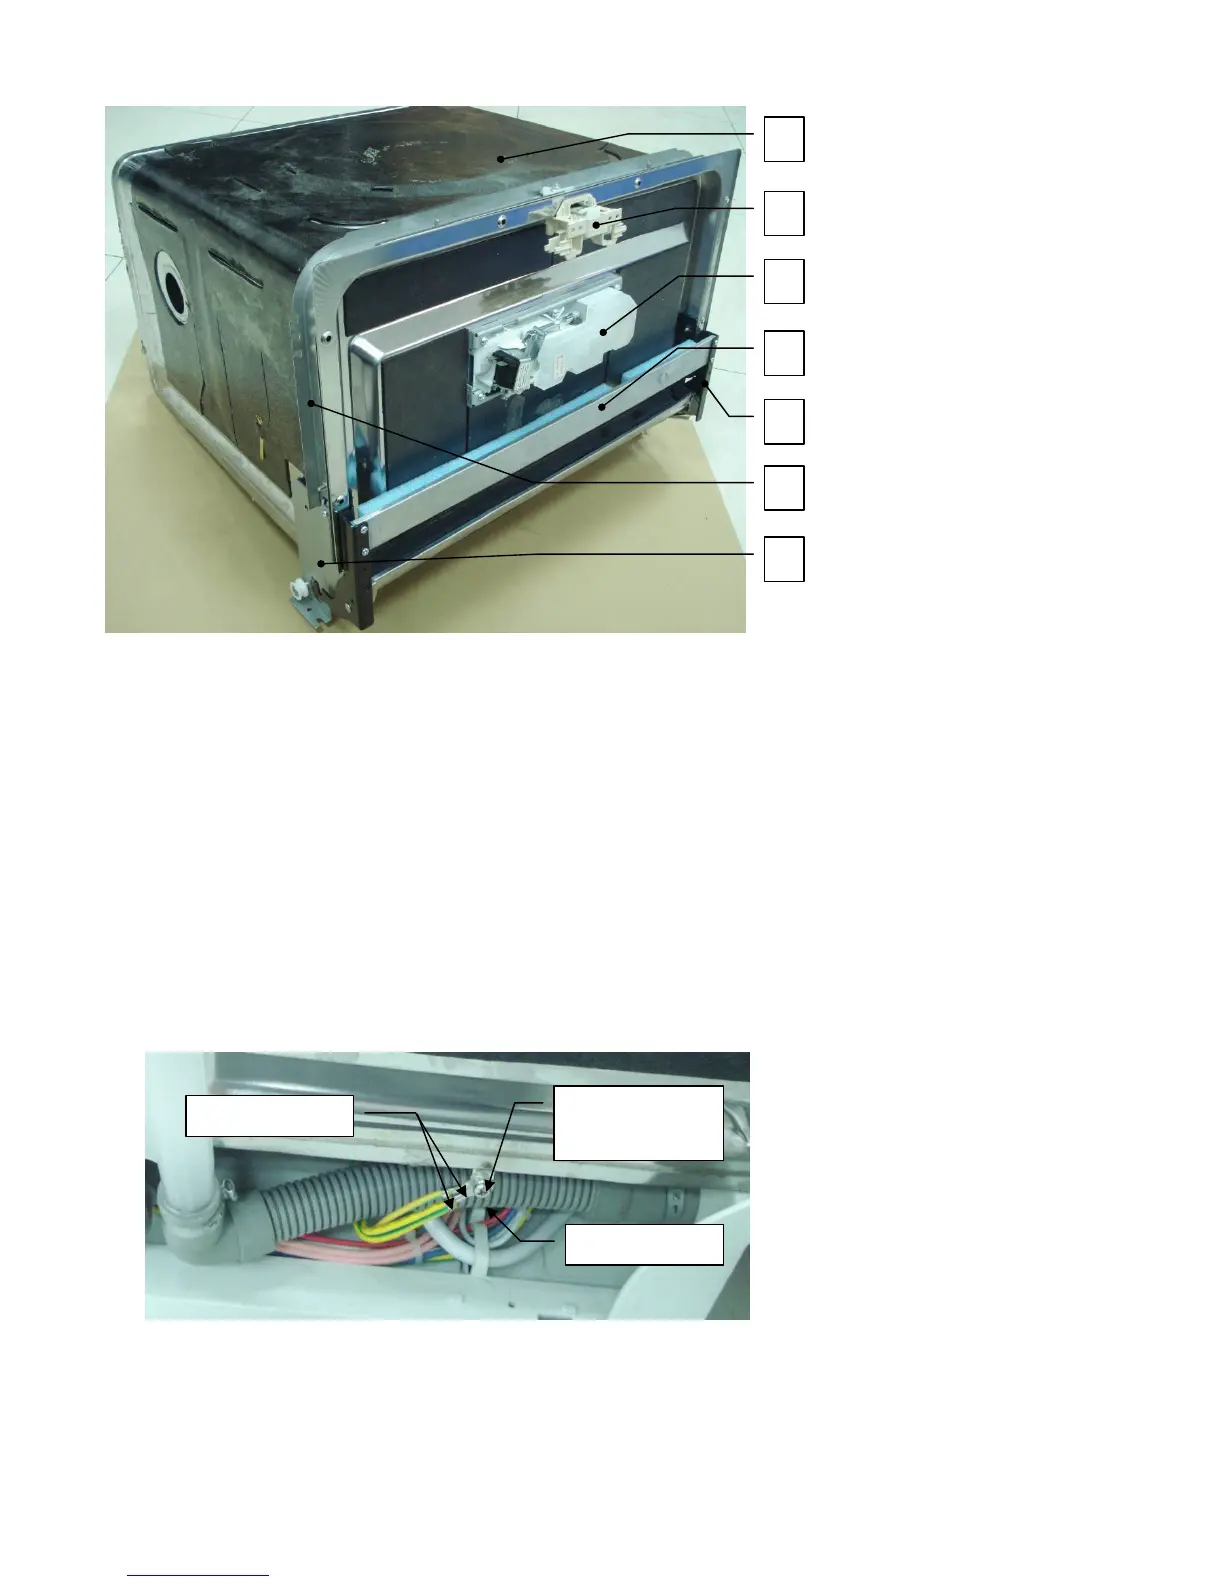
Part Name: 1 – tank 2 – door handle assembly 3 – dispenser
4 – rod for door hinges 5 – right front chamber bracket
6 – strengthen muscle 7 – left front chamber bracket
Removal and Installation
1. Take off cutlery basket, basket and filter system.
2. Remove shell. (see shell removal and installation)
3. Take out two corner boards, absorber sound, backboard, hollow plate.
4. Remove all screws for fixing cover of protecting box cover. Put out all housings for
connecting operating board. Take out connecting lines of operating board from protecting
box. (see operating board removal and replacement)
5. Remove outer door assembly (with operating board). (See outer door removal and
installation).
6. Put out all terminals for connecting Microswitch (door handle assembly), dispenser and rod
for door hinges. Take out all connecting lines from inner door.
Note: some terminals are locking terminals.
7. The plug terminal of tank assembly is on the edge in the left side of tank assembly. Remove
the screw and the nut for fixing ring terminals of ground lines.
8. Unfix the sheet copper for fixing the pressure switch hose. (see pressure switch removal
and replacement)
9. Remove two screws for fixing spray holder, then take out the spray holder.
2
1
3
5
4
7
6
Plug terminal of
tank assembly
Screw and nut
Ring terminals
 Loading...