OM-236297 Page 9
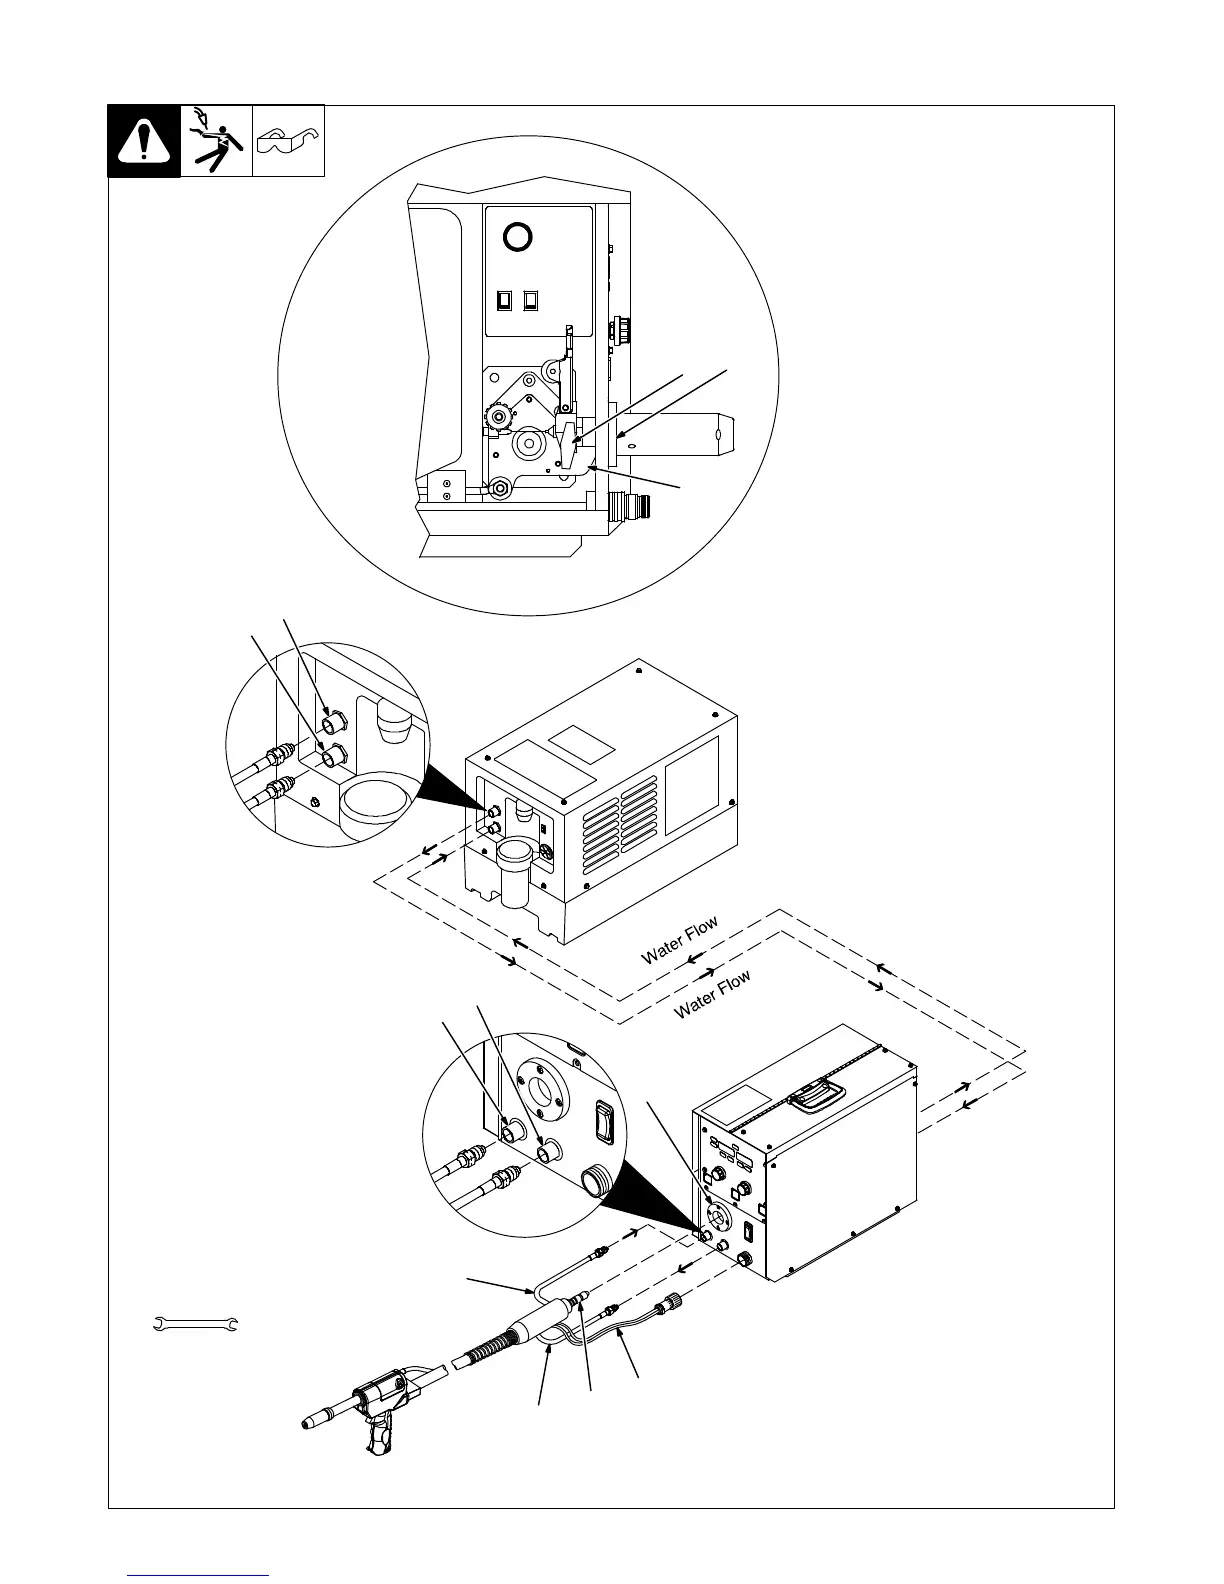
5-3. Water-Cooled Gun Connections
Ref. 246 218-A / 250 583-A
. Turn on coolant supply before
welding or gun will be dam-
aged.
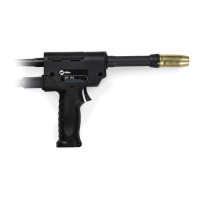
1 Gun Control Cable
Insert plug into Gun Control
receptacle, and tighten threaded
collar.
2 Gun Power Pin
3 Gun Securing Knob
4 Gun Bushing
5 Drive Casting
Loosen gun securing knob, and
insert gun power pin through gun
bushing until it bottoms against
drive casting. Tighten knob. Close
and latch door.
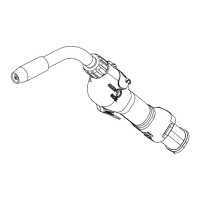
6 Gun (Coolant) “In” Hose
Connect to Water “Out” fitting on
feeder (left-hand threads).
7 Gun (Coolant) “Out” Hose
Connect to Water “In” fitting on
feeder (left-hand threads)
8 Water Cooler Output
9 Water Cooler Input
10 Feeder (Coolant) Output
11 Feeder (Coolant) Input
Tools Needed:
1
6
7
9/16 in.
5
3
Left Side
8
9
10
11
2
4
4
 Loading...