12 www.millipore.com
Attach the deep socket to the torque wrench by firmly pressing the deep socket onto 5.
the torque wrench drive. Attaching the deep socket may require force.
Hand tighten the nuts evenly by alternating from one nut to the other.6.
Brace the holder with one hand. With a continuous motion, turn each nut ¼ turn 7.
with the torque wrench, alternating from one nut to the other until torque wrench
“clicks” when it reaches 180-200 inch-pounds (20.3-22.6 Newton-meters).
Wait 5-10 minutes; re-torque to 180-200 inch-pounds (20.3-22.6 Newton-meters).8.
Waiting allows gasket(s) to relax before re-torquing.
Re-torque to a maximum of 200 inch-pounds (22.6 Newton-meters) as needed to 9.
create a liquid-tight seal. The torque wrench may have a fi xed head or a ratchet-style
head. If your wrench has a ratchet-style head, move lever to the right lock position
to tighten nuts and mover the lever to the left lock position to loosen the nuts.
Note Non-uniform tightening of the nuts can damage the fi lter. Non-parallel plates or
compression of the fi lter(s) at one end can cause leakage.
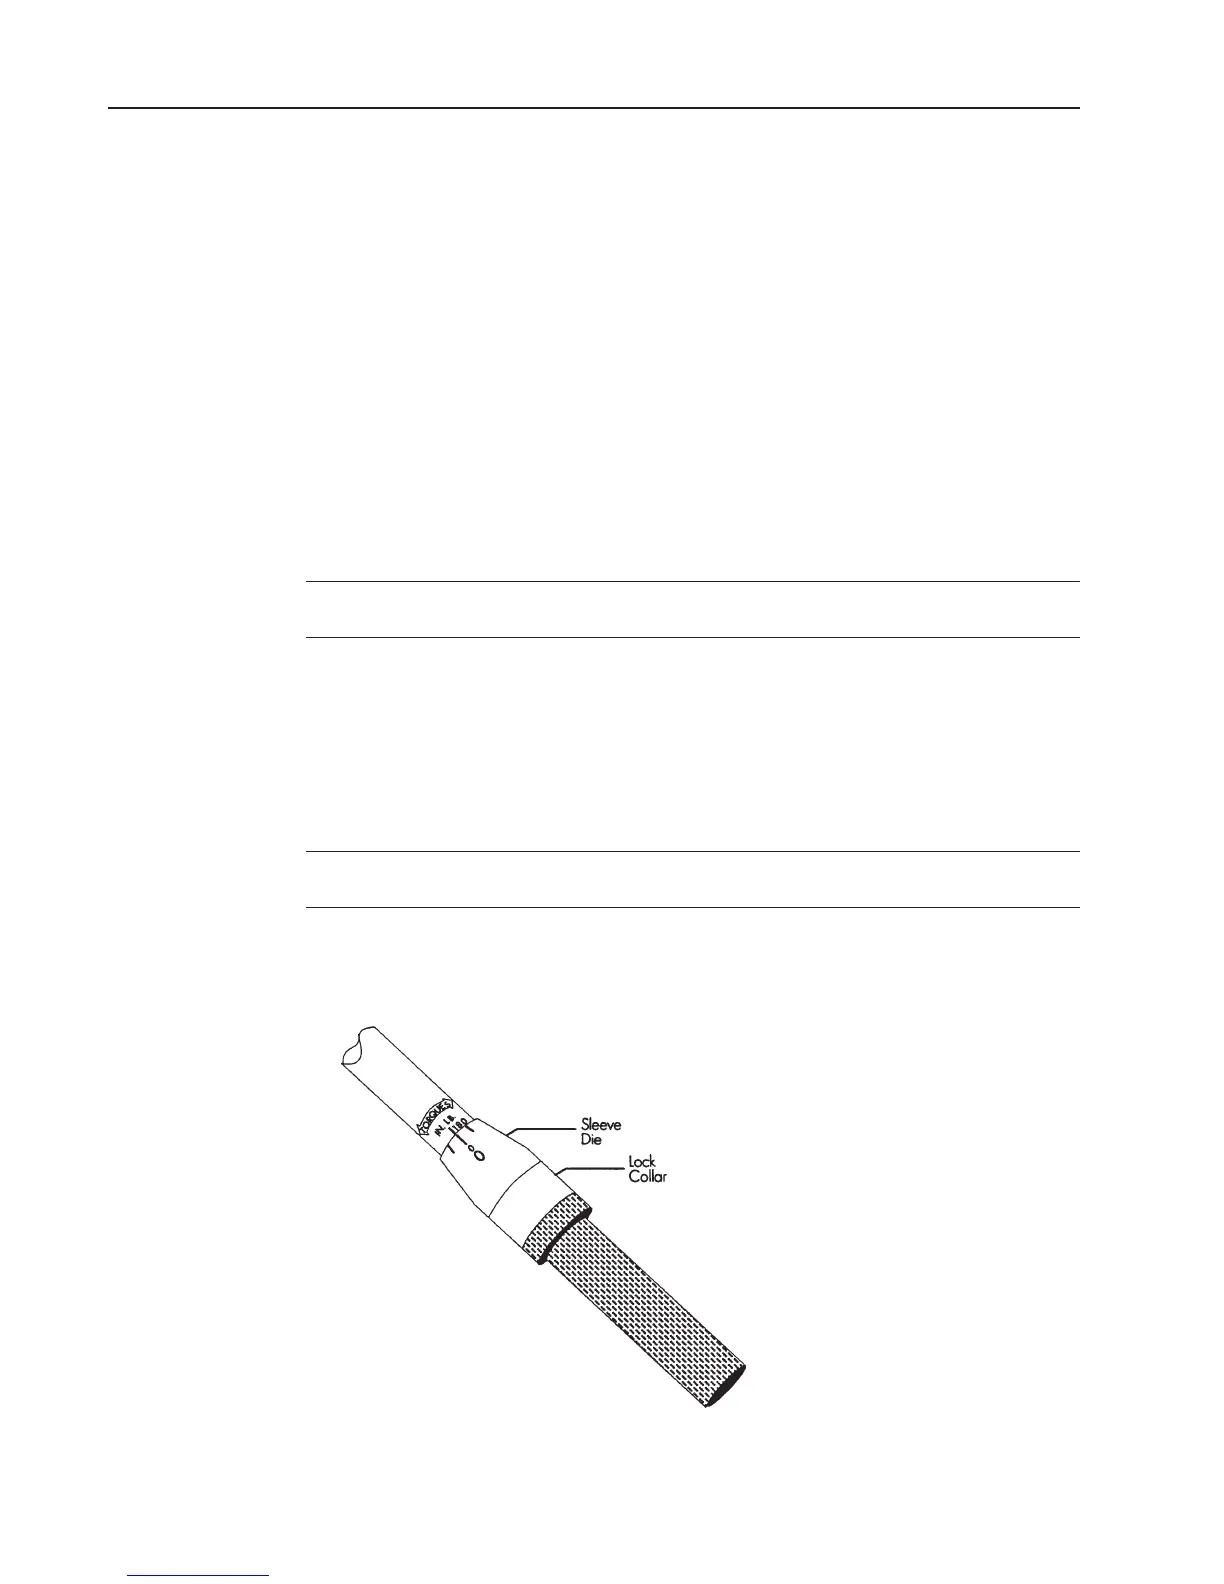
Setting the Torque Wrench
Pull down the spring-loaded lock collar to unlock the torque wrench.1.
Hold down the spring-loaded lock collar while turning the handle until the 180-200 2.
inch-pound (20.3-22.6 Newton-meters) mark on the wrench handle aligns with the
zero mark on the sleeve die.
Note One side of the torque wrench handle displays units as inch-pounds and the other
side displays units as Newton-meters.
Rotate the handle slightly so the lock collar springs back and locks into place. 3. When
the lock collar locks into place the handle will not rotate.
Setting the Torque WrenchFigure 10: