10
Attaching a tool
The below-stated tools can be used with the device.
• Cutter
• Ball-point pen on the market. (8-9mm diameter)
• Ball-point pen for plotter. (separately sold)
Refer to "Adjusting the blade tip and the blade of cutter (--->P.29) for the cutter blade adjustment and blade replacement.
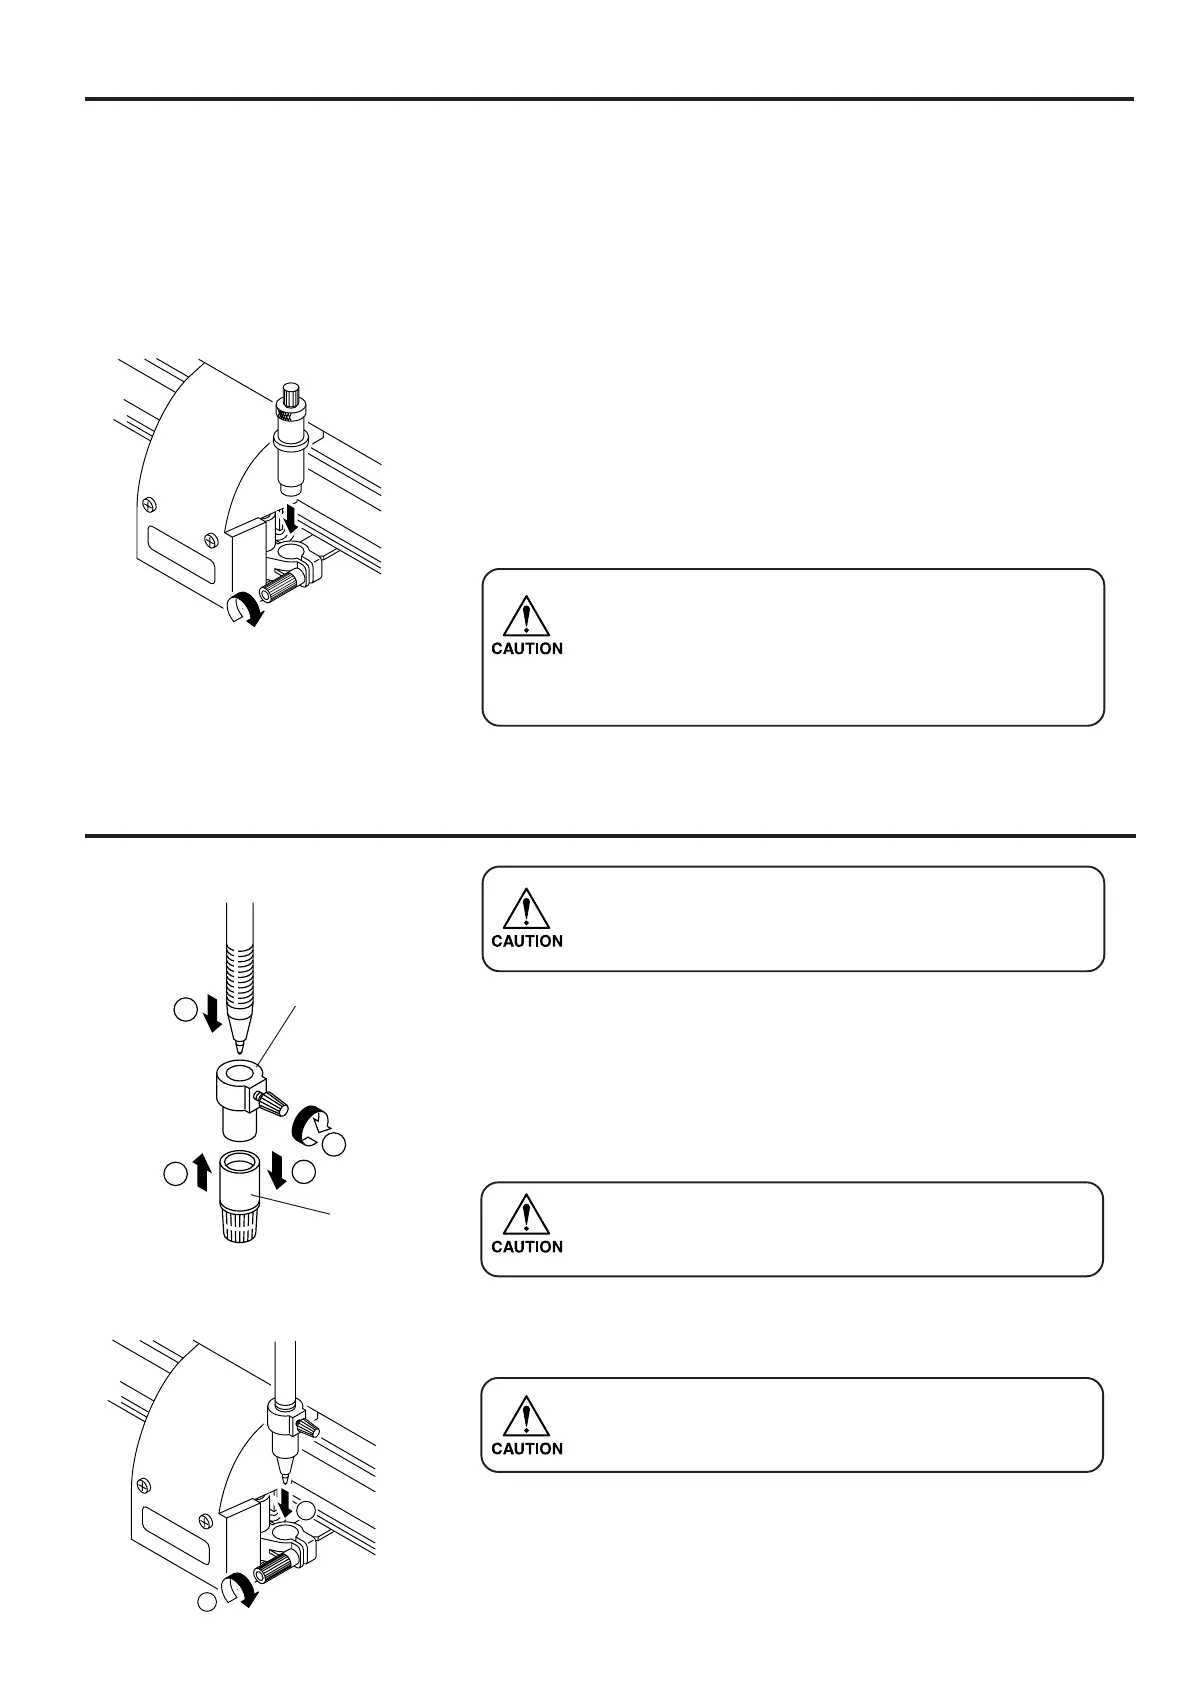
1. Put a cutter in the tool holder.
Fitting the collar of the tool in the slit on the tool holder, put the tool in the holder.
2. Turn the knob of the tool holder clock-wise until the cutter is
secured.
• Be sure to securely fix the tool. If not, accurate and high-
quality cutting results will not be obtained.
• Do not keep the screw of the tool holder tightened without
a tool inside. If done, the tool holder will deform and it
will be difficult to insert the tool.
Attaching ball-point pen on the market
• As for the ball-point pen on the market, use the ones with
8-9mm diameter. Picture quality may vary depending on
the pen used.
1. Put the cap on the pen adapter.
2. Insert the pen into the pen adapter.
Insert the pen all the way until the pen tip hits the cap.
3. Fix the pen tip.
Now, tighten the fixing screw clock-wise.
• Be careful not to over tighten the fixing screw of the pen
adapter. If tightened too much, ball-point pen may crack.
4. Remove the cap.
5. Insert the pen adapter with the pen into the tool.
• Set the adapter in a way that the fixing screw will not
hinder operation.
6. Turn the knob of the tool holder clock-wise to fix the tool.
2
3
4
1
Adapter
Cap
5
6

 Loading...


