Do you have a question about the MIMAKI CFL-605RT and is the answer not in the manual?
Explains safety symbols and provides essential guidelines for safe operation.
Details safety measures for device handling, environment, and installation.
Identification and understanding of warning labels applied to the machine.
Specifies the minimum installation space required around the plotter.
Step-by-step instructions for safely moving the plotter.
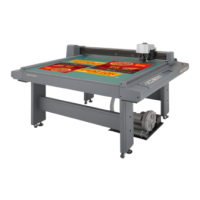
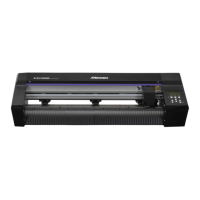
Identifies and describes the key parts of the plotter's main unit.
Identifies and describes the components of the plotter's head assembly.
Explains the function of each button and display on the operation panel.
Guides for connecting the power and interface cables to the plotter.
Details on applying and resetting the emergency stop function.
Instructions for attaching the felt mat and inserting set guide plates.
Lists compatible workpiece types and applicable blade types.
Guides for mounting various tools like pens, blades, and rollers.
Procedures for installing and replacing various cutter holders.
Steps for mounting the tangential cutter blade and holder.
Details on mounting and replacing the tangential cutter holder.
Instructions for mounting the grid roller tool.
Steps for mounting the reciprocating cutter blade.
Procedure for installing the reciprocating cutter holder.
Guide on how to attach the work holder to the plotter.
Explanation of local and remote status displays on the operation panel.
Aligns plotter origin with the CAD system's command origin.
Step-by-step guide for turning on the plotter and connected PC.
Steps to perform a test cut and evaluate the results.
Defines the starting point (origin) for cutting and drawing operations.
Manages active cutting jobs by interrupting and restarting them.
Step-by-step guide for safely turning off the plotter.
Configures core detection parameters like DETECT, SCALE, SIZE, and OFFSET.
Step-by-step guide for configuring the register mark detection system.
Adjusts the sensor height for optimal register mark detection.
Step-by-step process for performing register mark detection.
Adjusts the MARK SENSOR alignment relative to the cutter.
Adjusts the light pointer position to align with the cross pattern center.
Addresses common issues like inadequate cutting and torn lines with solutions.
Details adjustments for cutter eccentricity, angle, and offset.
Guides on correcting cutter eccentricity using test patterns.
Guides on correcting horizontal and vertical offsets for cutters.
Corrects the rotational angle of cutters and rollers using test patterns.
Guides on enabling and setting up circle θ correction for accurate circular cuts.
Addresses issues related to power, data transfer, and communication errors.
Resolves problems with tool lifting, line quality, and movement errors.
Lists common non-fatal error codes and provides solutions for each.
Details error codes related to register mark detection failures and their remedies.
Lists error codes for system, hardware, motor, and sensor issues.
Guides on executing sample cuts to diagnose cutting errors.
| Model | CFL-605RT |
|---|---|
| Category | Plotter |
| Interface | USB, Ethernet |
| Type | Flatbed |
| Cutting Width | 1600 mm |
| Compatible Media | Vinyl, paper, cardboard, foam, etc. |
| Maximum Cutting Speed | 1000 mm/s |
| Cutting Force | 500 g |
| Media Width | Up to 1, 600 mm |
| Repeatability | 0.1 mm |
| Power Supply | AC 100-240V, 50/60Hz |
| Weight | 90 kg |


