3. Consumable Item Replacement
28
3
Open the front cover.
• The carriage can be moved by hand. Move the carriage slowly to a position allowing easy
access while replacing.
4
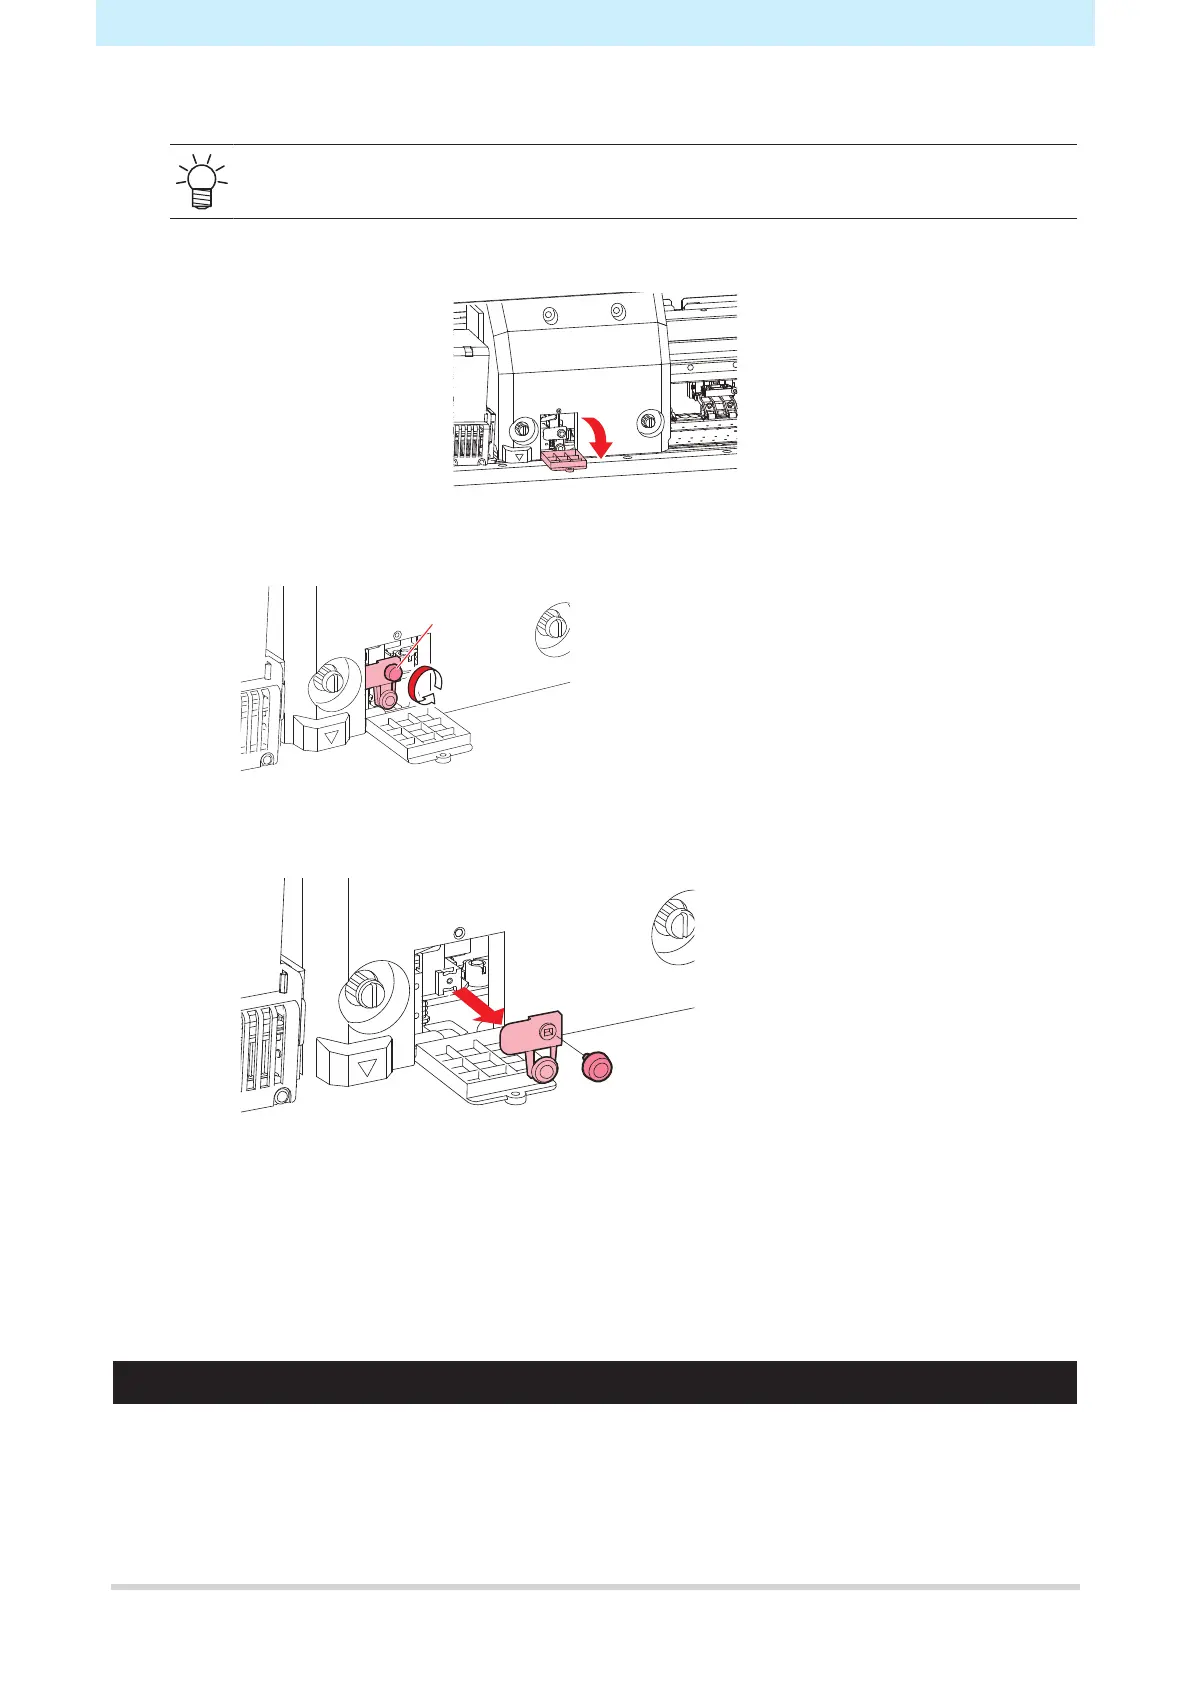
Loosen the screws and open the carriage cover window.
5
Replace the media cutter.
(1) Unscrew the cutter screw.
(2) Remove the cutter.
(3) Mount a new cutter.
(4) Tighten the screw to clamp the cutter.
6
Close the carriage cover window and retighten the screws.
7
Once replacement is complete, close the cover, then press the [ENTER] key.
Waste Ink Tank Replacement
Ink used during head cleaning and other processes is collected in the waste ink tank at the lower right of the
machine.
This product keeps track of the waste ink level. A "Check Waste Ink Tank" message appears when the
preset level is reached. Use this a guide for replacing the waste ink tank.
 Loading...


