© 2009 MIMAKI ENGINEERING CO.,LTD.
6.2.6 P.1
1
2
3
4
5
6
7
8
R.1.0
Maintenance Manual > Disassembly and Reassembly > Ink-related Parts > Cap Assy
Model CJV30/TPC Issued 2008.08.04 Revised F/W ver. 1.00 Remark
1.0
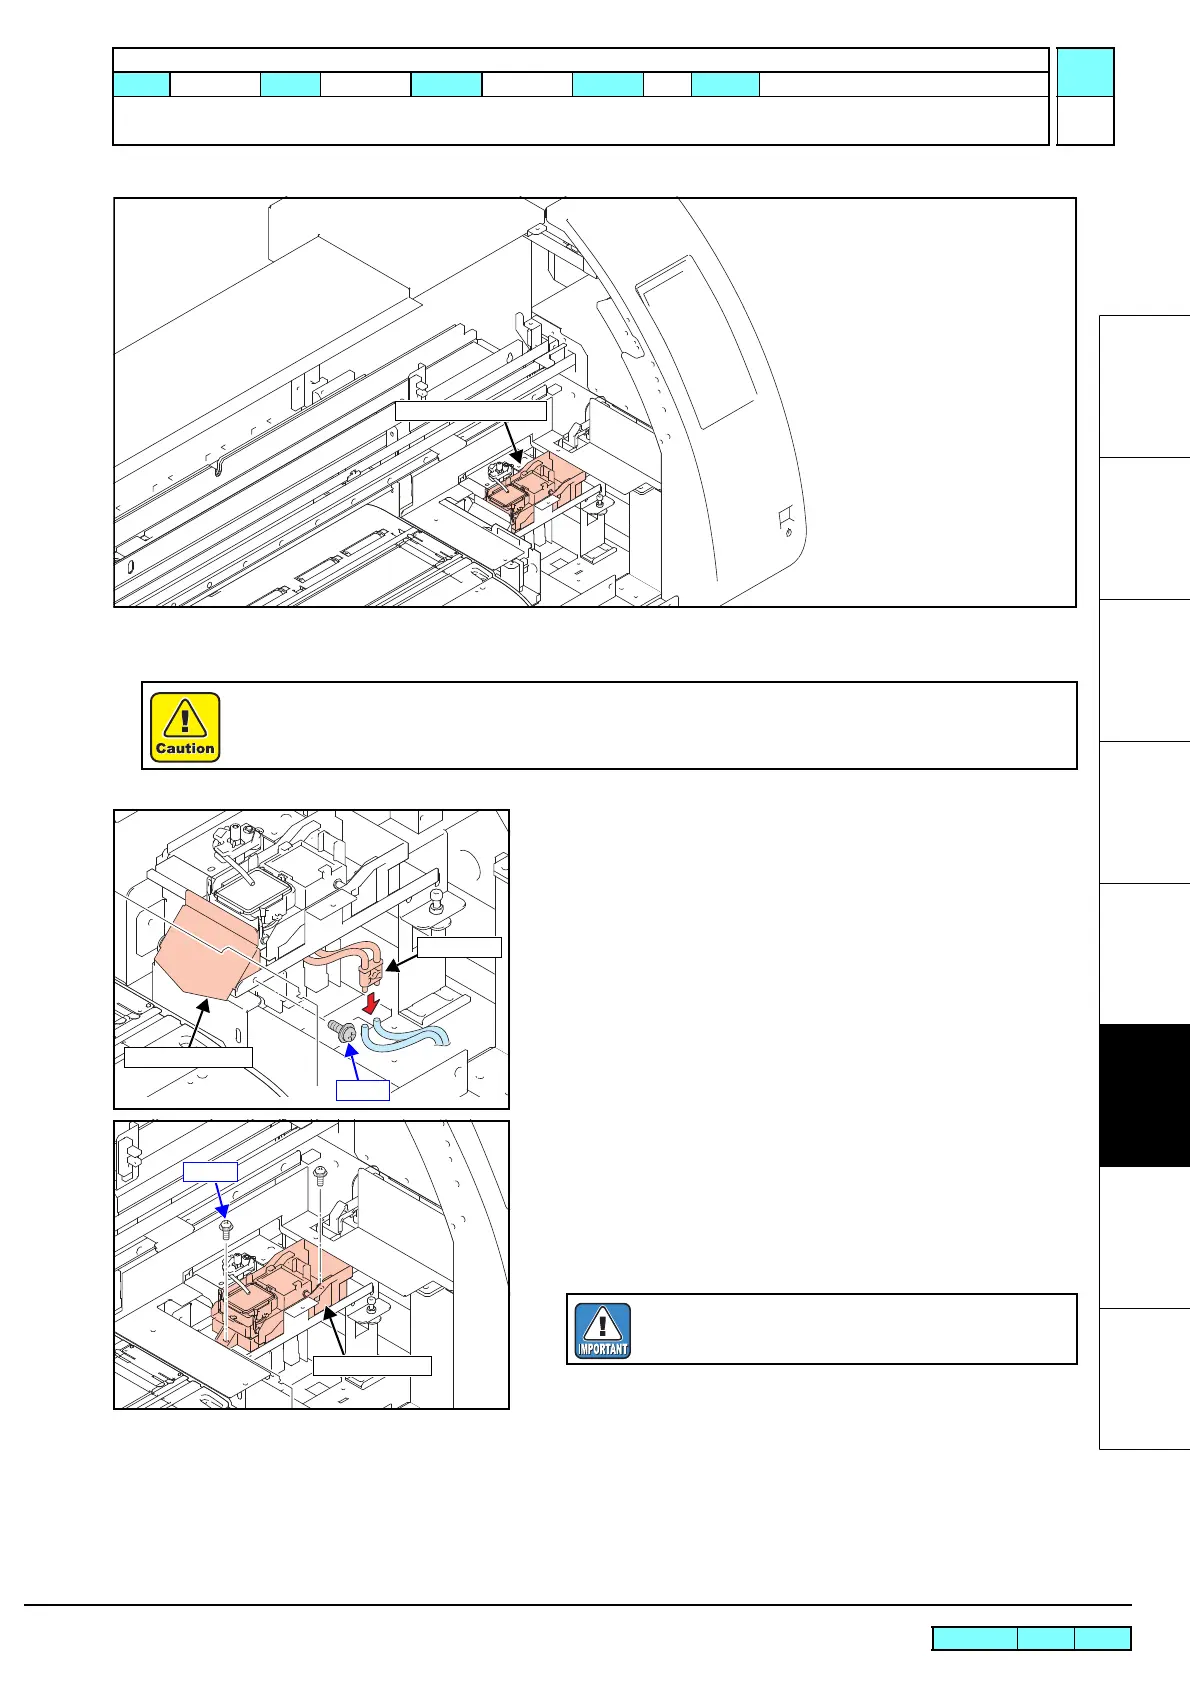
6.2.6 Cap Assy
Work procedures
1. Turn off the main power supply of the printer.
2. Manually move the head unit over the platen.
3. Remove the following covers.
• Station Cover U
• Wiring Cover
4. Remove the W ink guard.
5. Remove two tubes from the CP coupler.
6. Remove the screws, and then remove the cap assy while
turning back the PC pipe.
7. Reverse the disassembly procedure for reassembly.
Be sure to turn off the main circuit breaker to prevent unexpected movements of the printer.
W Ink Guard
CP Coupler
Screw
At the time of assembly, screw up the cap assy while
striking it against a recess.

 Loading...


