12-30 Probes and Biopsy
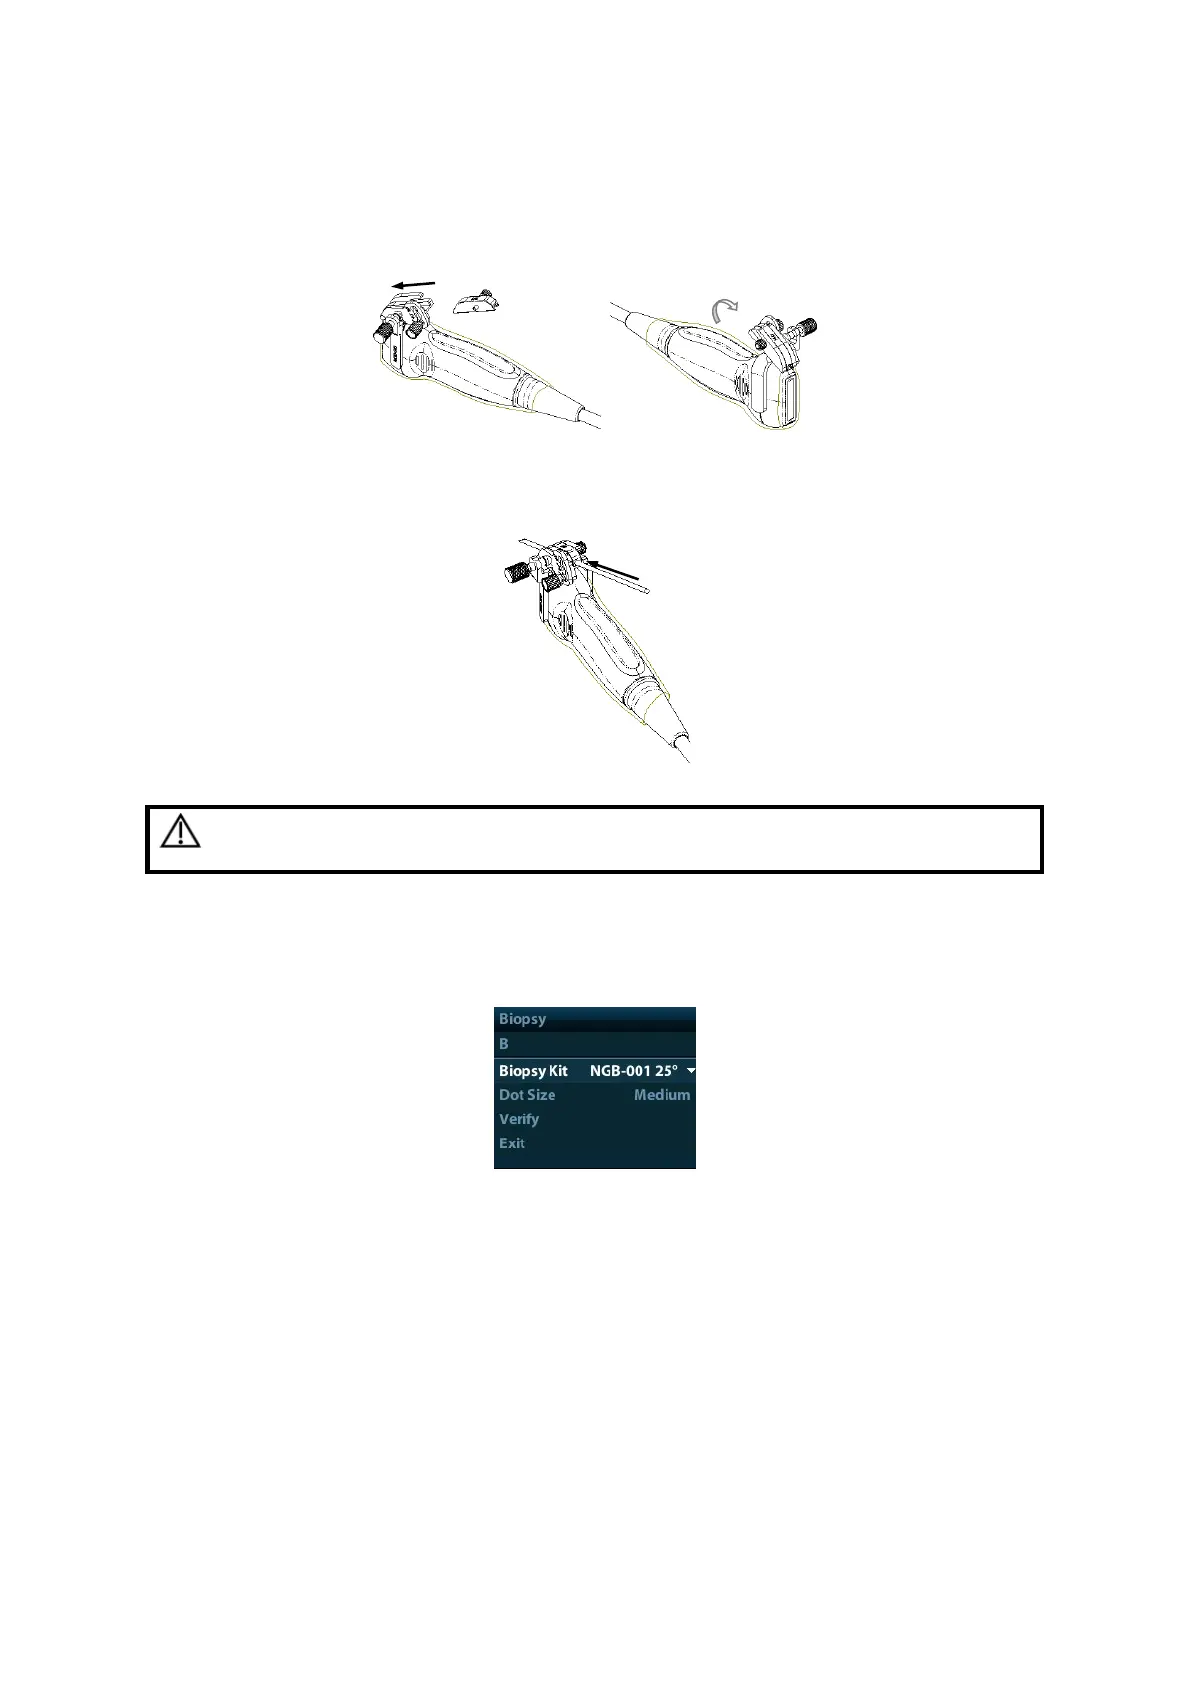
3. Screw the pinch nut of the needle-guided bracket to confirm that the needle-guided
bracket is properly installed on the transducer.
4. Select a proper guiding block and push it into the groove above the angle block, and
clamp it tightly.
5. Screw the nut of the block to secure the block.
6. Insert a biopsy needle with the same specification as that of the guiding block into the
hole of the guiding block.
CAUTION:
Ensure that all guide parts are seated properly prior to performing
a biopsy.
12.2.4 Biopsy Menu
Press <Biopsy> to show the biopsy menu.
Select biopsy bracket angle
If the needle-guided bracket supports more than one biopsy angle, you can select the
angle from the drop-down list.
Select Dot size
Move the cursor onto [Dot Size], press <Set> to select the dot size among Small, Medium
and Big.
Tips:
The guide line is a dot line which consists of two kinds of dots, the distance between
two dots is depth dependent. Move the cursor onto the big dot, a numeral, which
represents the biopsy depth, is displayed.
The biopsy guidezone adjusts along with image adjustments, such as image
inversion/rotations, zoom and depth changes.