12 | minnkotamotors.com
©2022 Johnson Outdoors Marine Electronics, Inc.
INSTALLING THE RIPTIDE TERROVA
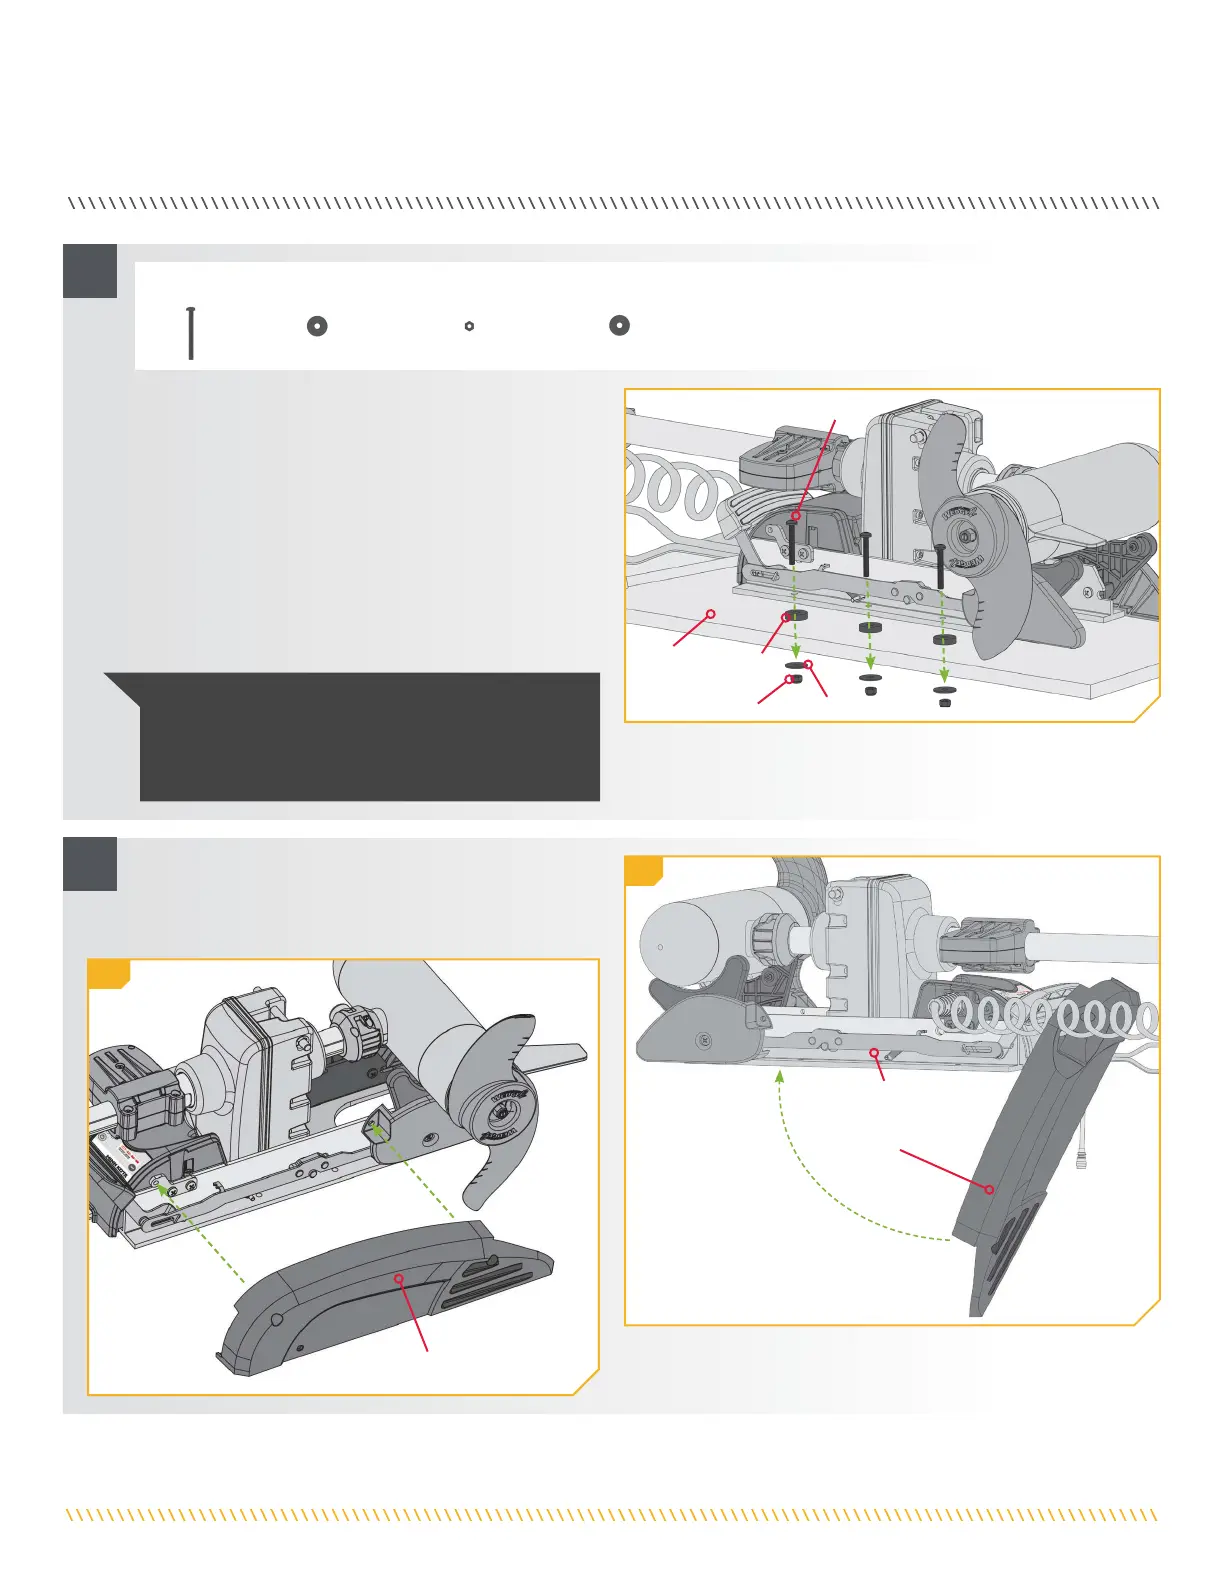
#1 x 6
#2 x 6 #4 x 6#3 x 6
ScrewScrew
Rubber Rubber
WasherWasher
Boat Boat
DeckDeck
Nylock NutNylock Nut
Flat WasherFlat Washer
Right SideplateRight Sideplate
Left SideplateLeft Sideplate
Base ExtrusionBase Extrusion
ITEM(S) NEEDED
7
8m
8n
8
k. Put a 1/4-20 x 3 1/2" (Item #1) screw in each of the
drilled locations. The screw should pass through
the Base Extrusion and the boat deck. If the rubber
washers (Item #4) are used, they should sit between
the Base Extrusion and boat deck. Make sure to
secure the motor with screws on each side of the
Base Extrusion.
l. Place a Flat Washer (Item #2) and then a Nylock Nut
(Item #3) at the end of each screw as shown and
secure. Make sure all hardware is secure.
m. Replace the Right Sideplate.
n. Swing the Left Sideplate back into its correct
position on the Base Extrusion.
NOTICE: To prevent seizing of the stainless steel
hardware, do not use high speed installation tools.
Wetting the screws or applying an anti-seize may help
prevent seizing.